Resolve Issues in Branches
A powerful tool for keeping track of tasks, enhancements, and bugs for your projects is the issues feature of GitHub. You can access the issues associated with a repository through the Issues tab.
They allow storing conversations about tasks in the project repository, visible to the whole team throughout the life cycle of the project, rather that them being buried in hard to navigate email chains! 💯
It’s also easy to see the status of tasks as issues can be closed when completed, leaving the tasks still pending visible by default.
You can write in markdown so they are great for having discussions around code.
They can also be assigned to a specific team member, labelled and associated with specific project milestones.
For more information, check out the Mastering Issues GitHub Guide
Open and assign issues
To organise the tasks for each team member, the owner will first open an issue for each person which will contain detailed instructions on how to complete the task.
I’ve actually used a nice feature of issues to make this easy for owners called GitHub Issue templates. The markdown files that power the feature are stored in the .github/ISSUE_TEMPLATE folder of the project. Let’s see how they work.
For more information, check out Configuring issue templates for your repository in the GitHub Docs
Open issue from templates
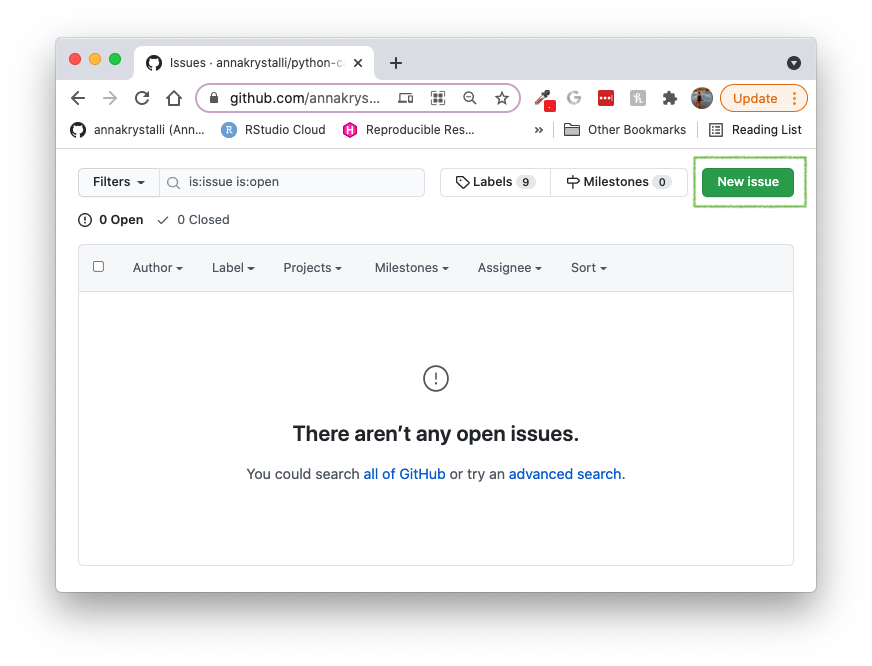
To create a new issue navigate to the Issues tab

Click New issue
Because we are using GitHub Issue templates, we are immediatelly presented with the 3 issue templates I’ve created.
To demonstrate, I’m going to open the Add subtraction function issue. To initiate the process, I click on Get started next to the issue template I want to open.
You can override the templates and create an issue with custom content by clicking on Open a blank issue at the bottom of the page.

Inspect issue content
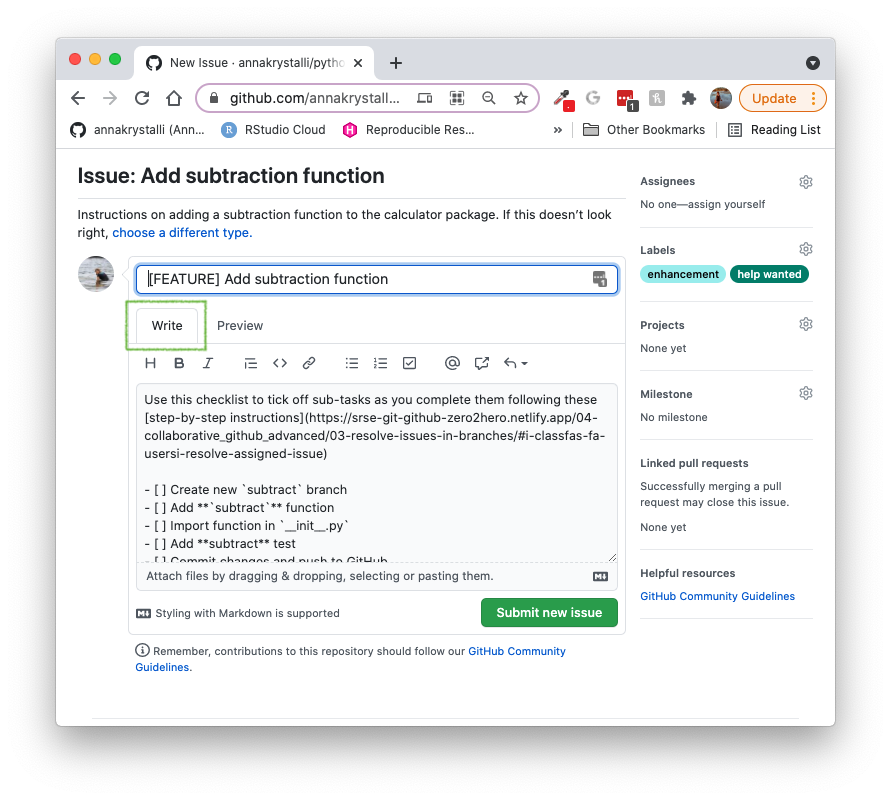
Because we’re working from an issue template, the title and contents of the issue are already pre-populated.
The contents of this particular issue contain detailed step-by-step instructions on how to add a subtract function as well as a test to our pythoncalculator package. At the top of the issue there’s also a checklist of all the steps involved which team mates can use to keep track of and communicate their progress.
The special -[ ] list notation means the checkboxes will be interactive when the issue is submitted.
When we’re creating our issue, the main body contains two tabs:
- Write: were you enter the contents of the issue in markdown
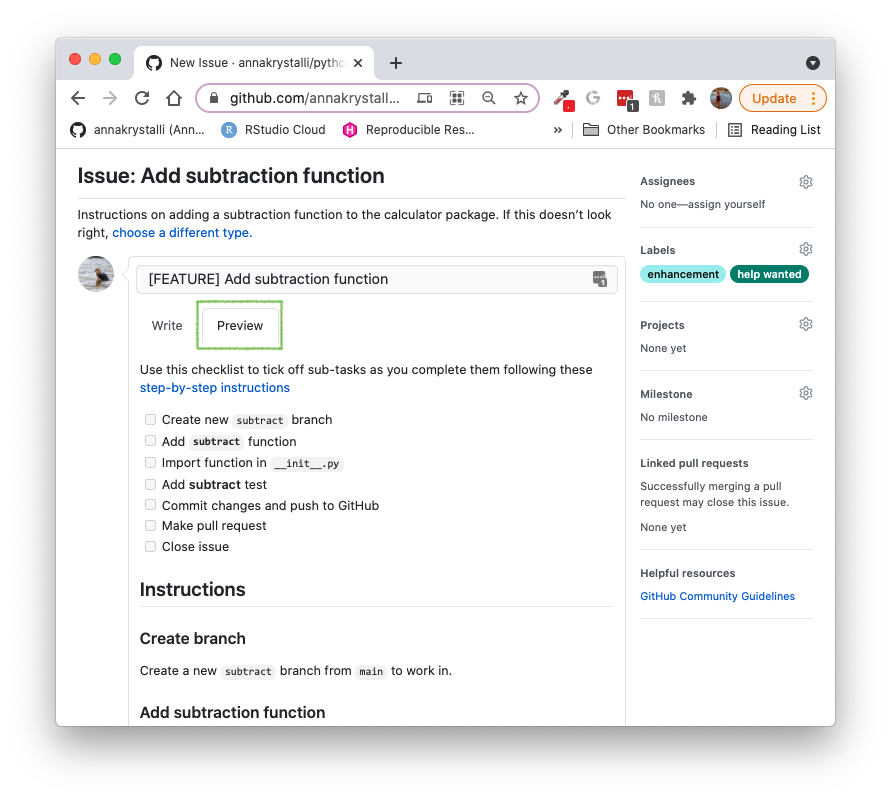
- Preview: were you can preview what the content will look like when it is rendered once the issue is submited.
Toggle the tabs below to explore this feature. Note how the checklist is rendered in the Preview tab.
Assign team mate to issue
Now that I’m happy with the content of the issue (which needs no editing…aren’t GitHub issue templates awesome?! 😜), I’m ready to assign the task to one of my team mates.
To do this, I click on Assignees on the top-right which launches a drop-down menu of team mates associated with the project and select the team mate I want to assign.
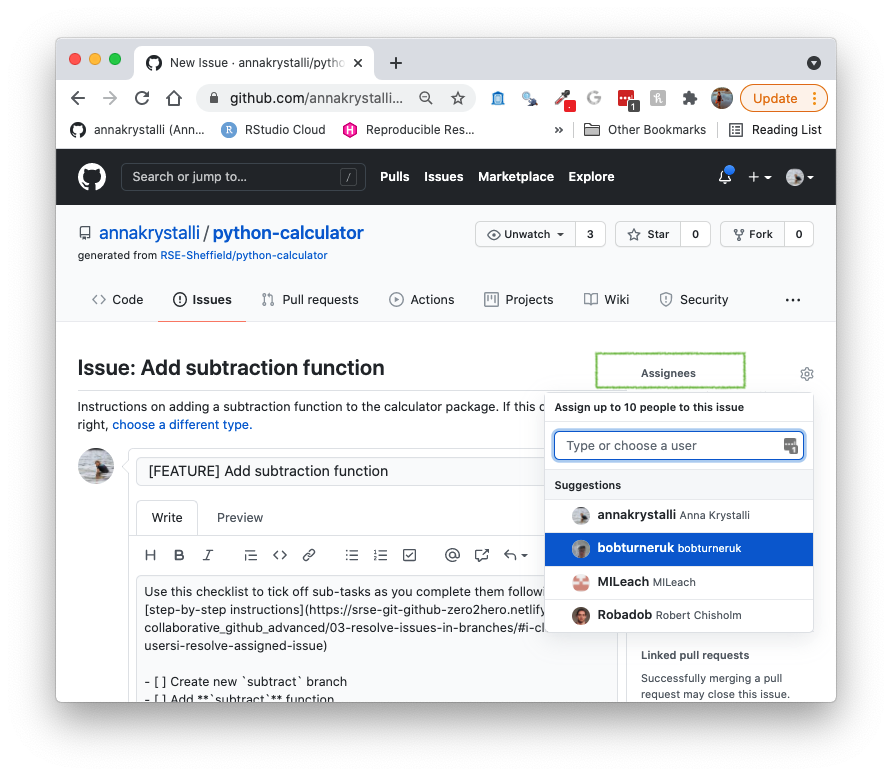
You can assign an issue to a team mate, add more or remove assignees at any point, even after you’ve opened the issue. If your repo is public, you can also assign issues to users who are not collaborators on your repo. Just type in their username in the drop down menu textbox.
Submit issue
Once I’ve assigned the issue to a team mate, I click Submit new issue to create it.
The issue has now been opened and given a unique number (in this case #2).

You can use the special #issue-number notation anywhere in GitHub’s markdown (e.g. other issues, pull requests etc) to refer to it which will add a link to it automatically!
The issue is also now listed under the Issues tab.

Make sure you have opened and assigned a unique issue to each member of your team!
Resolve assigned issue
Now that tasks have ben assigned through issues, it’s time for team mates to get to work!
Let’s follow an example workflow by one of my team mates, bobturneruk, who will be tackling the add a subtract function issue I just opened and assigned to him.
Open the issue that was assigned to you and follow instructions within
Example: Resolve subtract function issue
Create subtract branch
Make sure to create a new branch to start work in!
To begin resolving the task, Bob first needs to create a new branch off the main branch to work in. Before that, he checks that his local main branch is in synch with the origin main branch and that the main branch is checked out.
If your local main branch is behind the origin main branch, click on Pull to pull the remote changes to your local main branch.
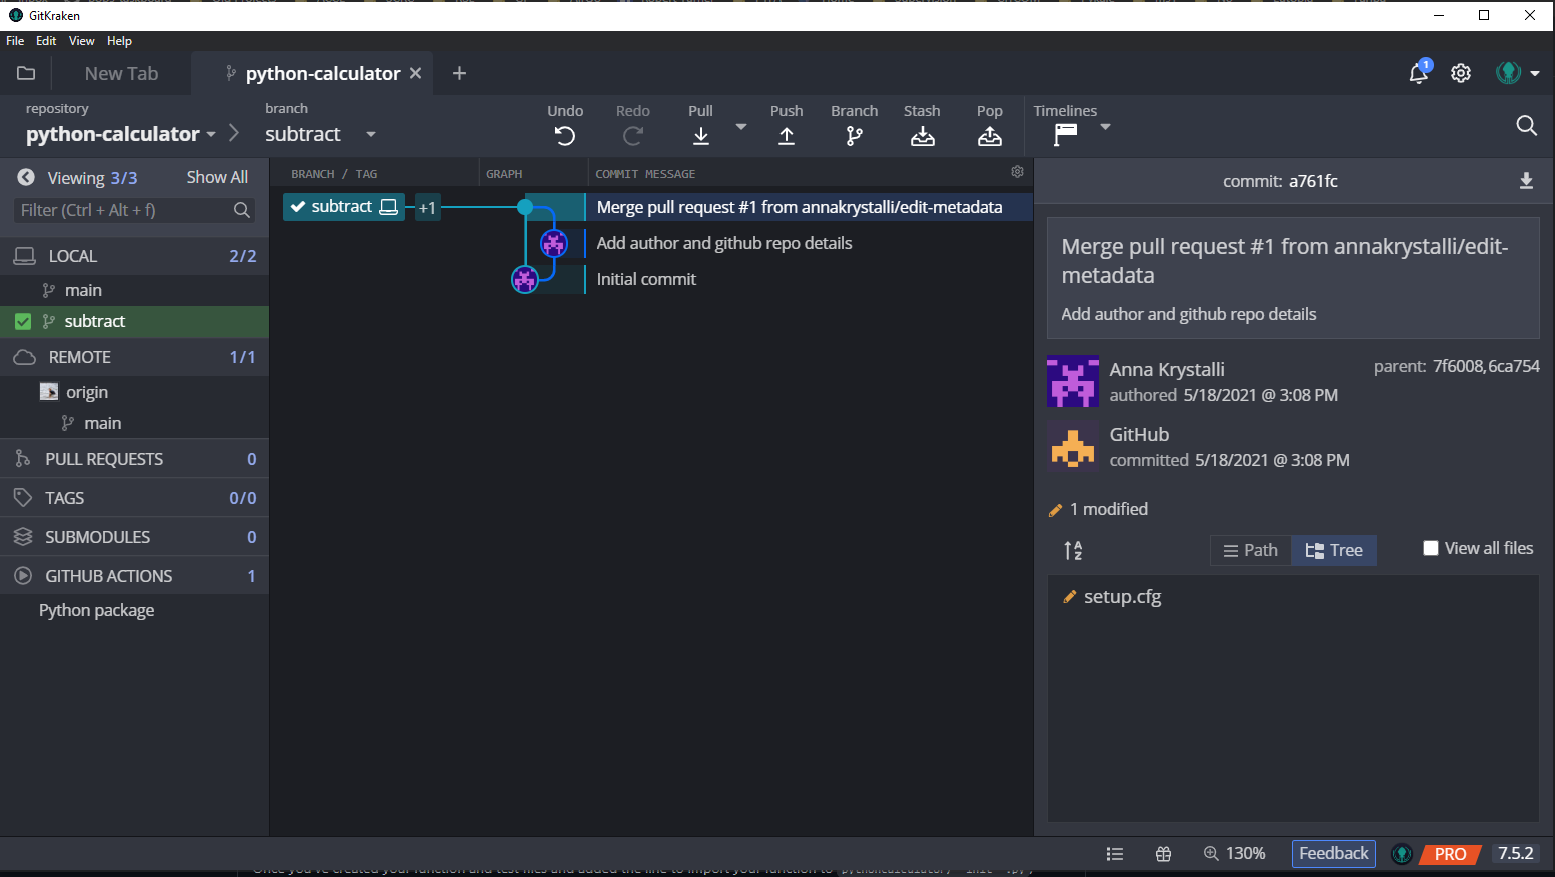
Start by clicking the
Branch
button and giving the branch an appropriate name (subtract).
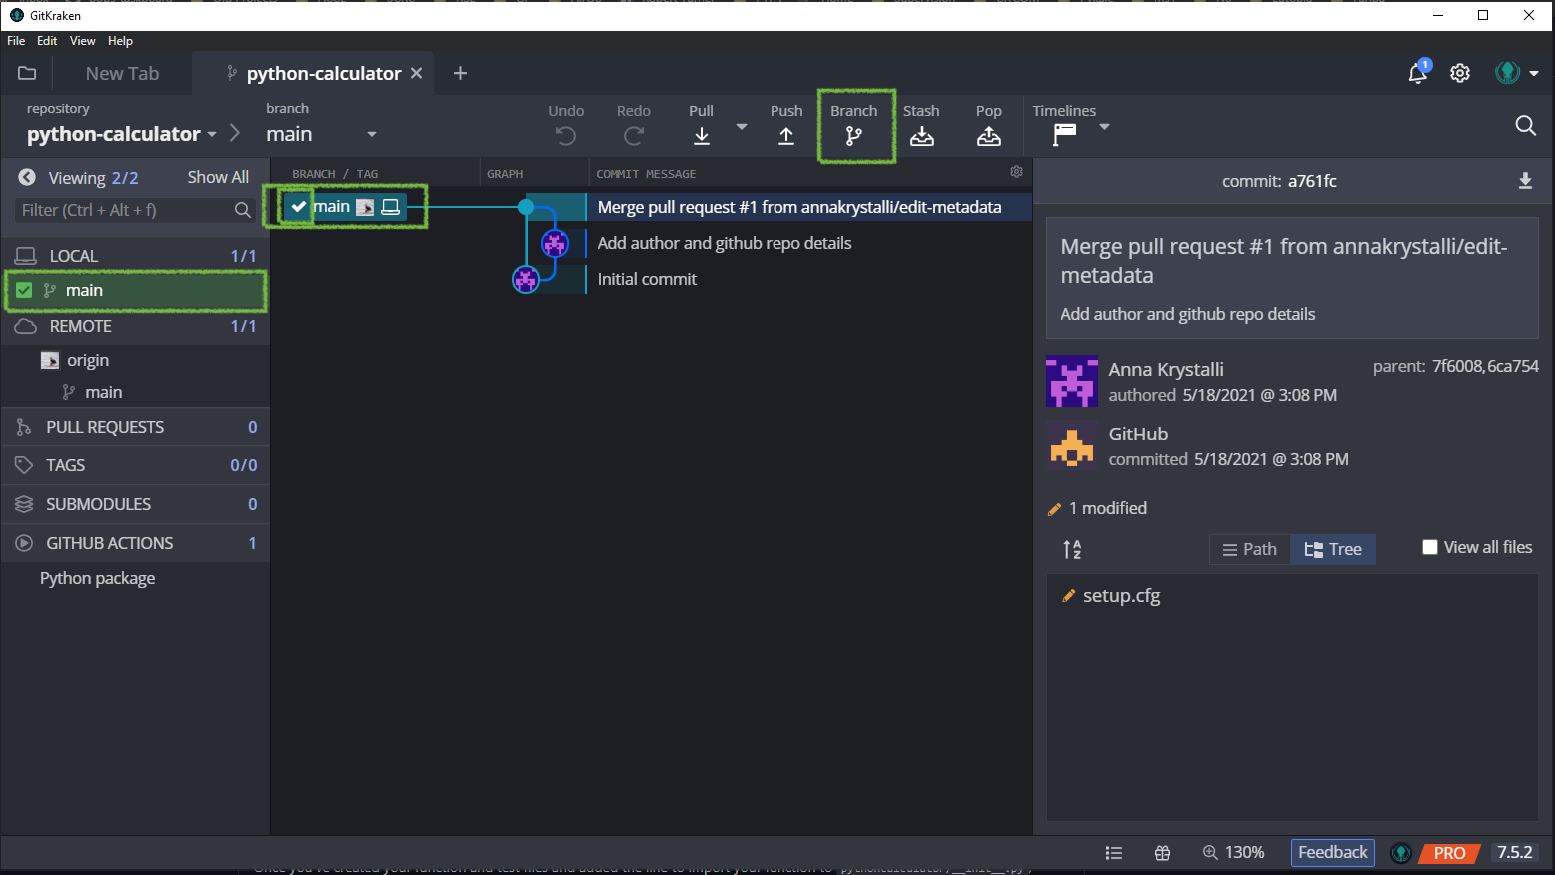
The subtract branch has now been created and been checked out (indicated by the fact that the the subtract branch in the local repository is now checked).
Add subtract.py file
The next step in Bob’s instructions is to create a new subtract.py file in the pythoncalculator/ directory and paste the code for the subtract function.
A nice feature of GitKraken Client is that, as well as a basic text editor, it also allows us to create new files!
To create a new file, first launch GitKraken Client’s Command Palette with
 | Ctrl + P
Next, type File. This launches a dropdown menu of action you can perform on files. Select Create file.
For more information check out the GitKraken Client documentation on Adding a file and GitKrake’s Command Palette.

Next, type in the path to the new file you want to create, in Bob’s case it’s pythoncalculator/subtract.py, and hit Enter|Return.
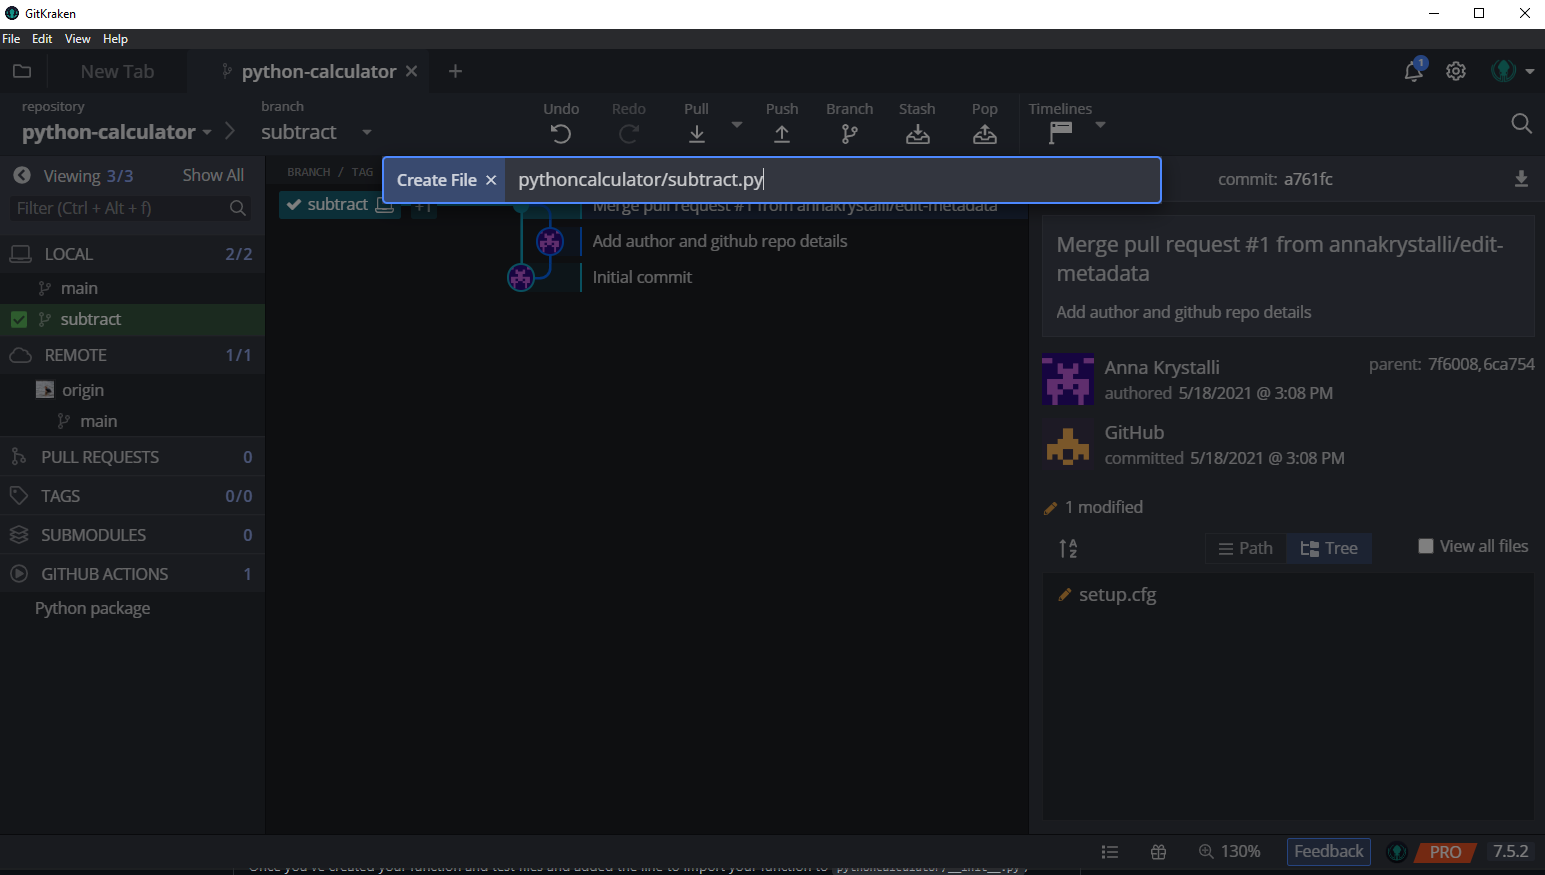
This creates the new file and opens it up for editing!.
Next, paste the function code provided in the issue instructions and save.
Please paste the code in exactly as it is in the issue instructions, even if you find something fishy with it 🧐
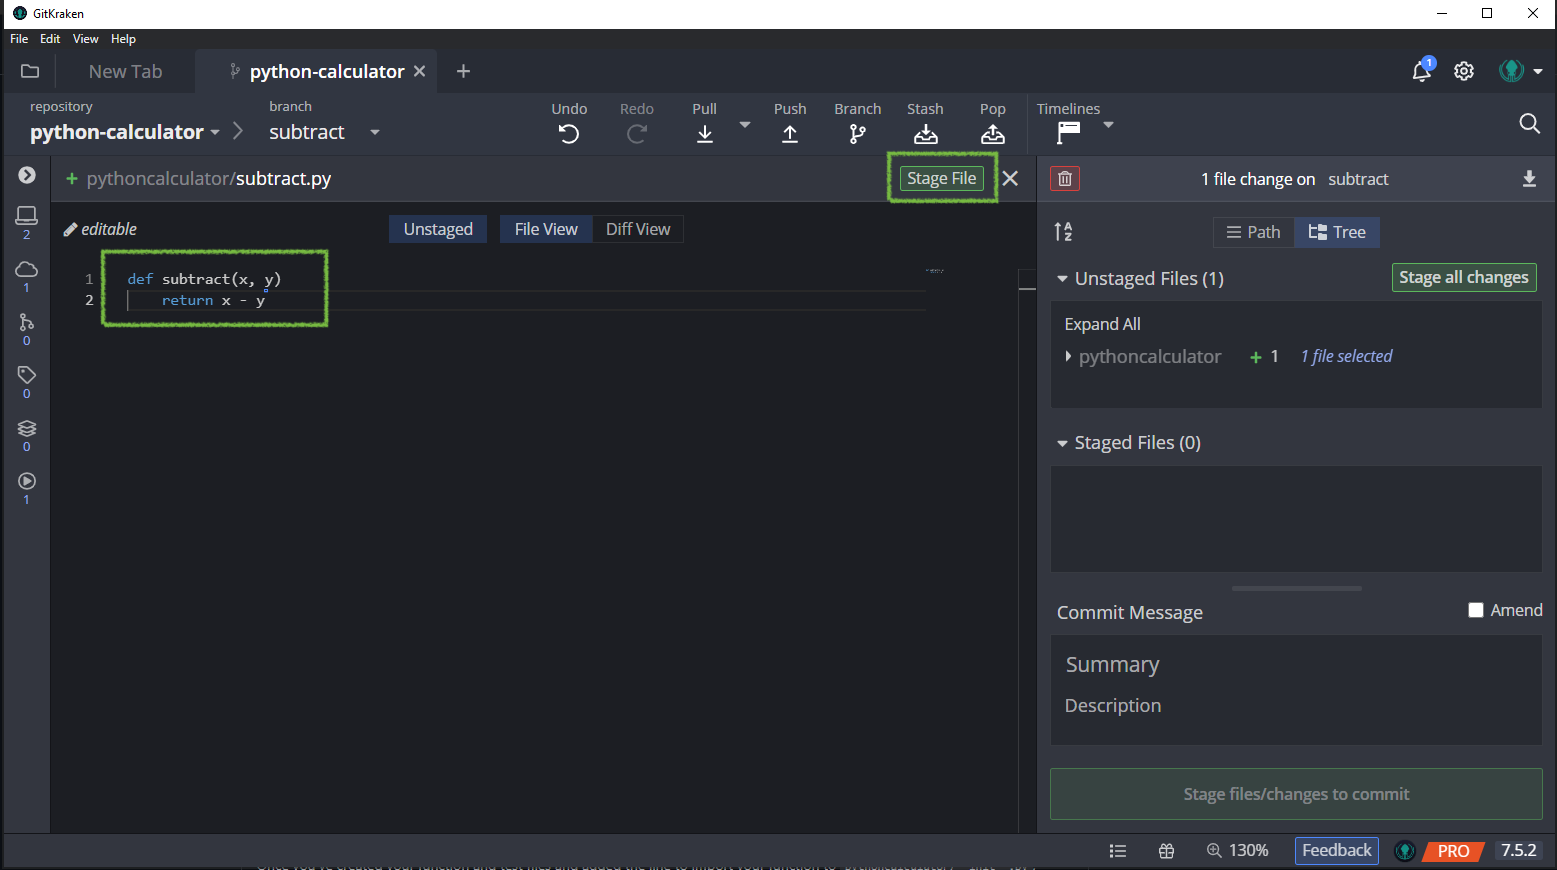
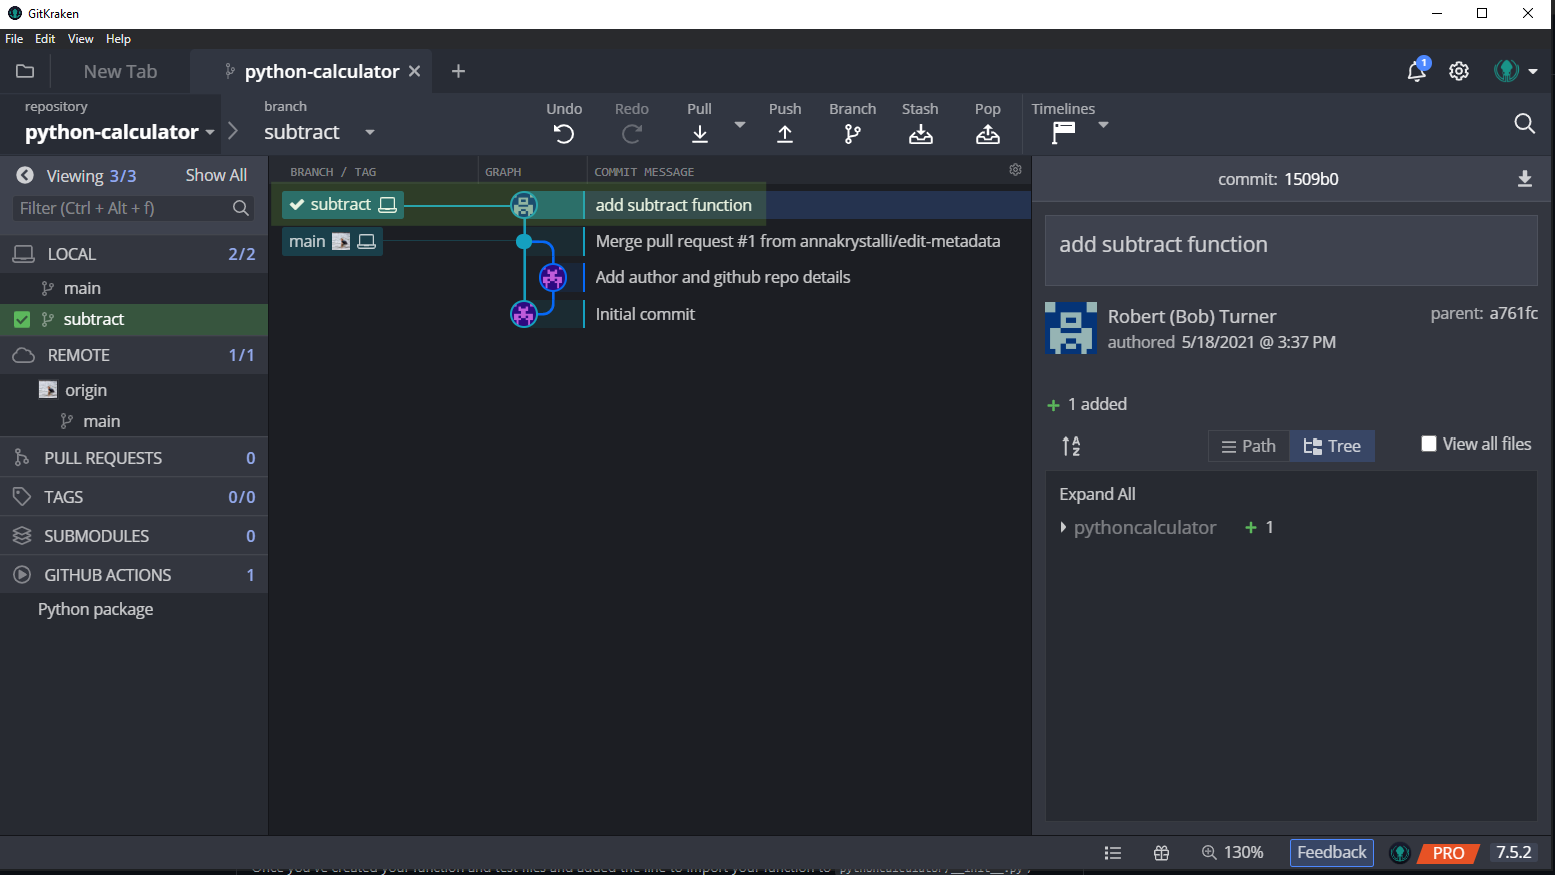
We now need to stage and commit the new file. Follow the steps we’ve been practicing and commit your file with an appropriate commit message (e.g add subtract function).
Including the text resolves #issue-number-you-were-assigned will link the issue to your pull request and automatically close it once your pull request has been merged! ✨ Find out more, including additional keywords you can use to link pull requests to issues

The file is now commited and we can see that Bob’s local subtract branch is ahead of the origin and local main branches by 1 commit.
Edit pythoncalculator/__init__.py file
Next Bob needs to add an instruction for the new subtract function to be imported. To do this, he needs to edit pythoncalculator/__init__.py.
To open pythoncalculator/__init__.py, double click on it in the file finder panel.
To see all files in the repo, tick the View all files box. You can also initiate file editing through GitKraken Client’s Command Palette. More info on editing files.

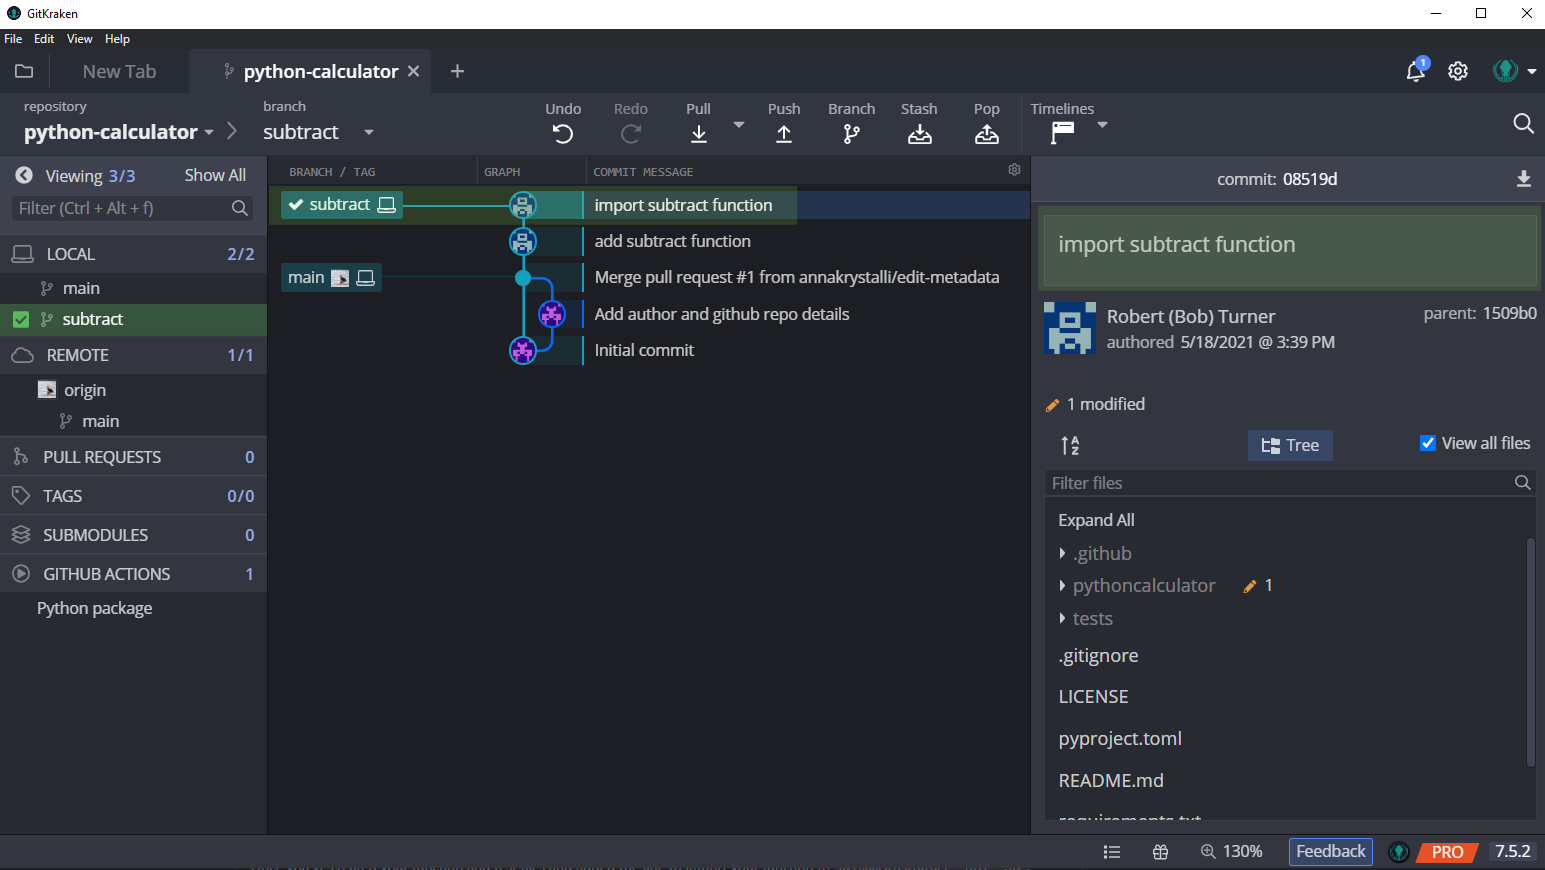
Once the file is open for editing, add the import line of code from your issue to line 2 of the file.
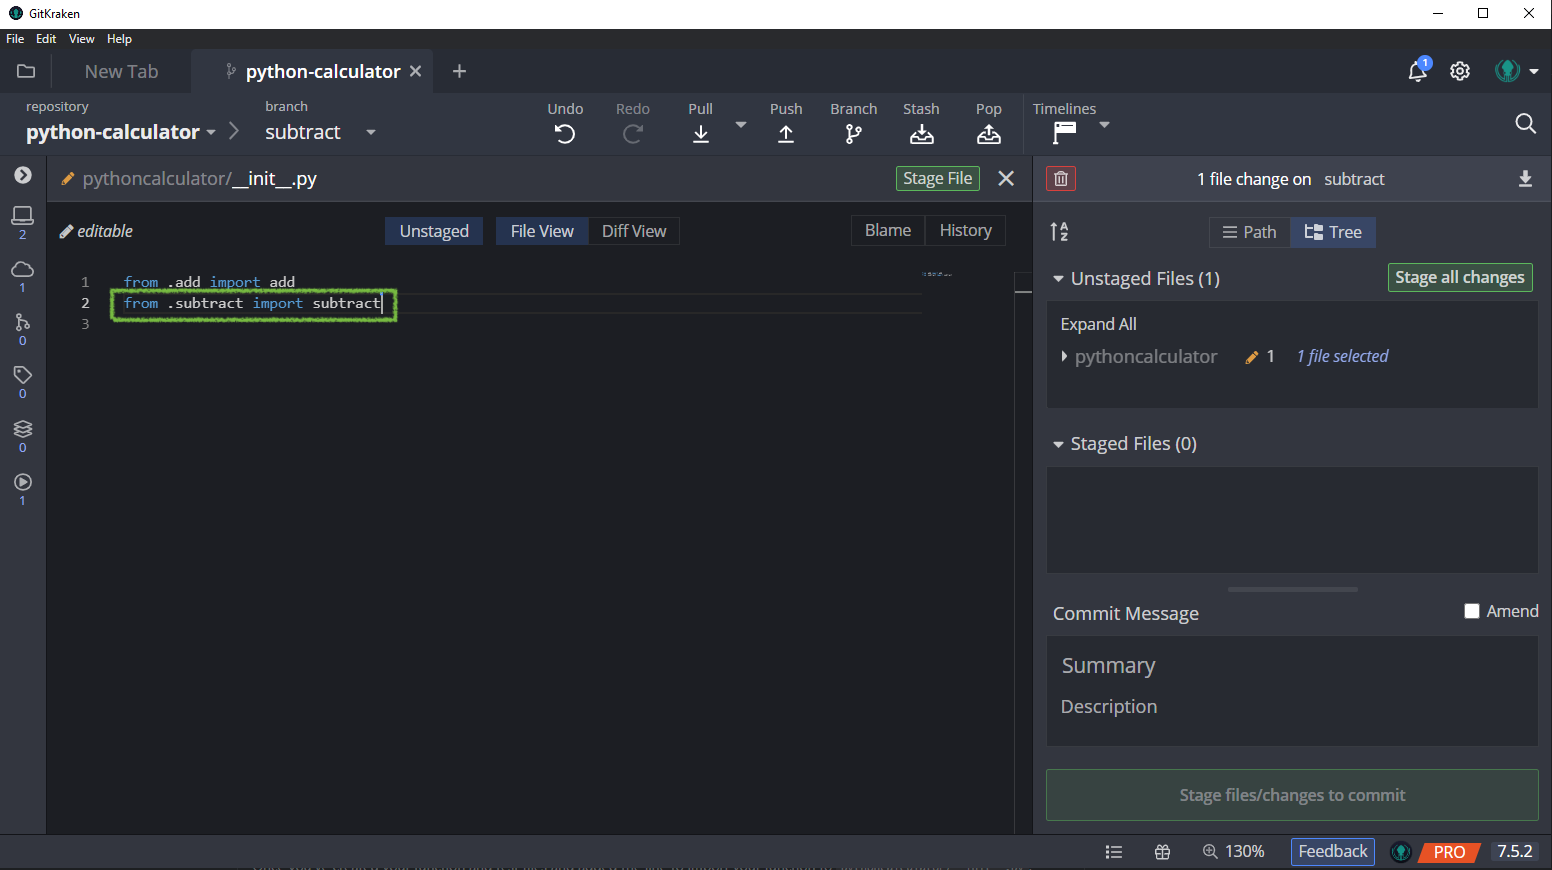
Save, stage and commit your changes.
Add test_subtract.py file
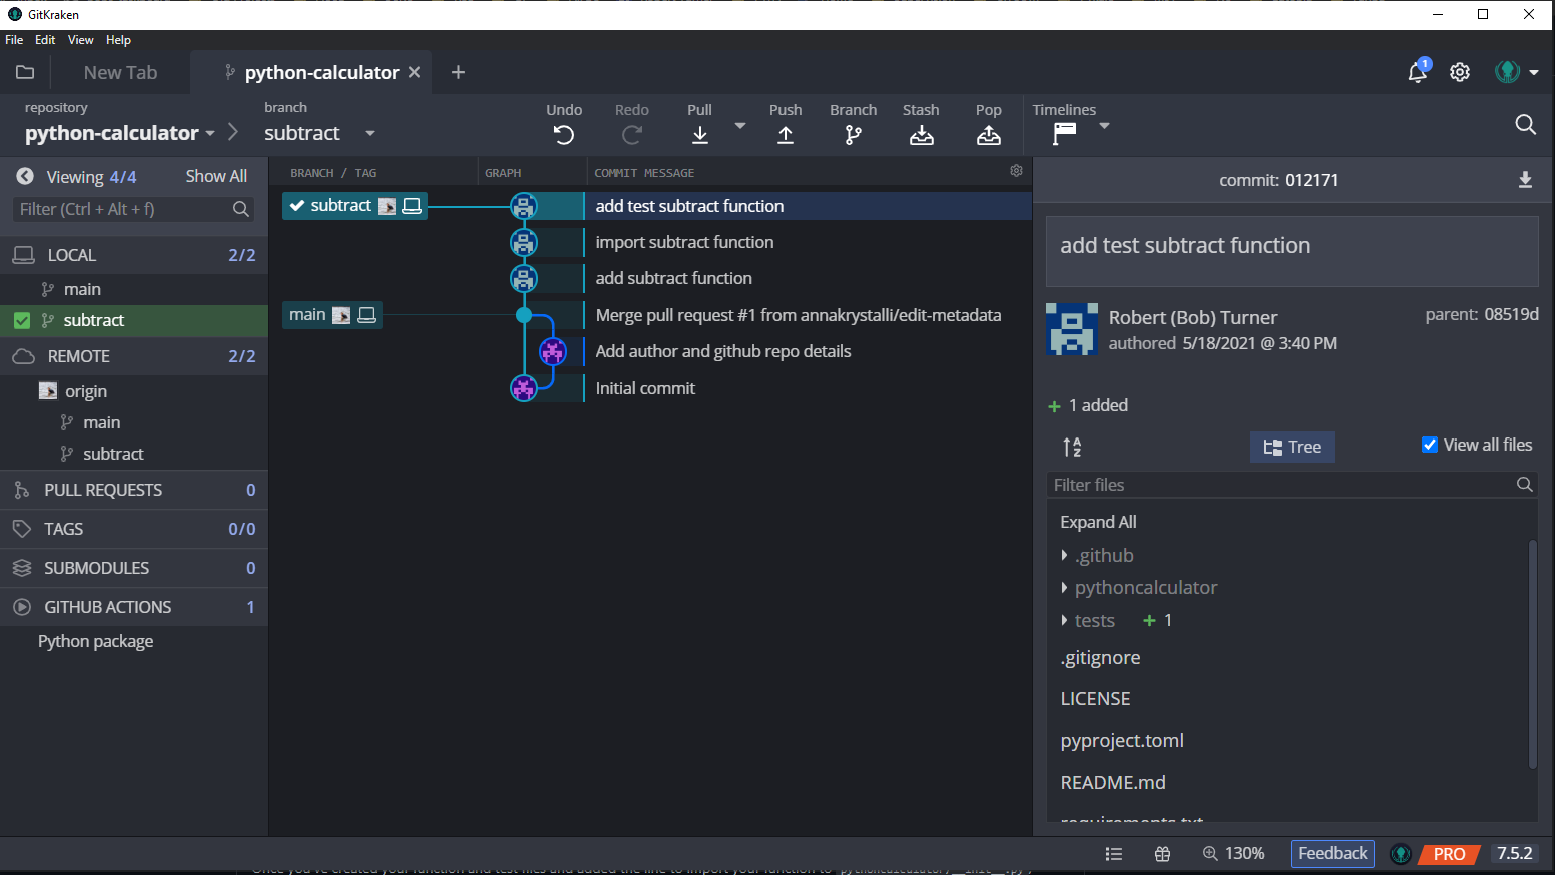
The next step in Bob’s instructions is to create a new test_subtract.py file in the tests/ directory and paste the code for the subtract function test.
To create the new file, launch GitKraken Client’s Command Palette again with
| Ctrl + P
Next, type File to launches the file action dropdown menu. Select Create file and type in the path to the new file you want to create, In Bob’s case it’s tests/test_subtract.py and hit Enter|Return.

Paste the code for the test provided in your issue.

Save, stage and commit your changes.

Push changes and make a Pull request
The final step of the process is to push the subtract branch to origin and make a pull request to the origin main branch.
To push the changes, click on
Push
and accept the default name to create the `subtract branch on origin.
Next, on the left-hand navigation panel, hover over PULL REQUESTS and click on the Create pull request button when it appears.
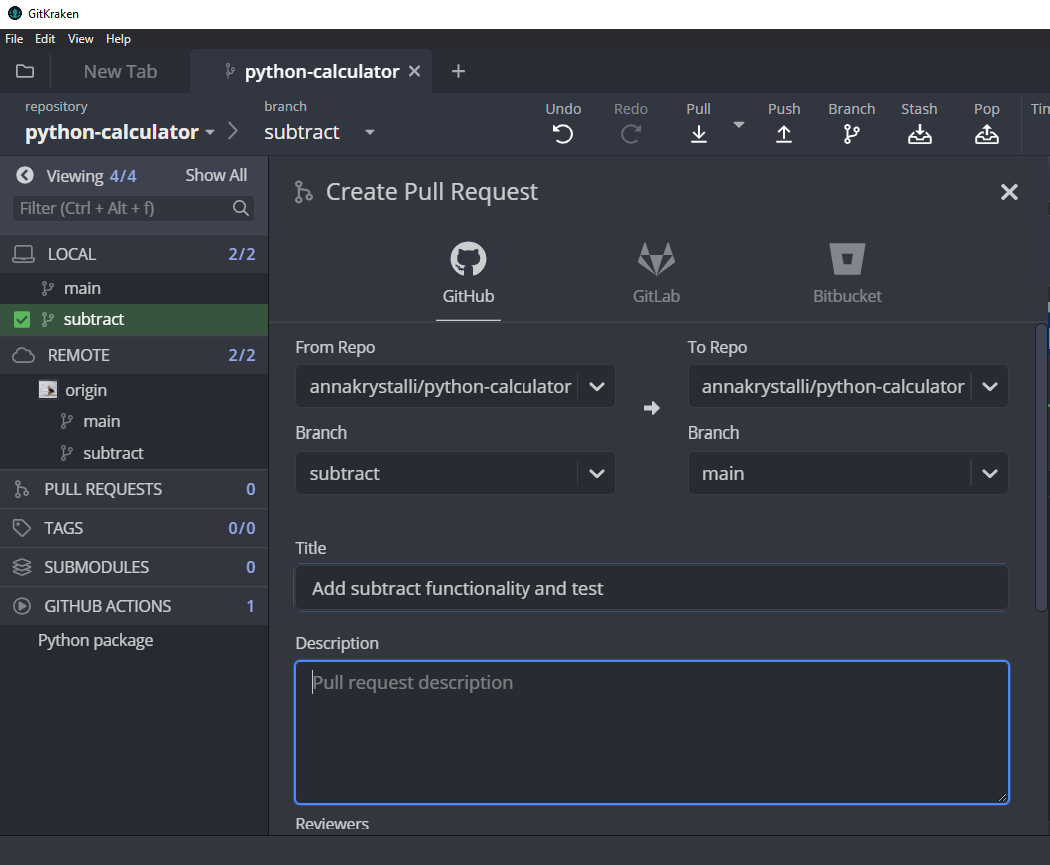
Configure the details of the pull request including the source and target repository (in this case your team’s copy of the repository) and the source and target branches. In this case Bob wants to merge the subtract branch into the main branch.
You can again include keywords, like resolves #issue-number-you-were-assigned in your pull request Title or Description to link your pull request to your issue.
If you want, you can also add the owner as a reviewer but in the next steps, they will go through the review process anyways.
Finally, scroll to the very bottom and click on Create Pull Request to submit it.
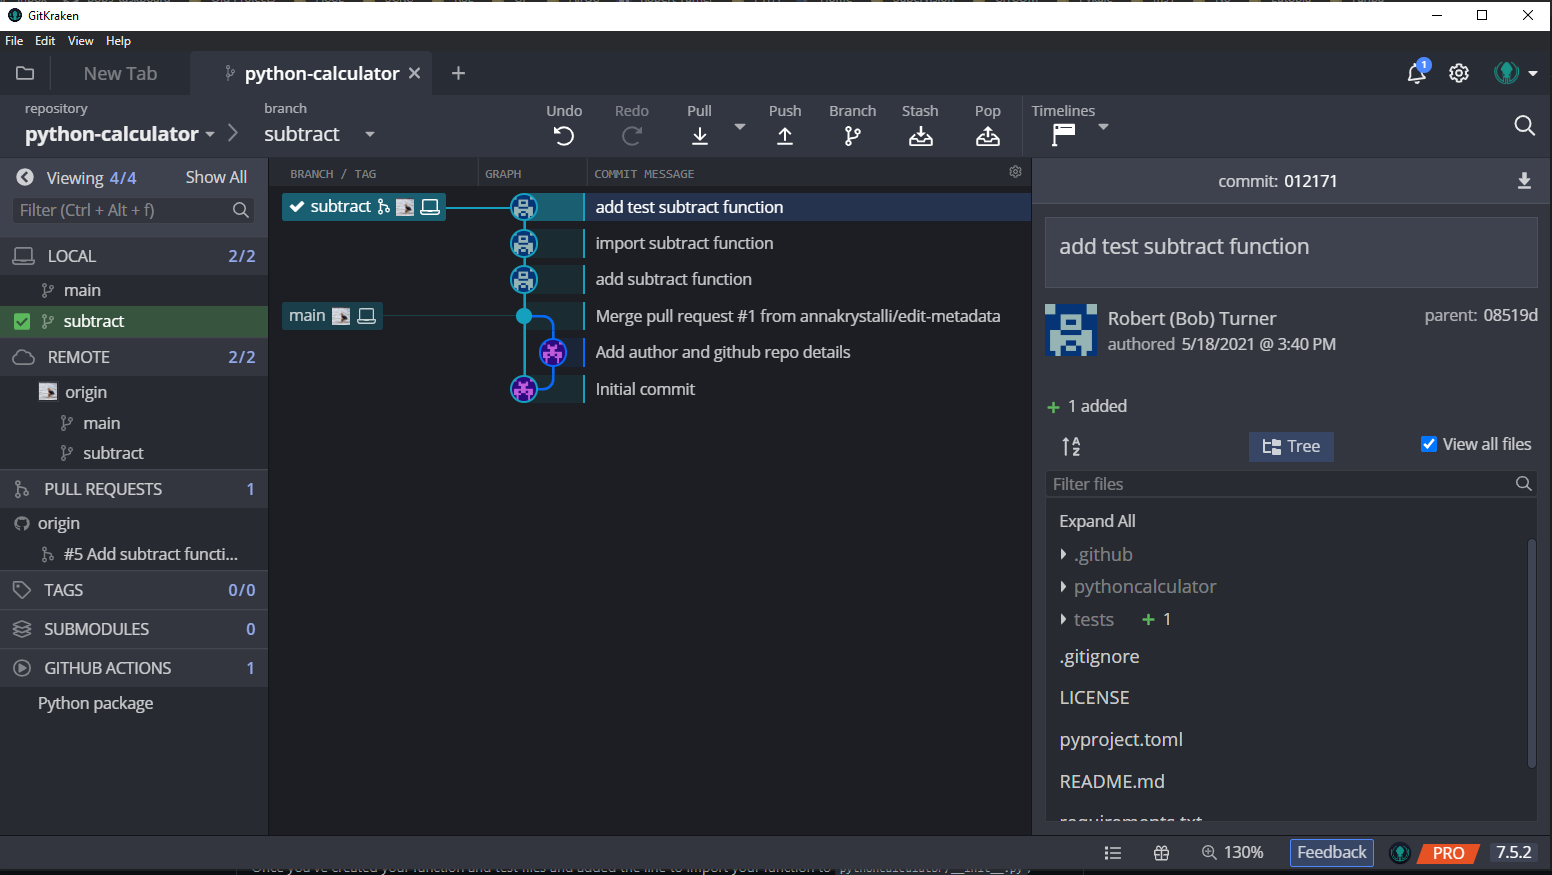
The PR has now been created, as indicated by the symbol on the subtract branch label.
Now it’s time for the project owner to review your contribution!