Make first owner contribution
To demonstrate contributions through branches we’ll first start with a small contribution to the python package metadata by the owner.
But first, to complete any work on the repo locally, we first need to download the repo to our computers. So let’s go ahead and all do that.
Make a local copy of the repository
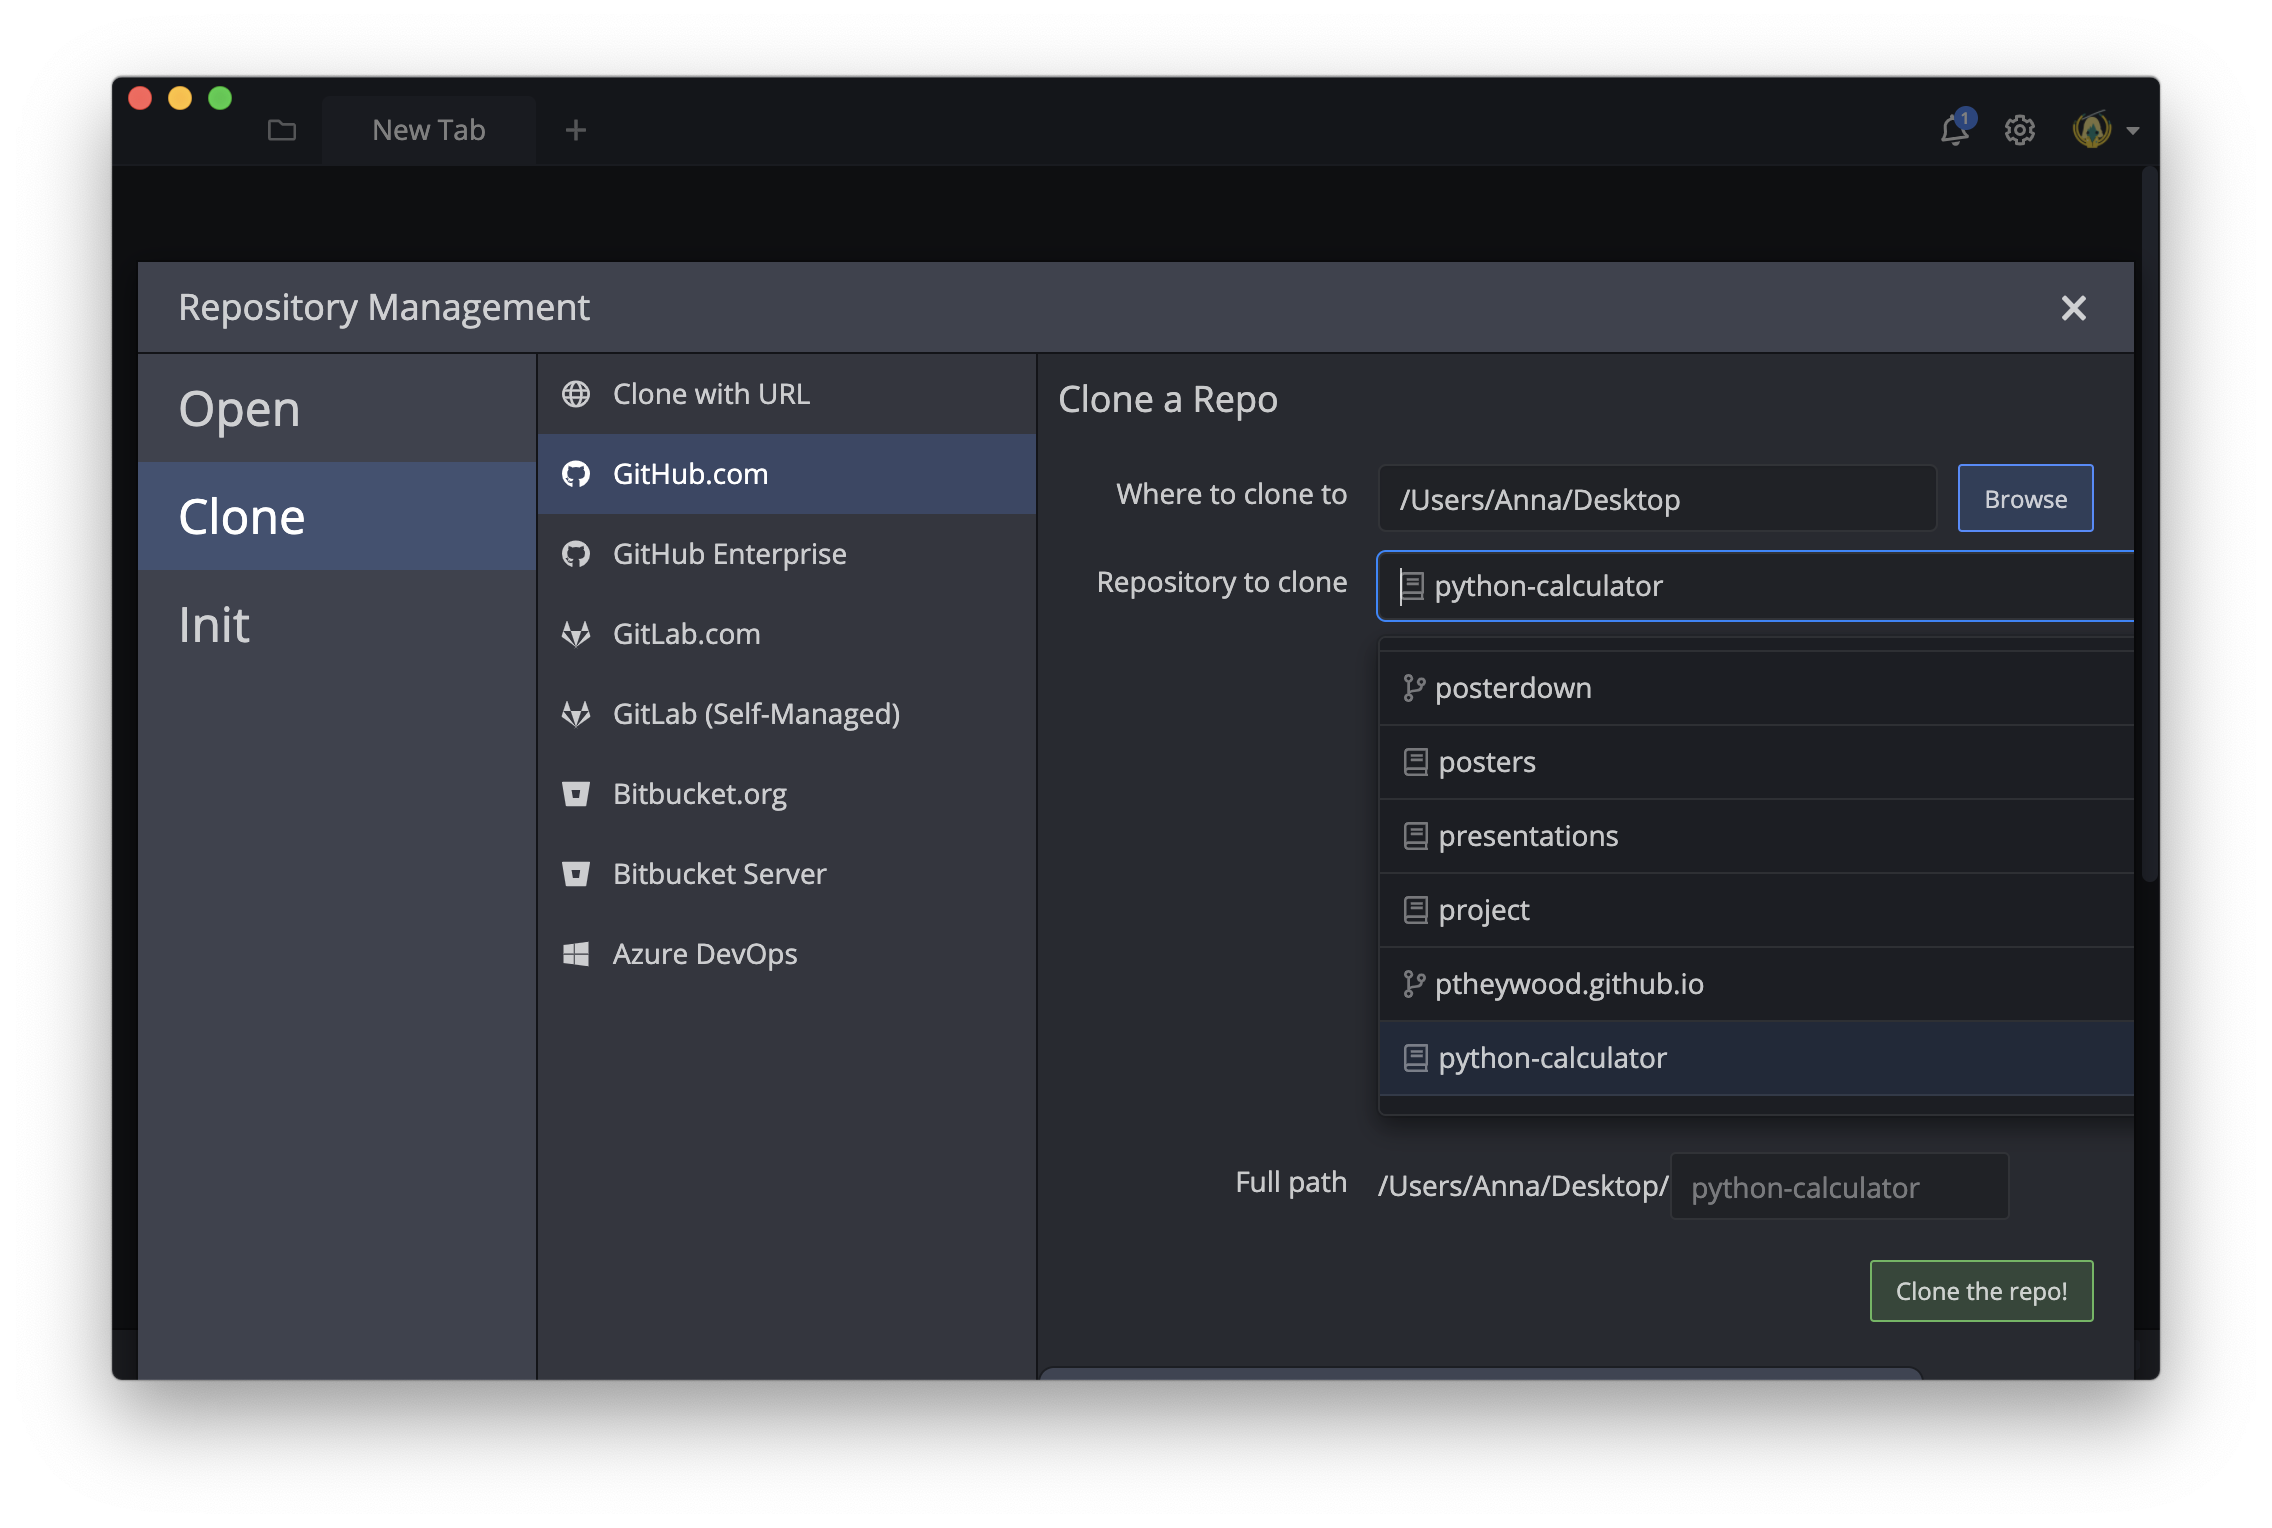
Open GitKraken Client and on the left-hand navigation bar, click on Clone a repo
Next, choose GitHub.com as the source of the repository. This allows GitKraken Client to search through any repositories you have access to.
On the next panel, first choose your destination directory (I’ve chosen my ~/Desktop/).
Then, in the Repository to clone box, start typing python-calculator until the repo associated with your account appears. Select it and click
Clone the repo!
To clone any repository you don’t have direct access to, use the Clone with URL option. You can download any public repository on GitHub like this but if you are not a collaborator, you will not be able to push. To contribute to such a repository you are best making a fork and then a pull request from your own fork to the upstream repo..
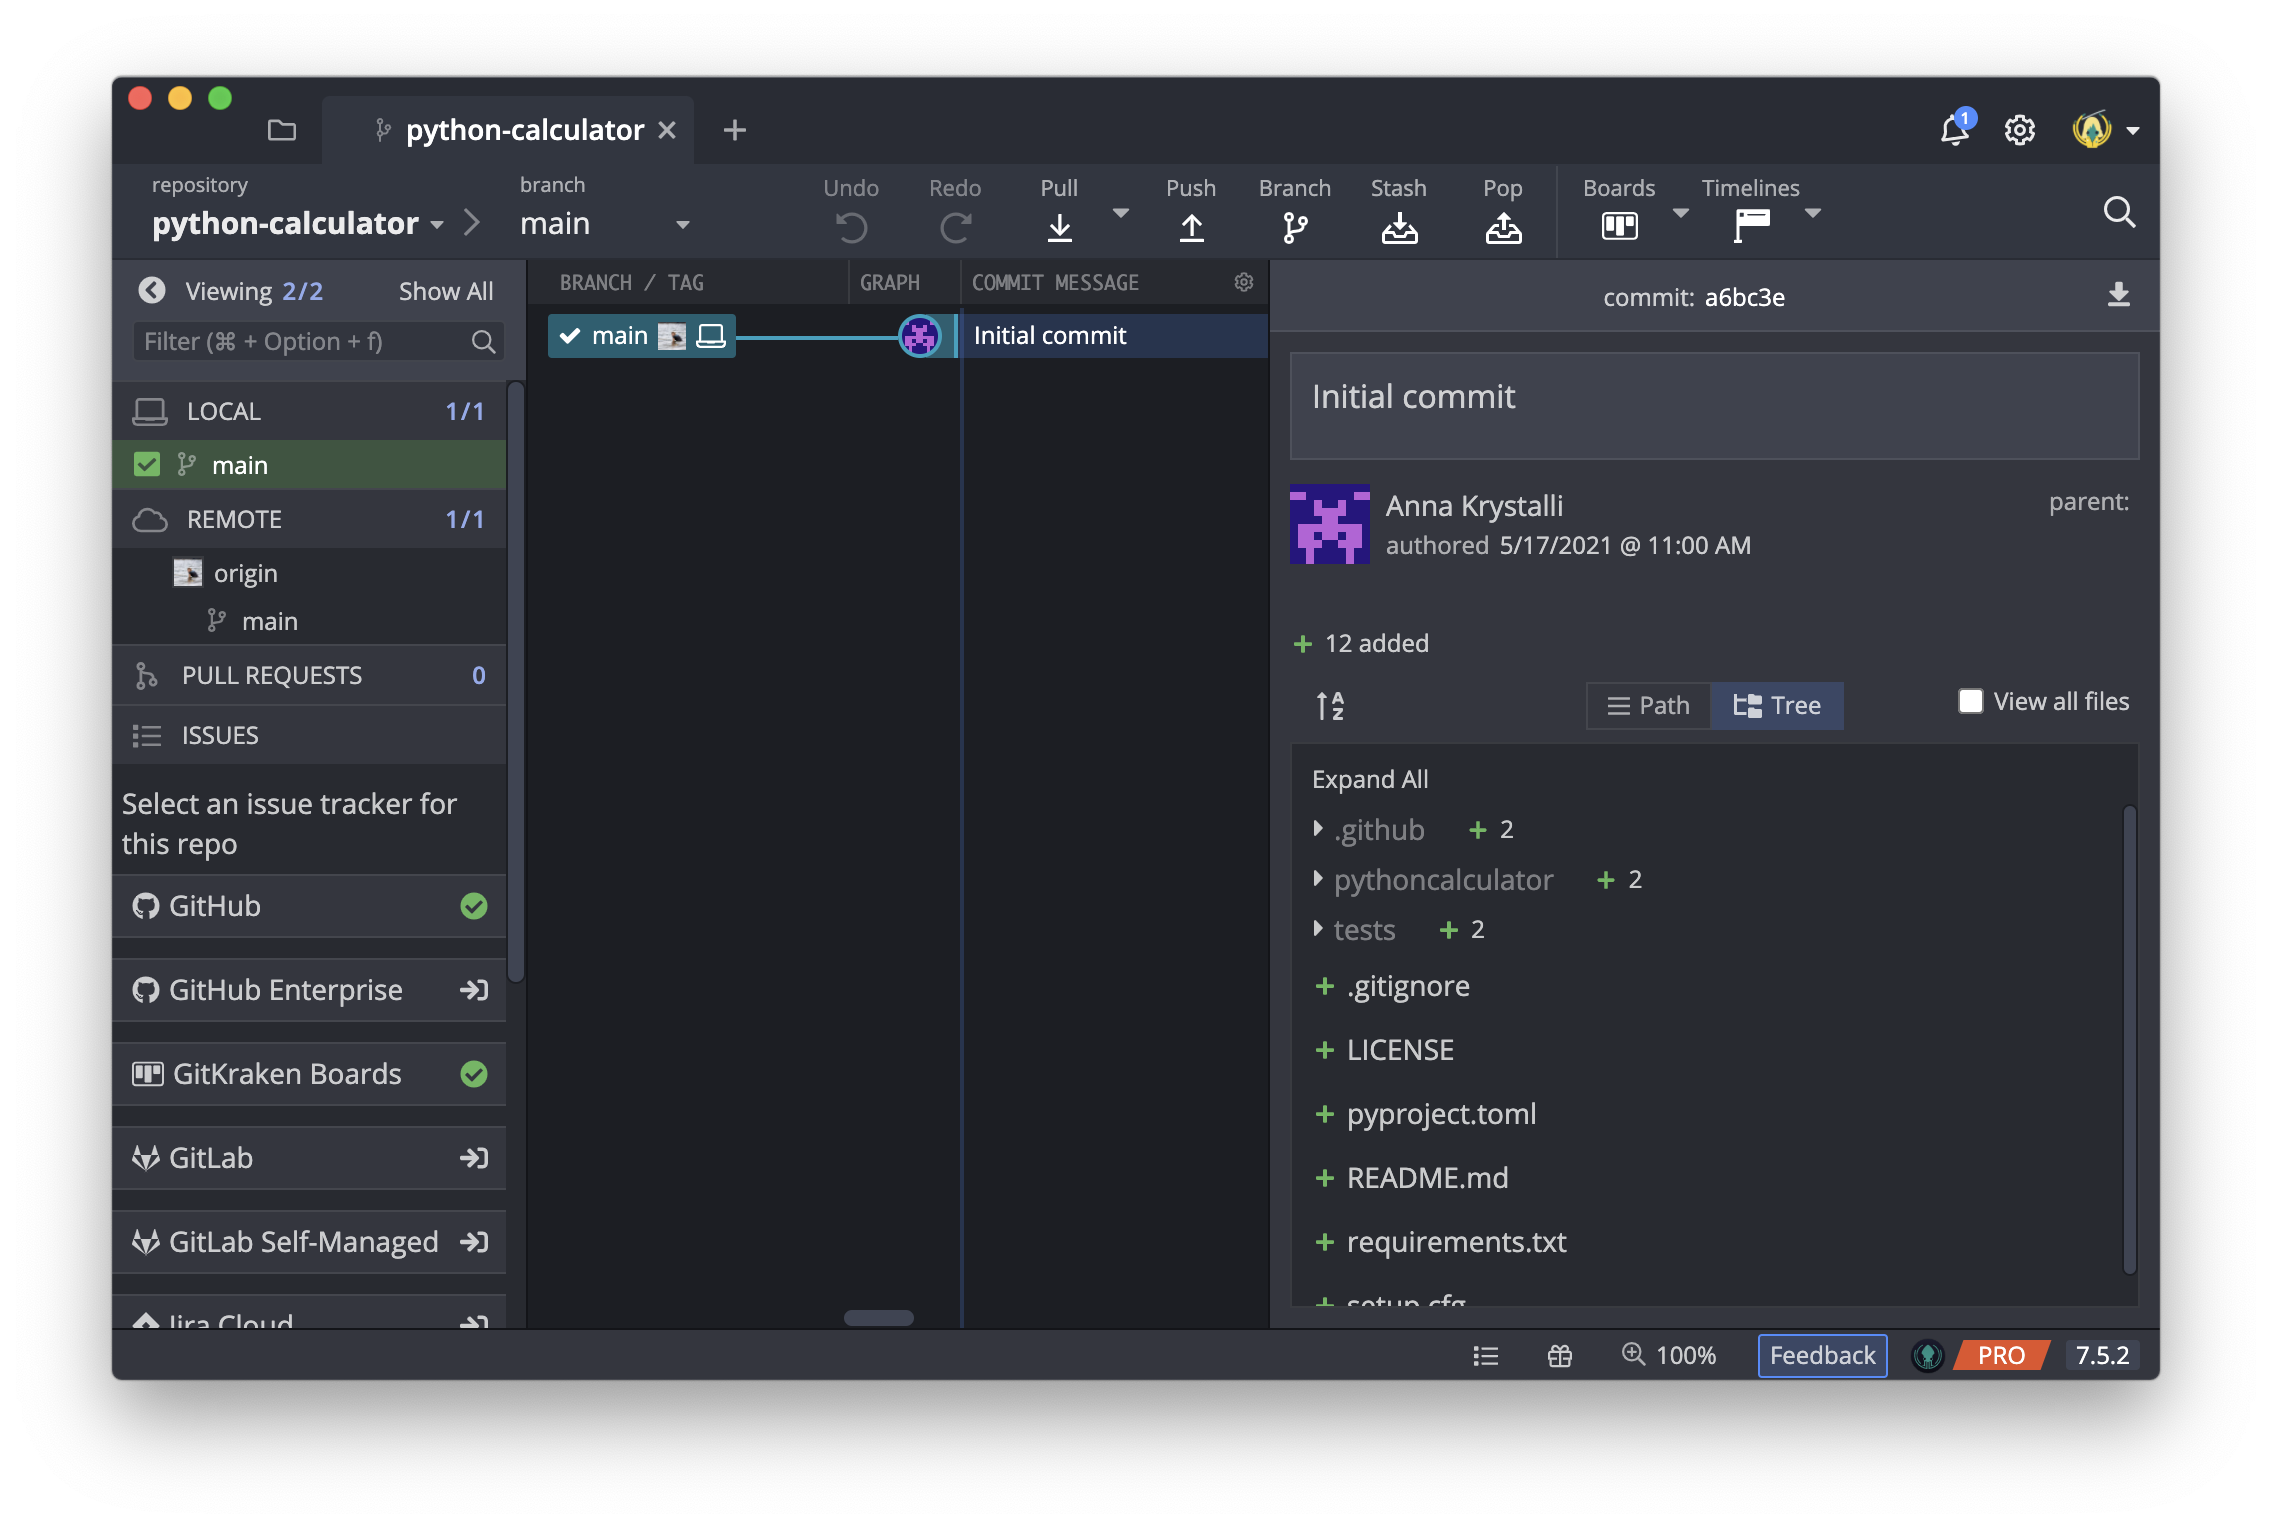
If all went well, at the top of the application you should see a banner reading Successfully cloned repo ‘python-calculator’.
Click on the Open Now button.
You should now see the git status of your local and origin repositories and all the files associated with the project. Everything should be up to date.
Create a new branch
Let us first get the owner of each repo to make a contribution via a branch and pull request and get another member of the team to review it.
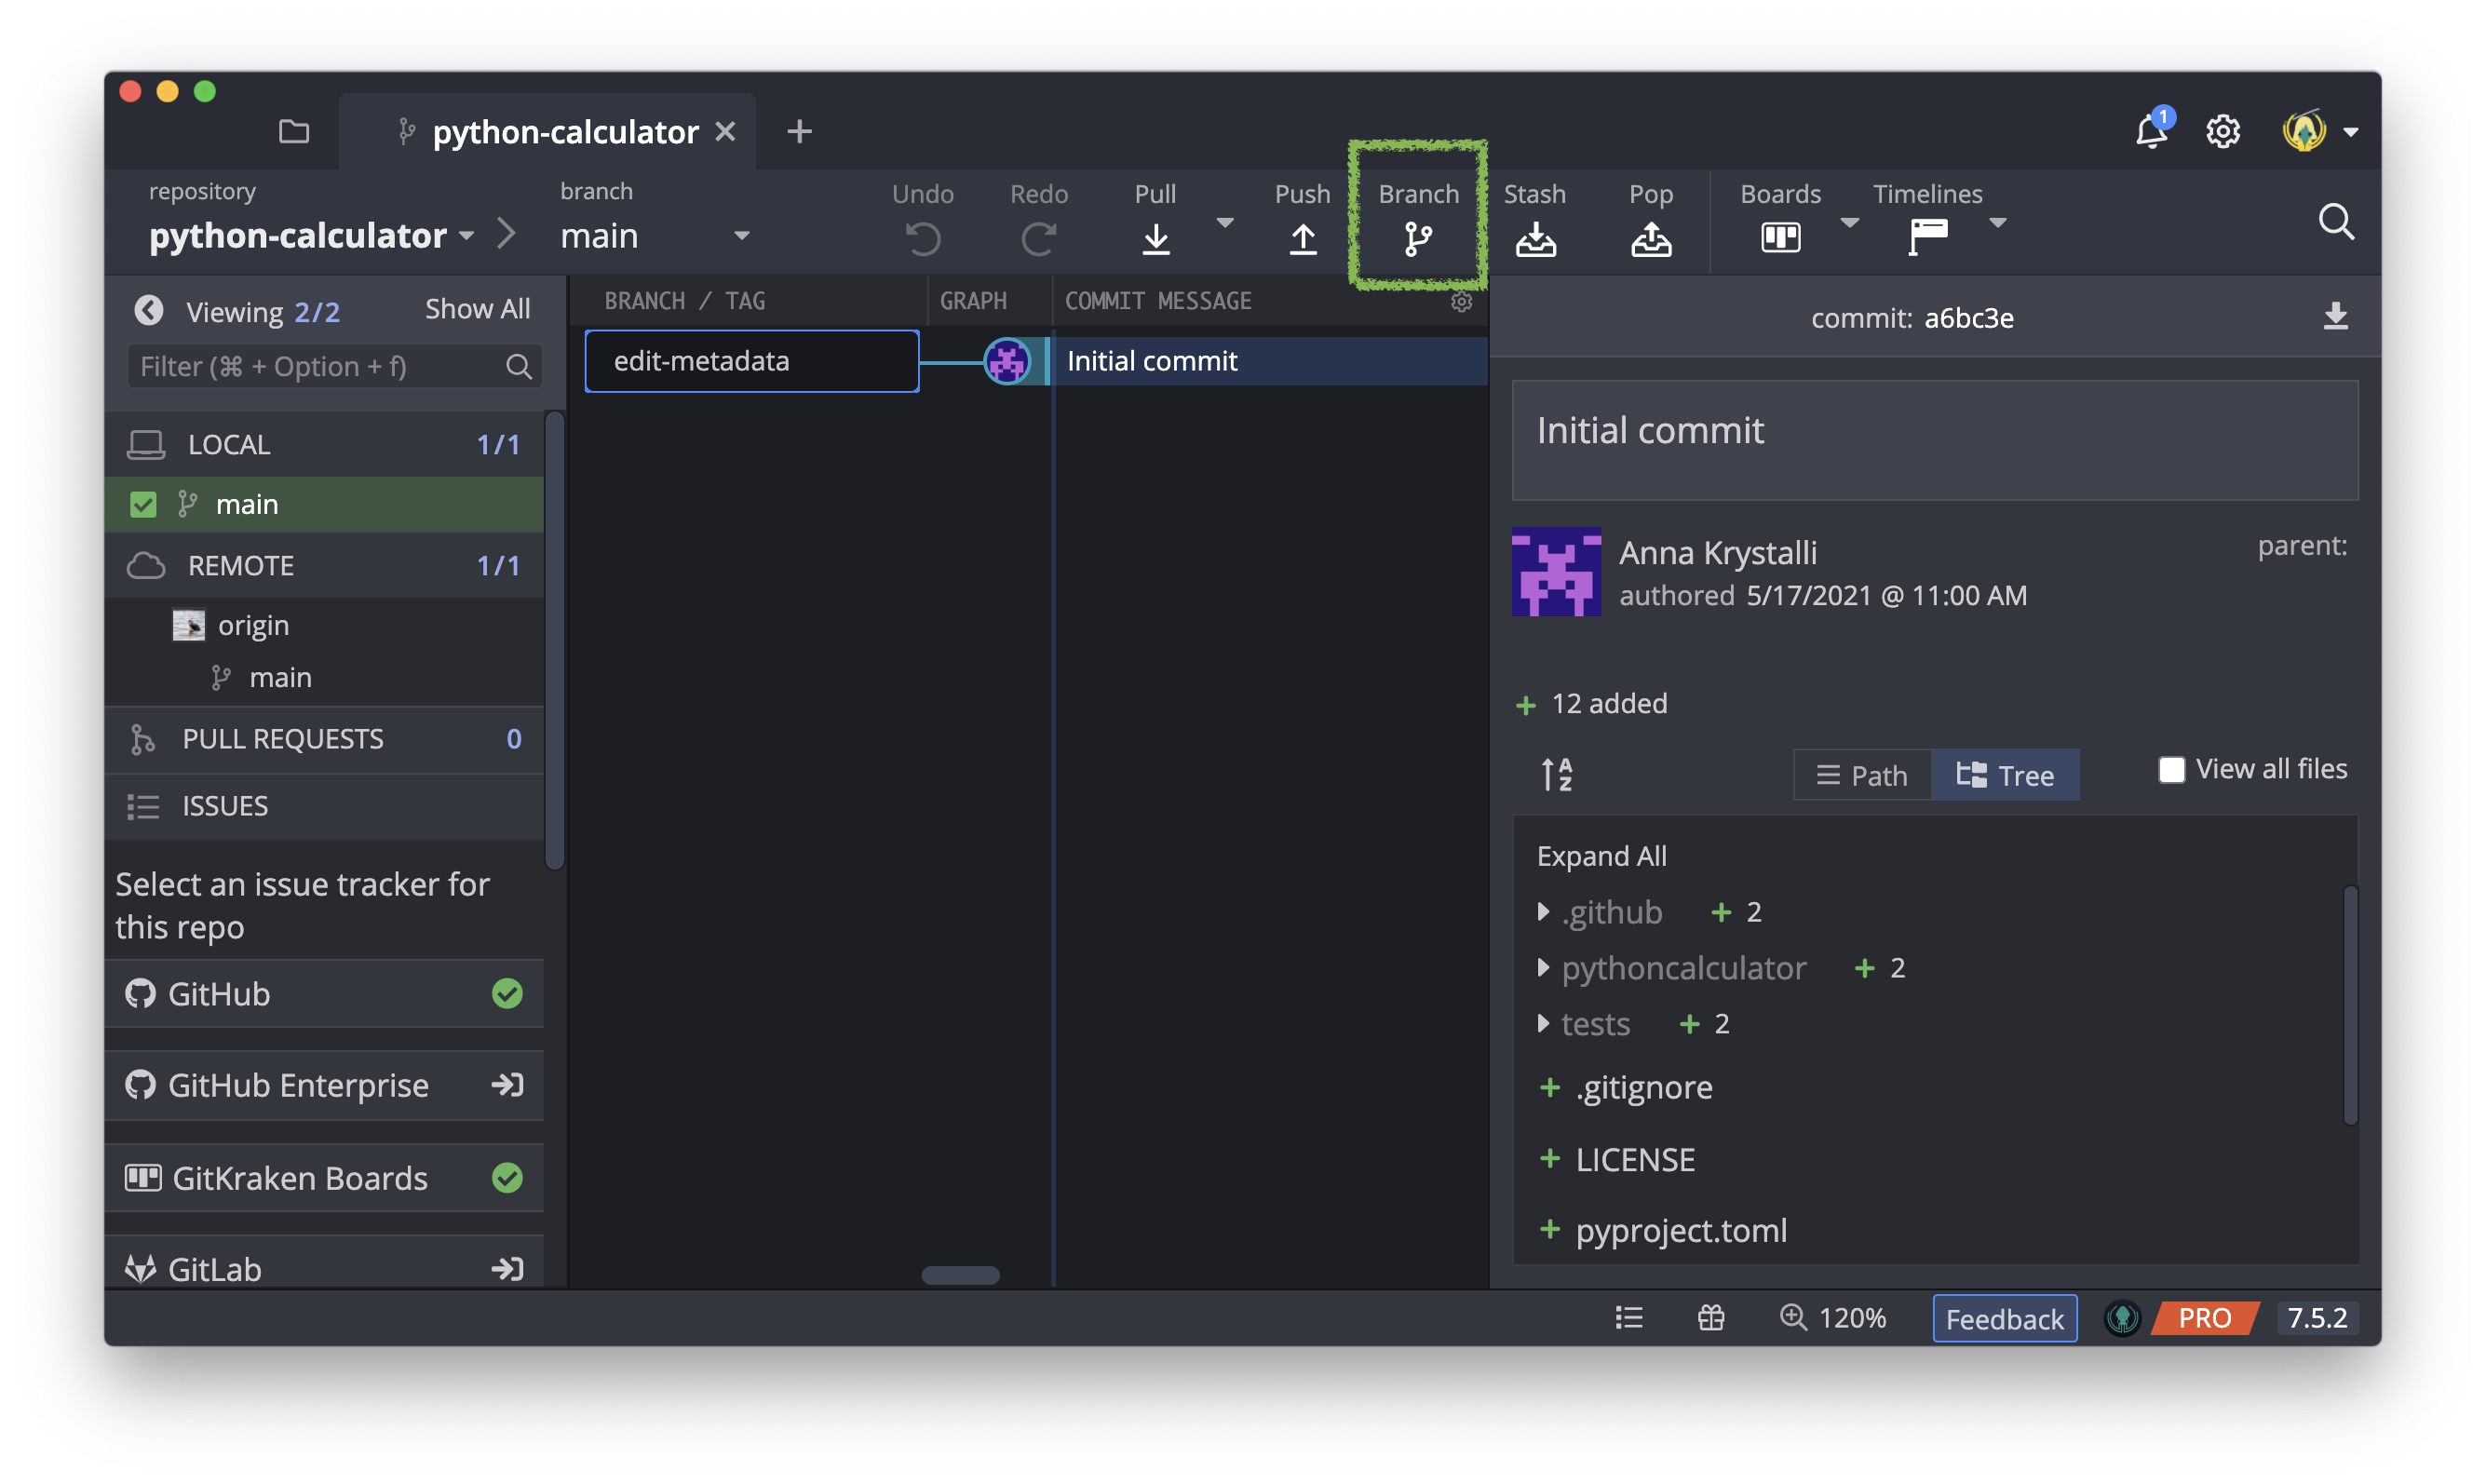
To create a new branch from the main branch, first make sure that, in the left-hand navigation panel, the main branch in the local repo is checked.
When you’re ready, click on the
Branch
button on the top panel.
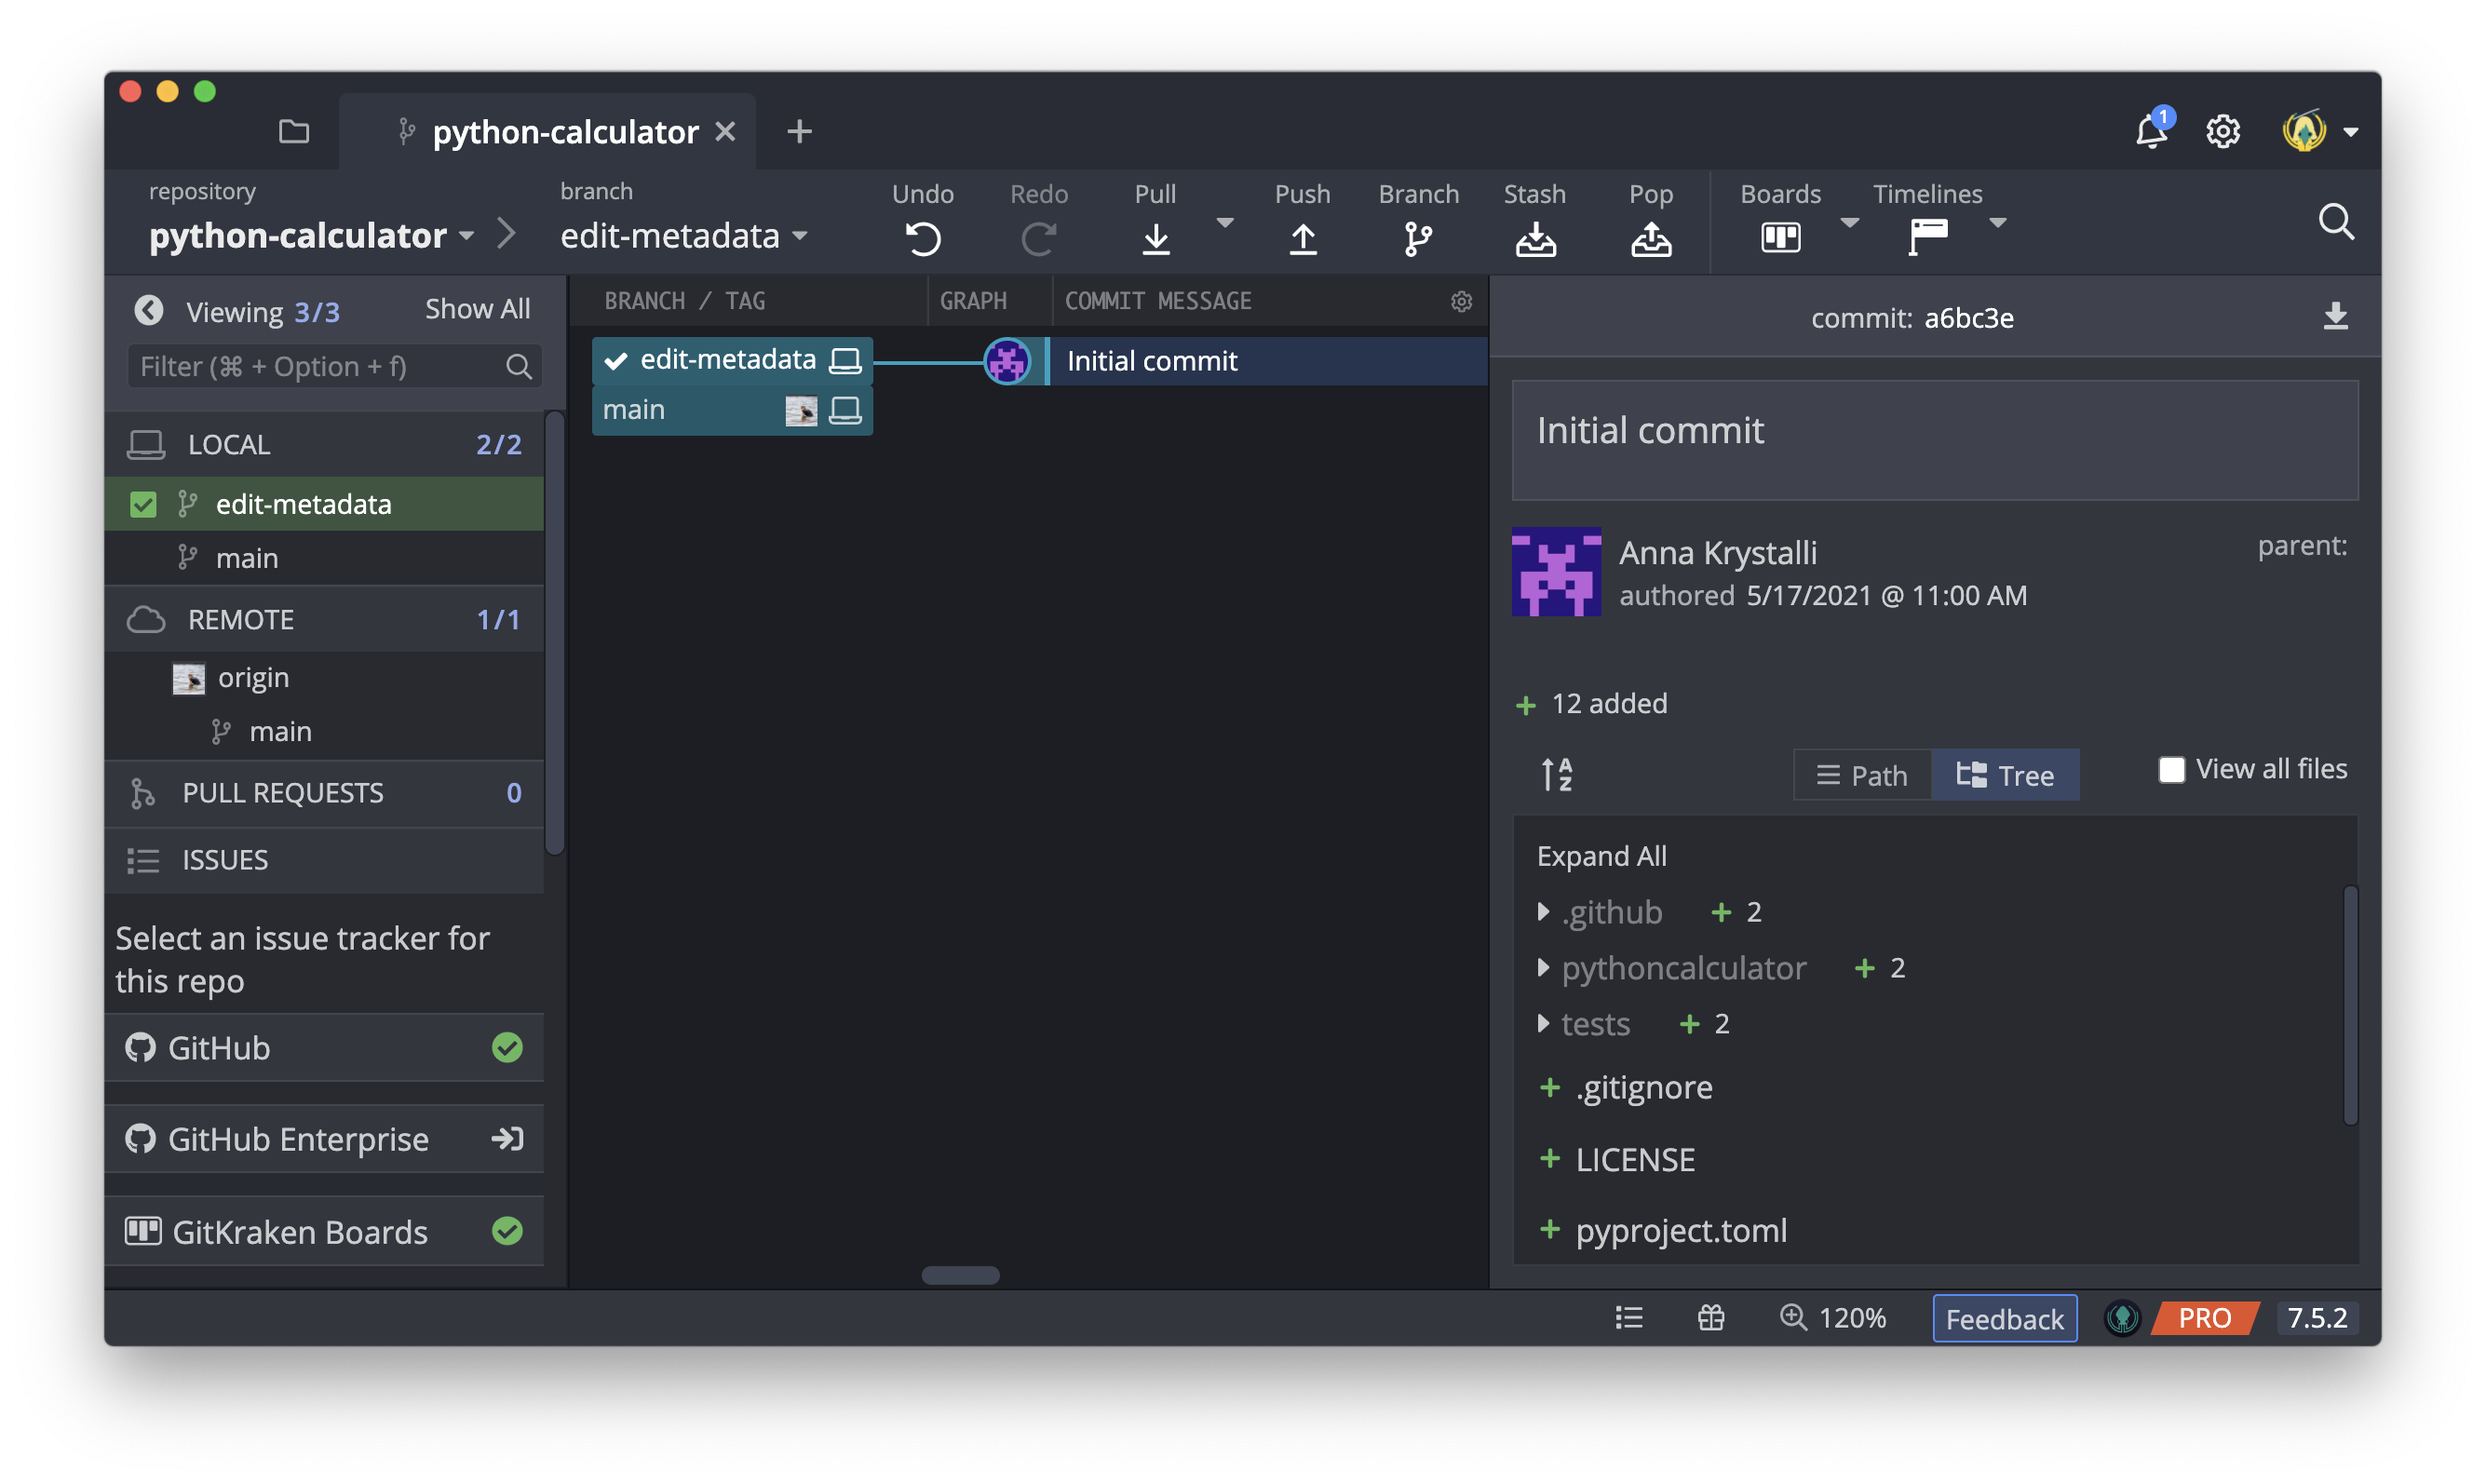
In the new branch text box that appears, enter a name for the new branch, e.g. edit-metadata. Press Return or Enter to create the new branch.
If you hover over the branch indicator, you’ll now see there are two branches, all in the same git state 👍
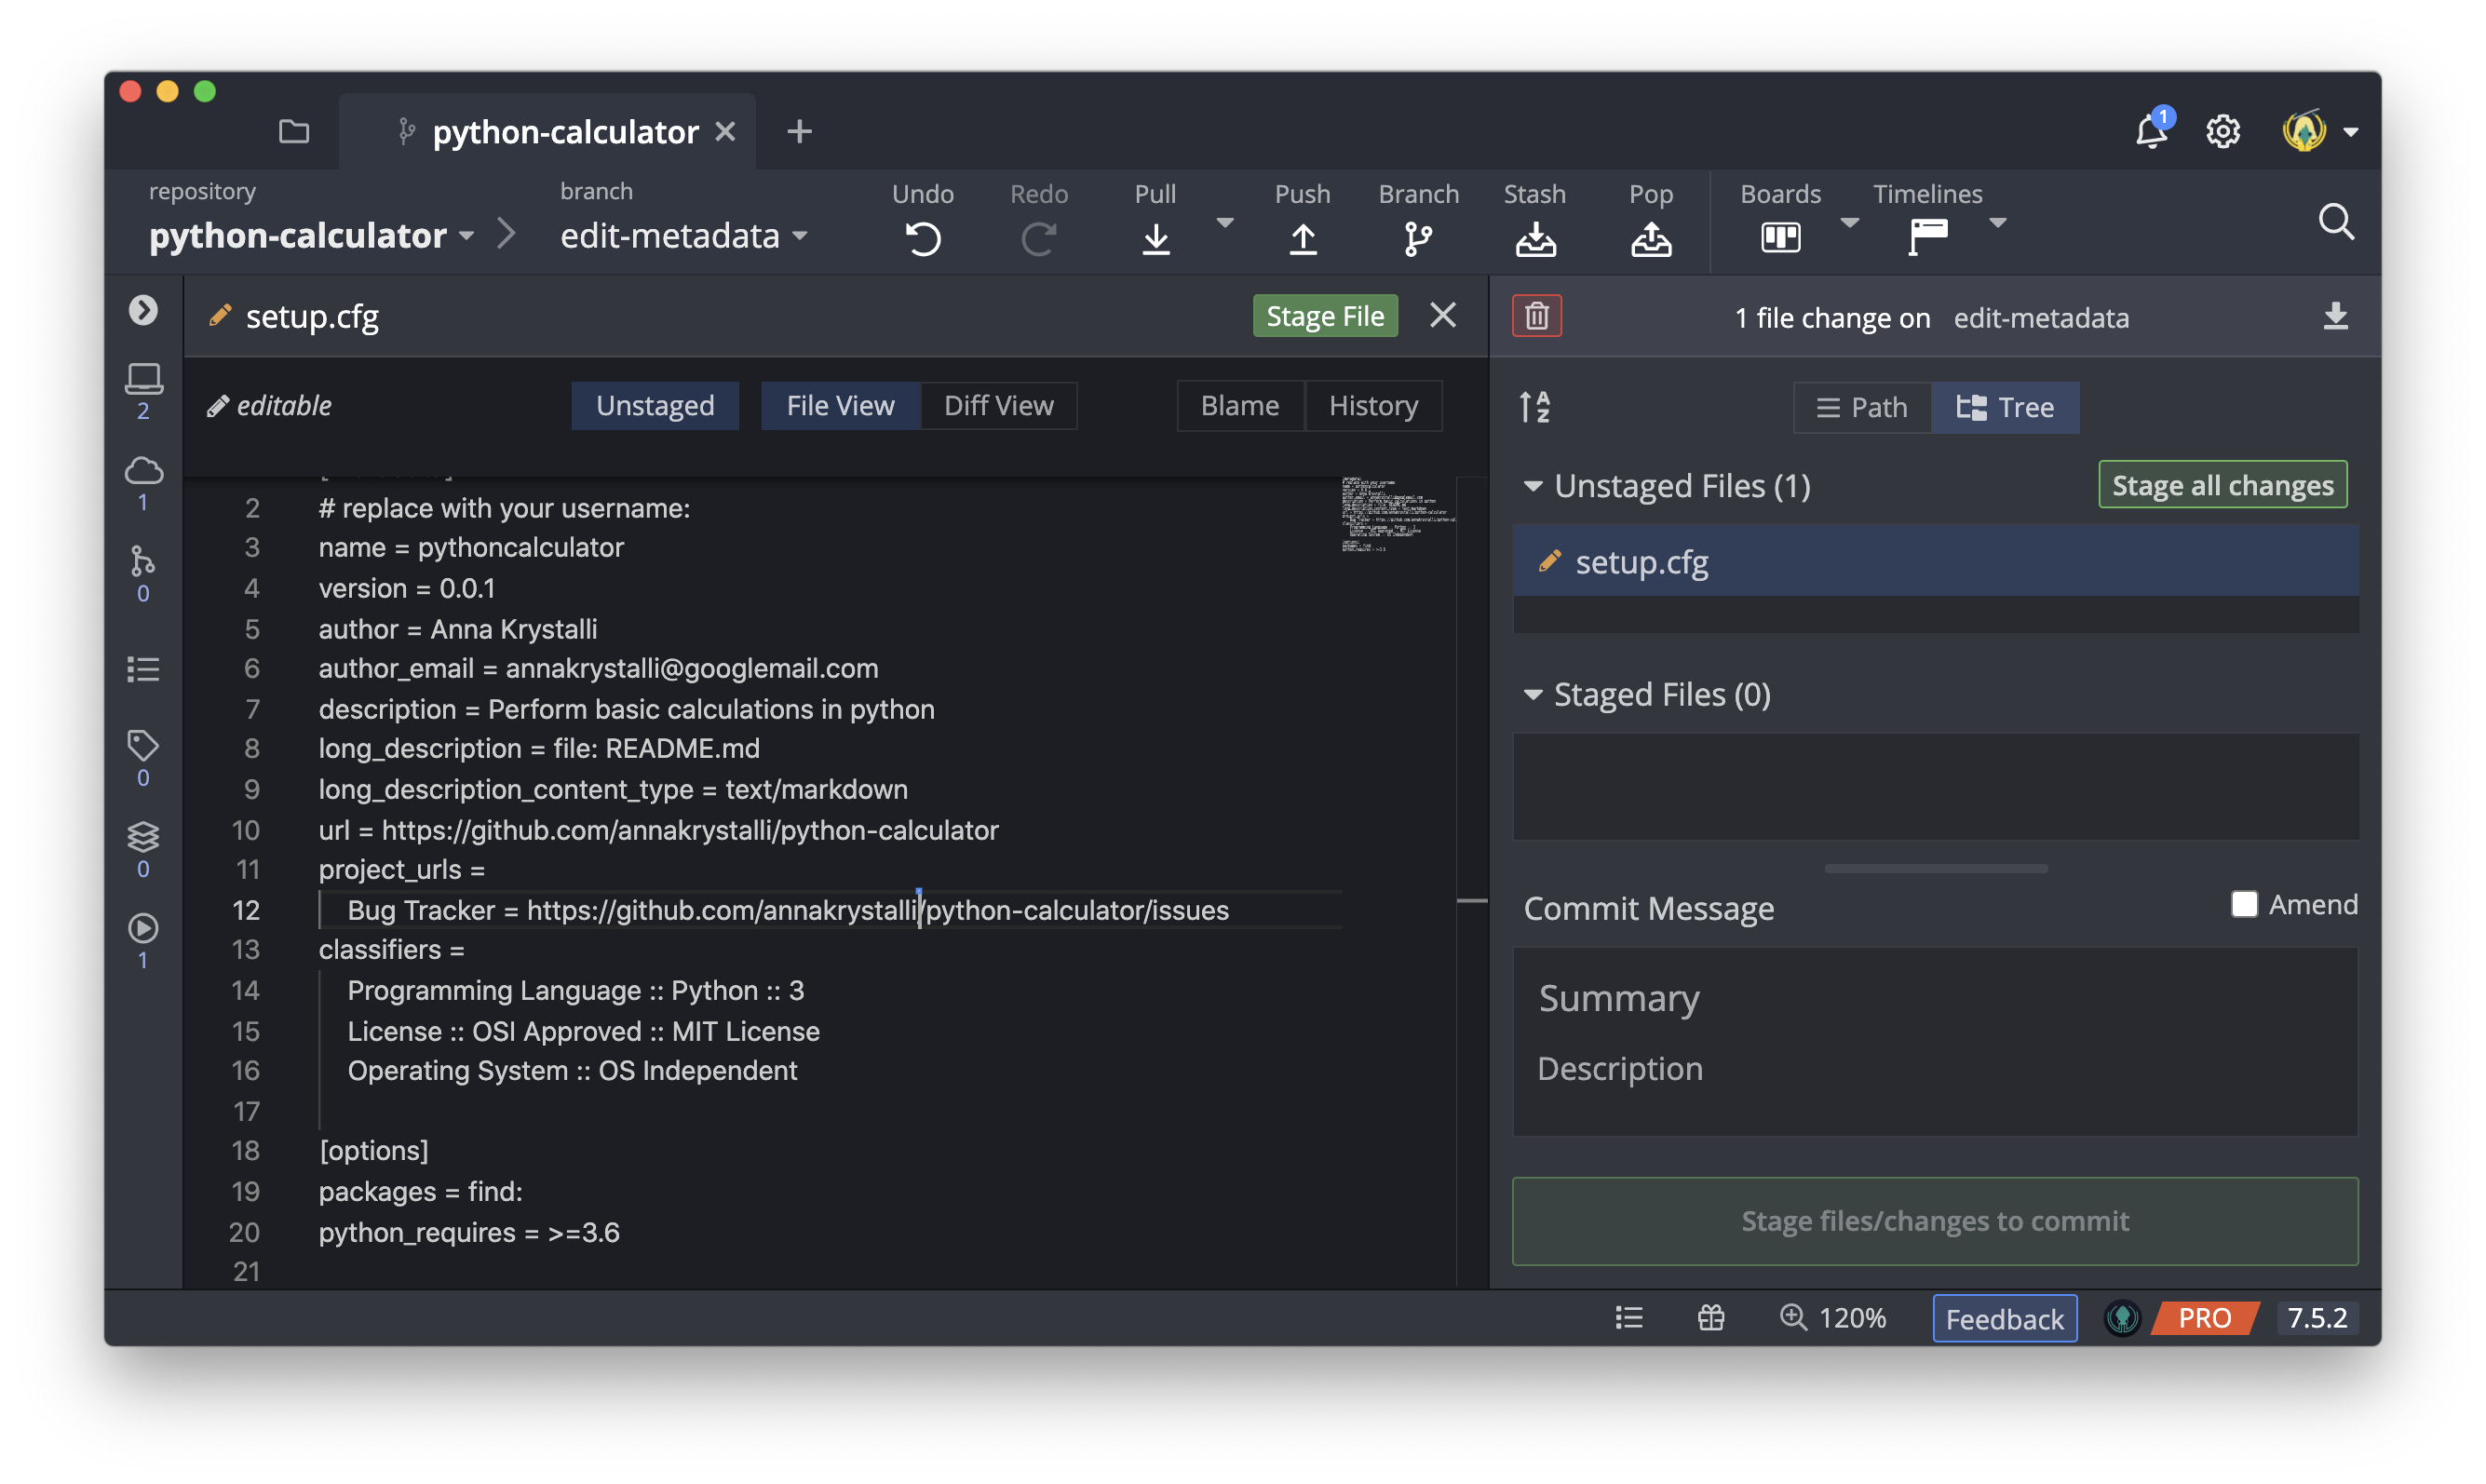
Edit setup.cfg
The setup.cfg file in a python package stores metadata about the project. Each owner will now edit that file to add their author details as well as complete the details of the team repository.
We can edit the file in GitKraken Client by first navigating to the file in the bottom-right file panel. Once you’ve double-checked you’re in the correct branch, click on Edit this file .
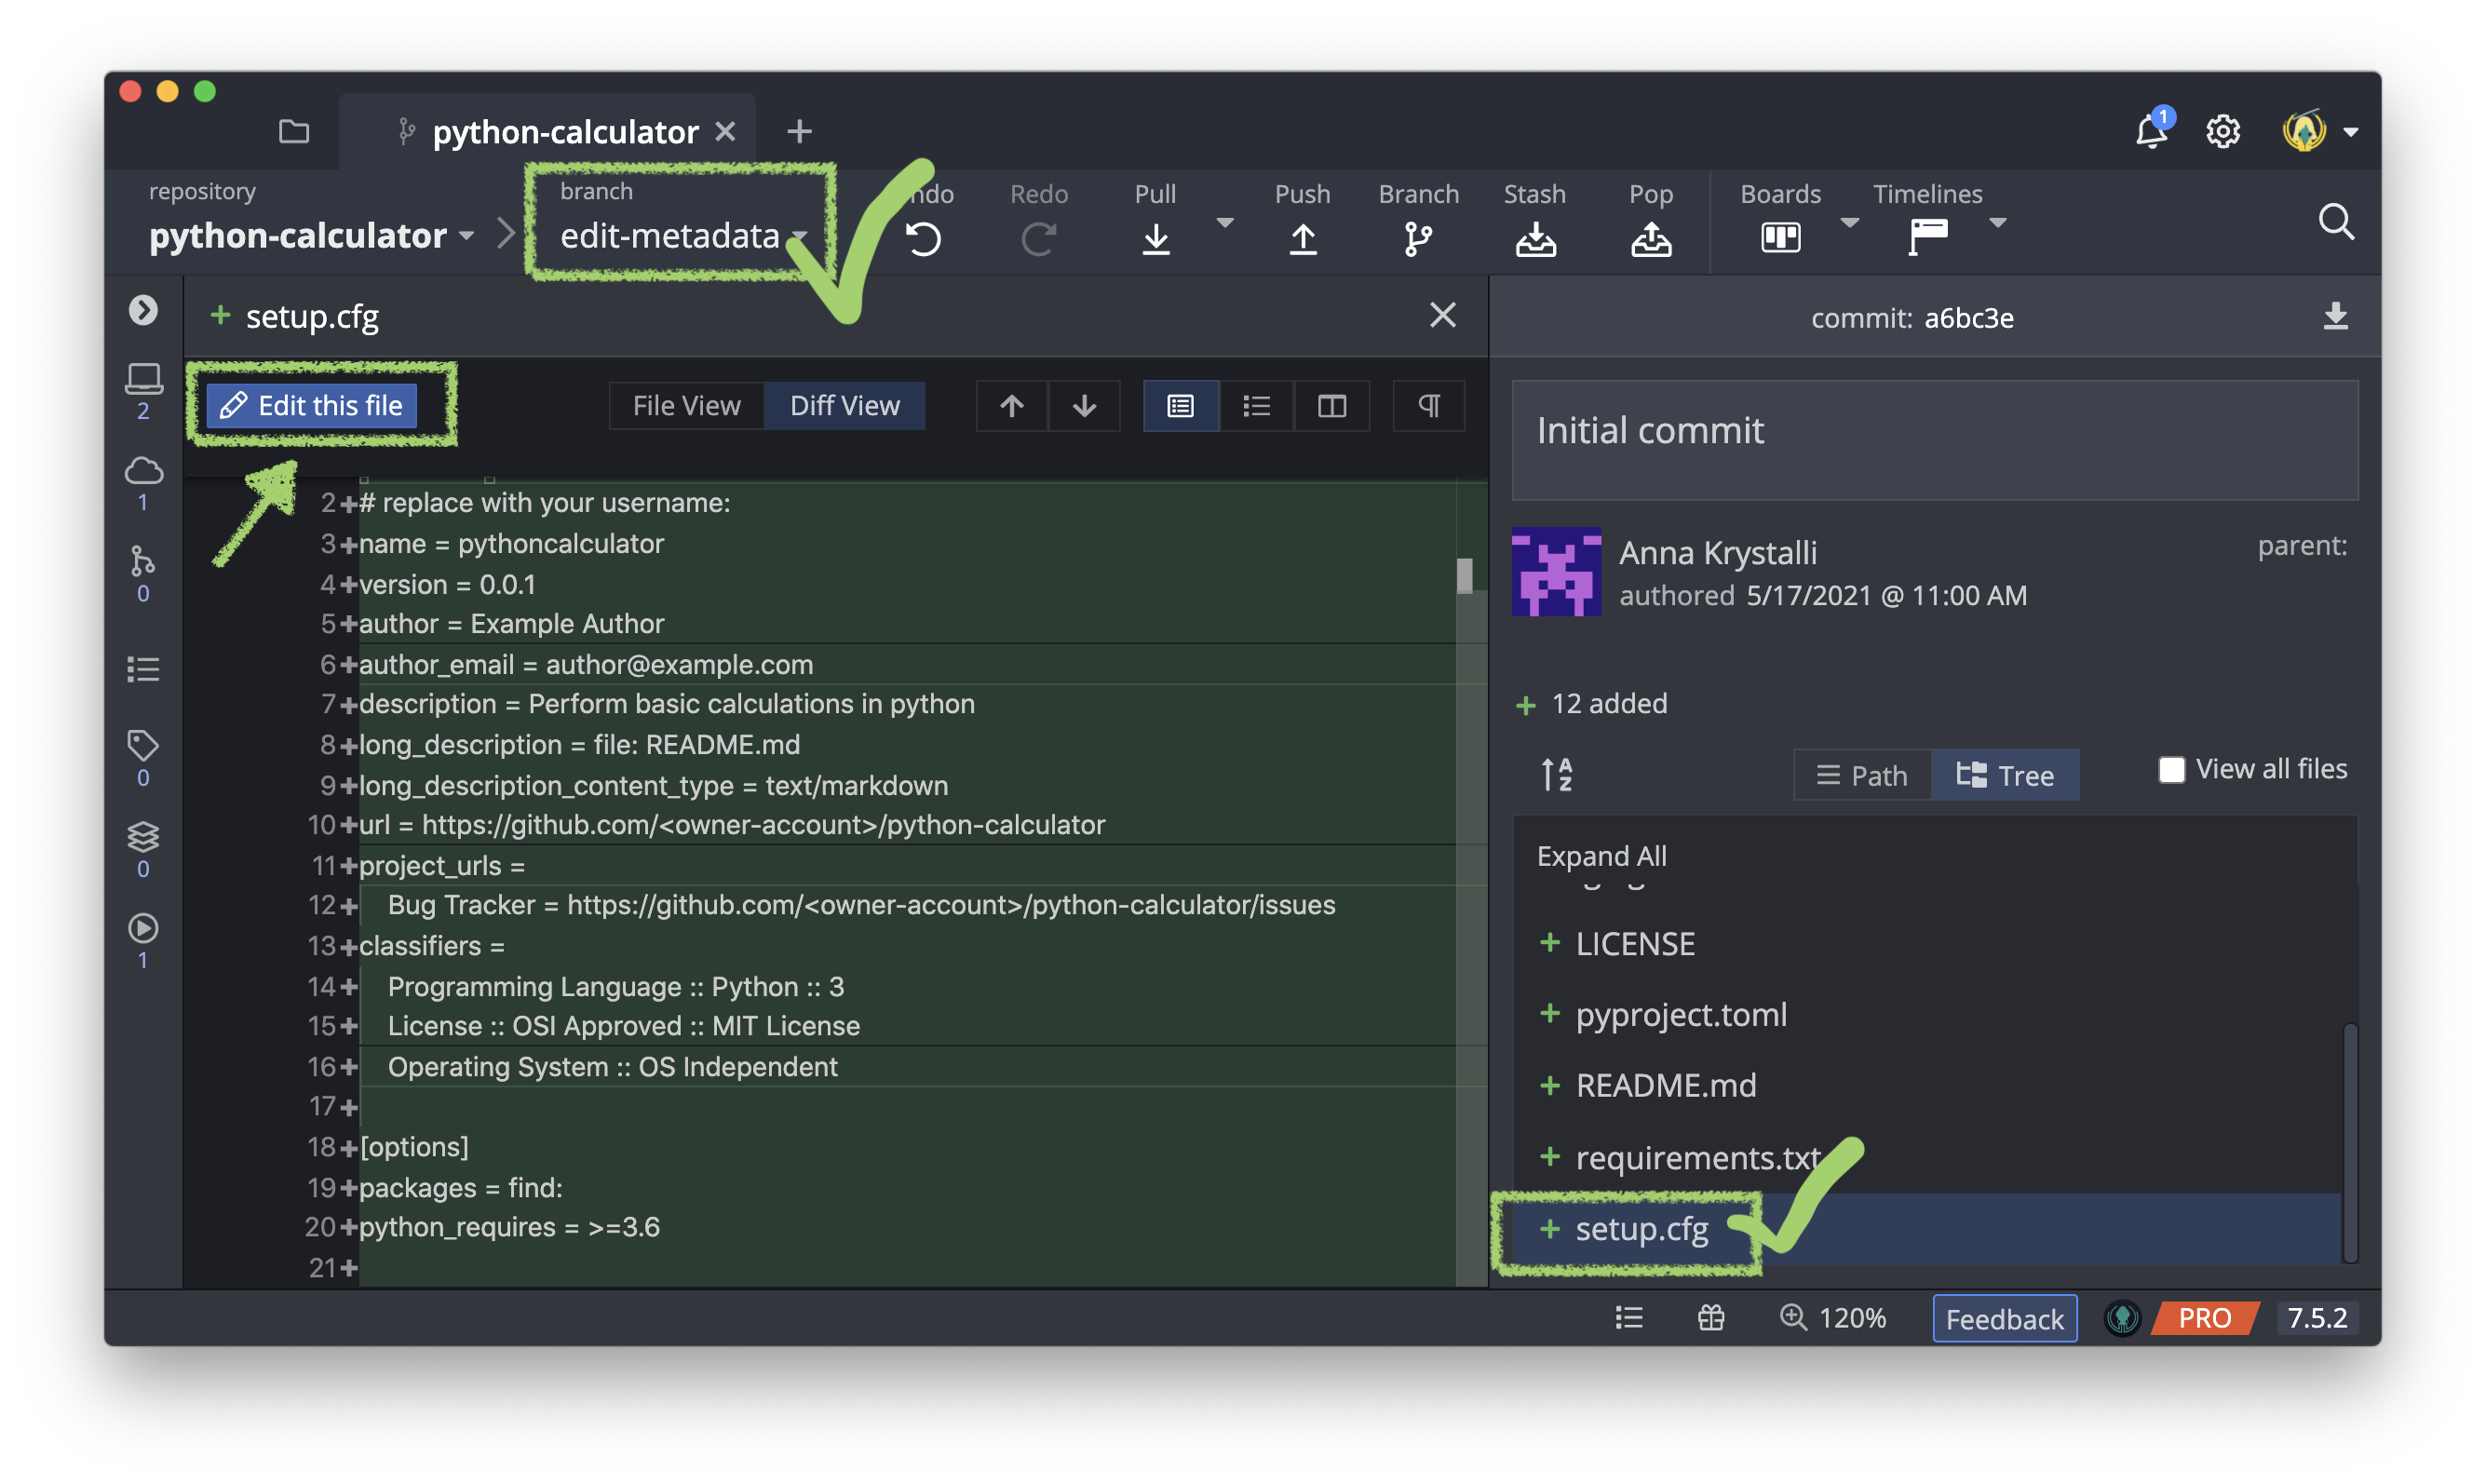
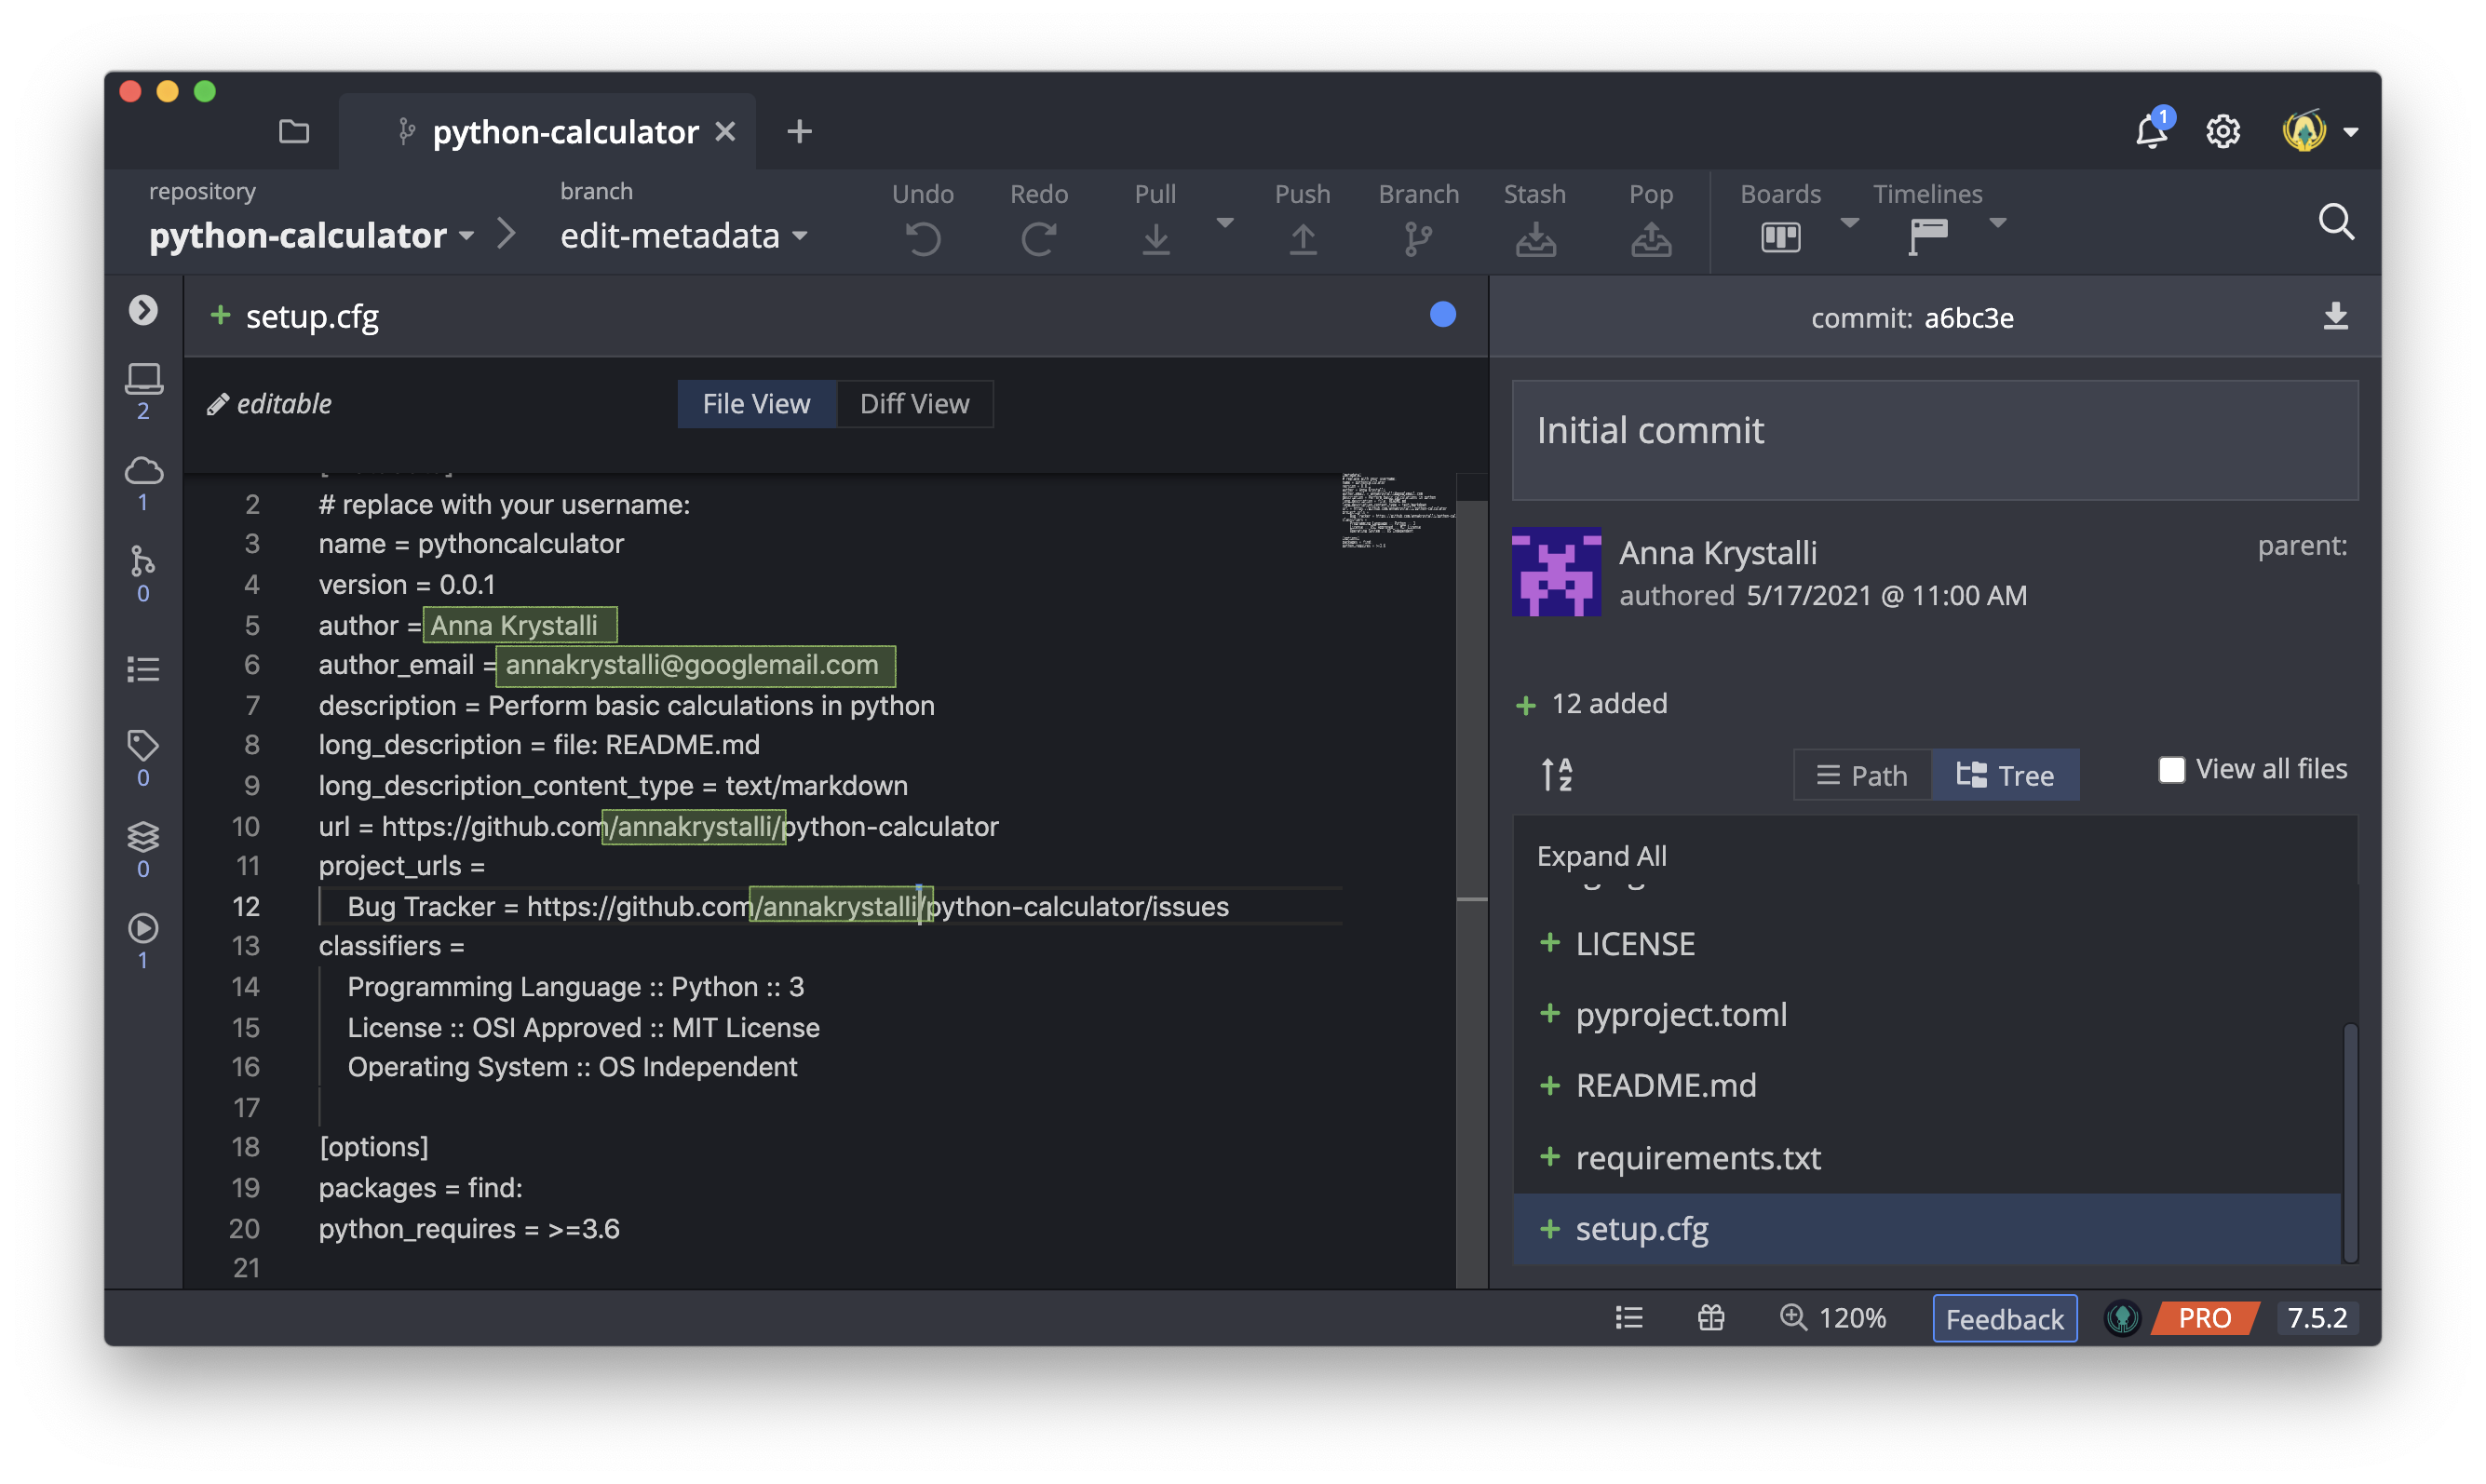
Next, edit the:
- author field with your name.
- author_email field with your email.
- Complete the url with your github account details.
- Complete the Bug Tracker field under project_urls again with your github account details.
Press  | Ctrl + S to save your changes.
Commit changes to setup.cfg
The right hand side panel now indicates that you have a single unstaged file (setup.cfg) with uncommitted changes.
Click on the Stage file or Stage all changes button.
This stages setup.cfg and opens up the commit panel. Add a commit message to your commit, e.g. Add author and github repo details.
Click Commit changes to 1 file
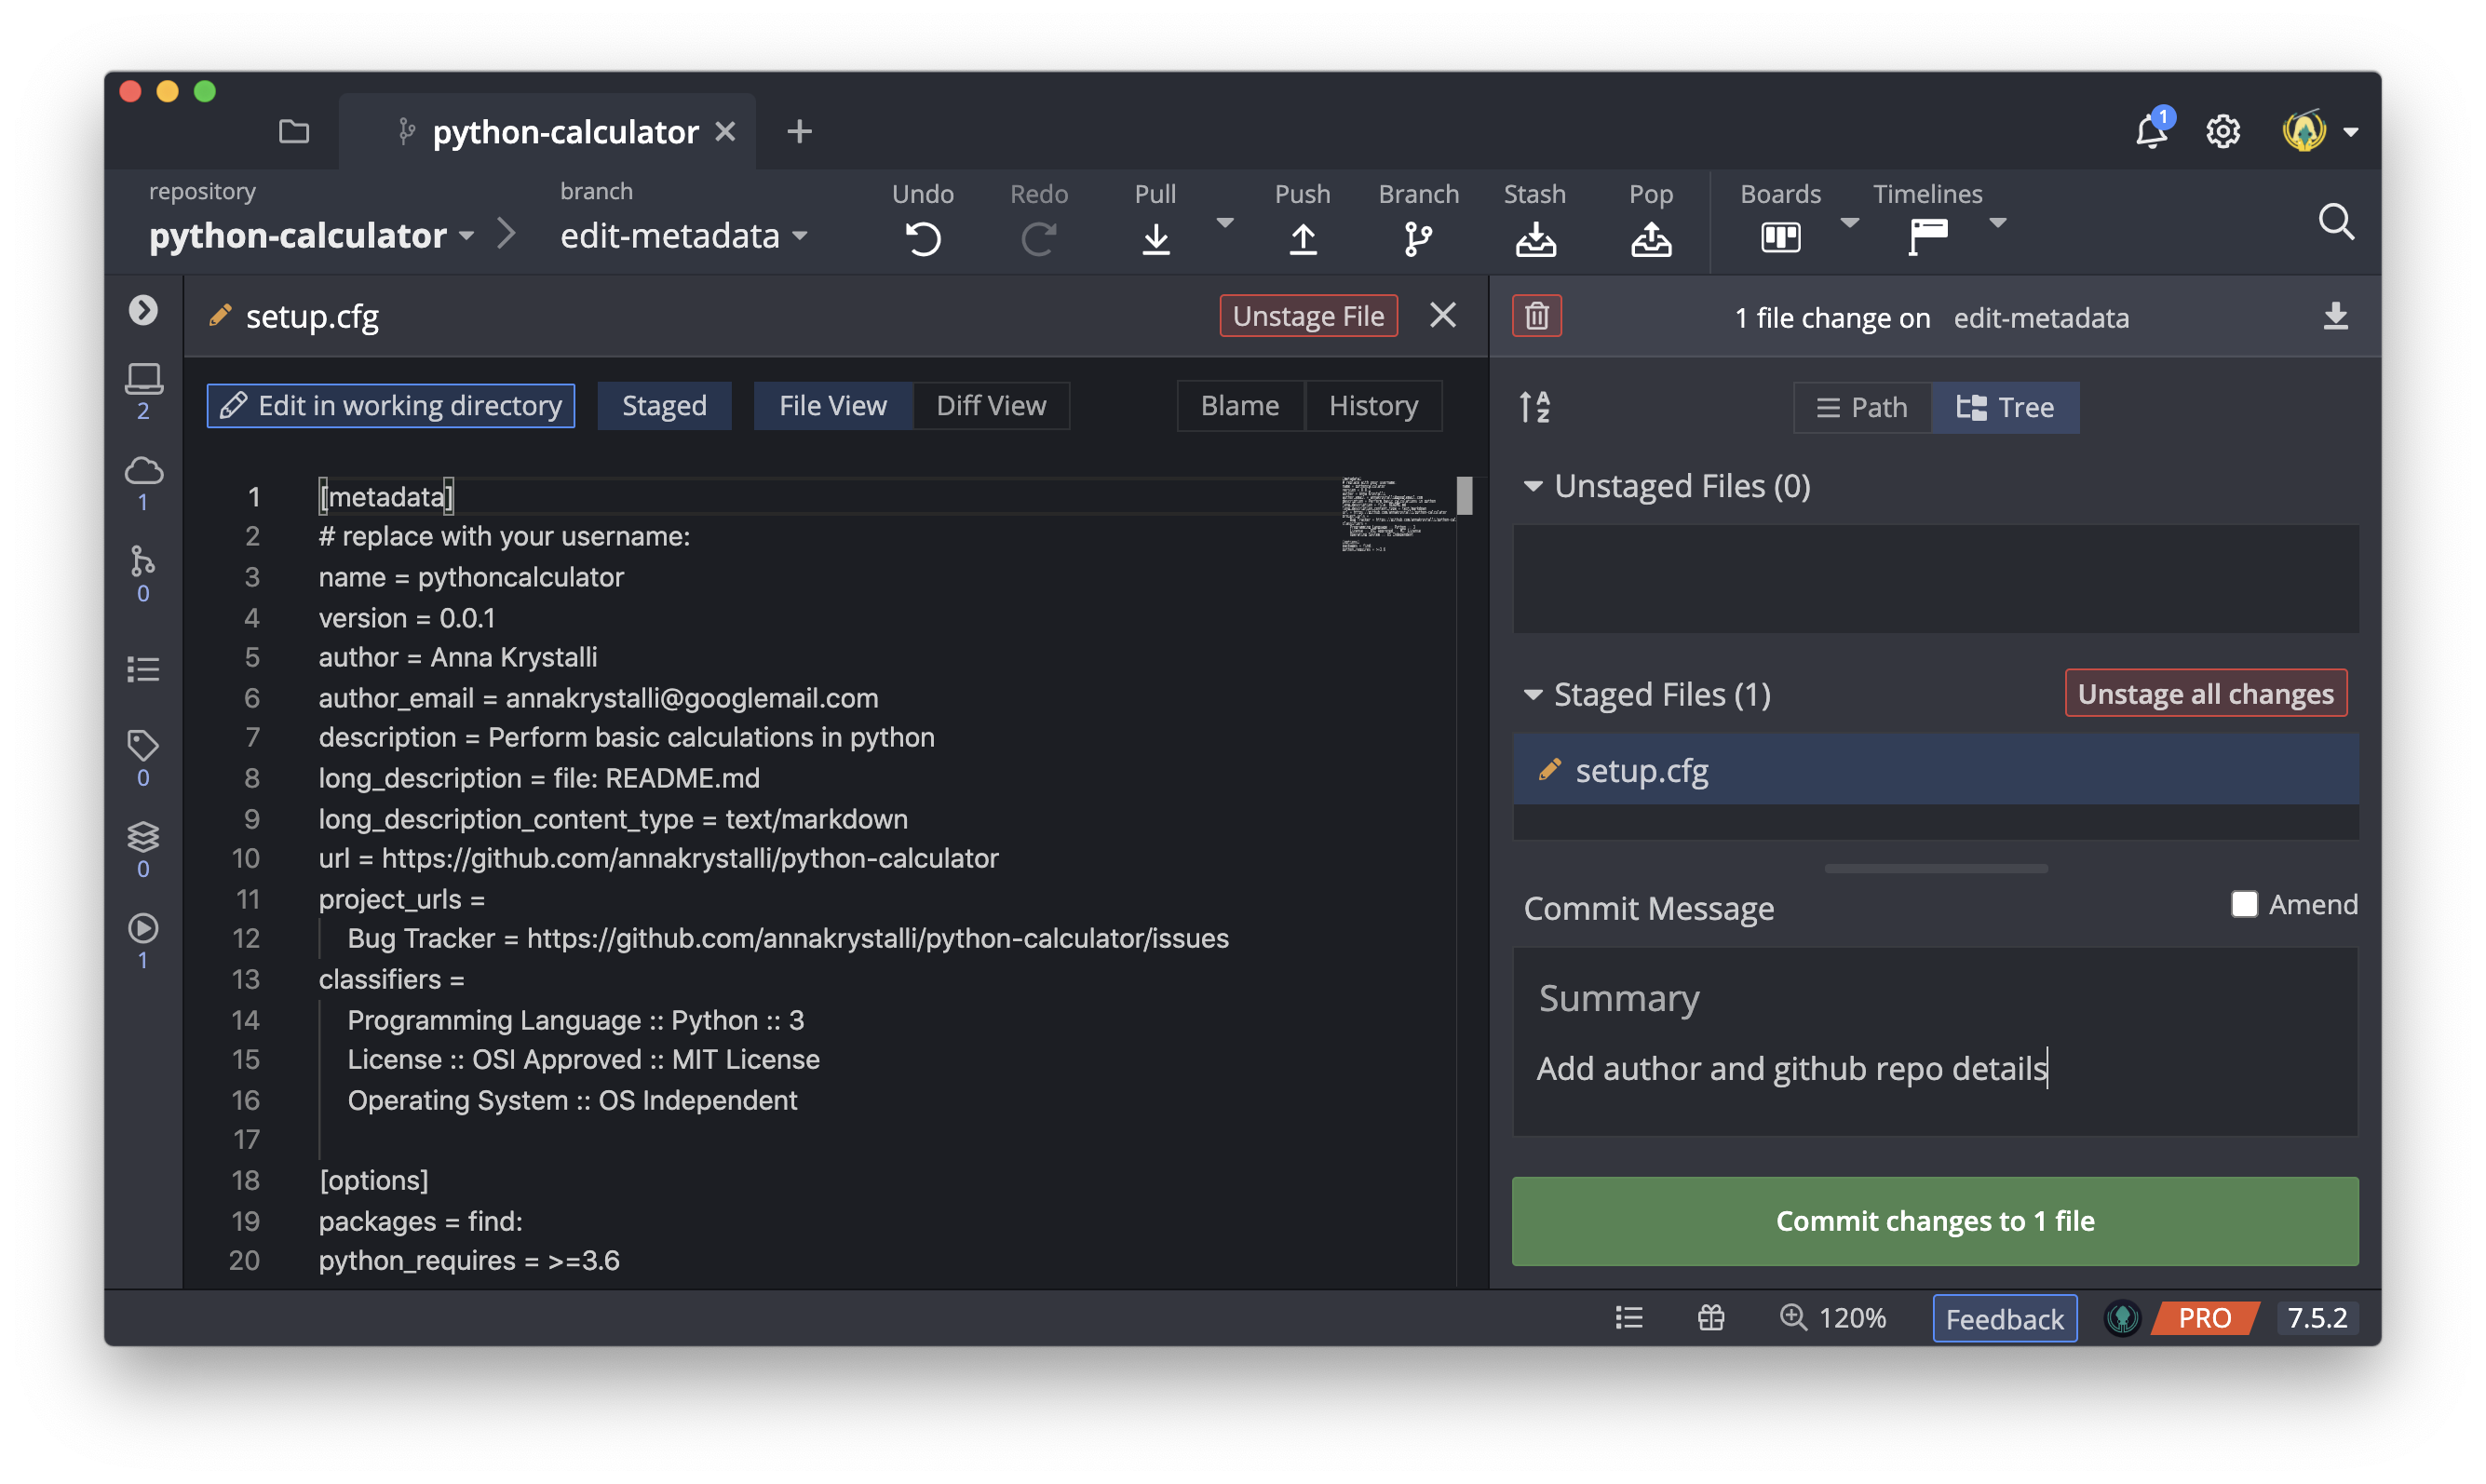
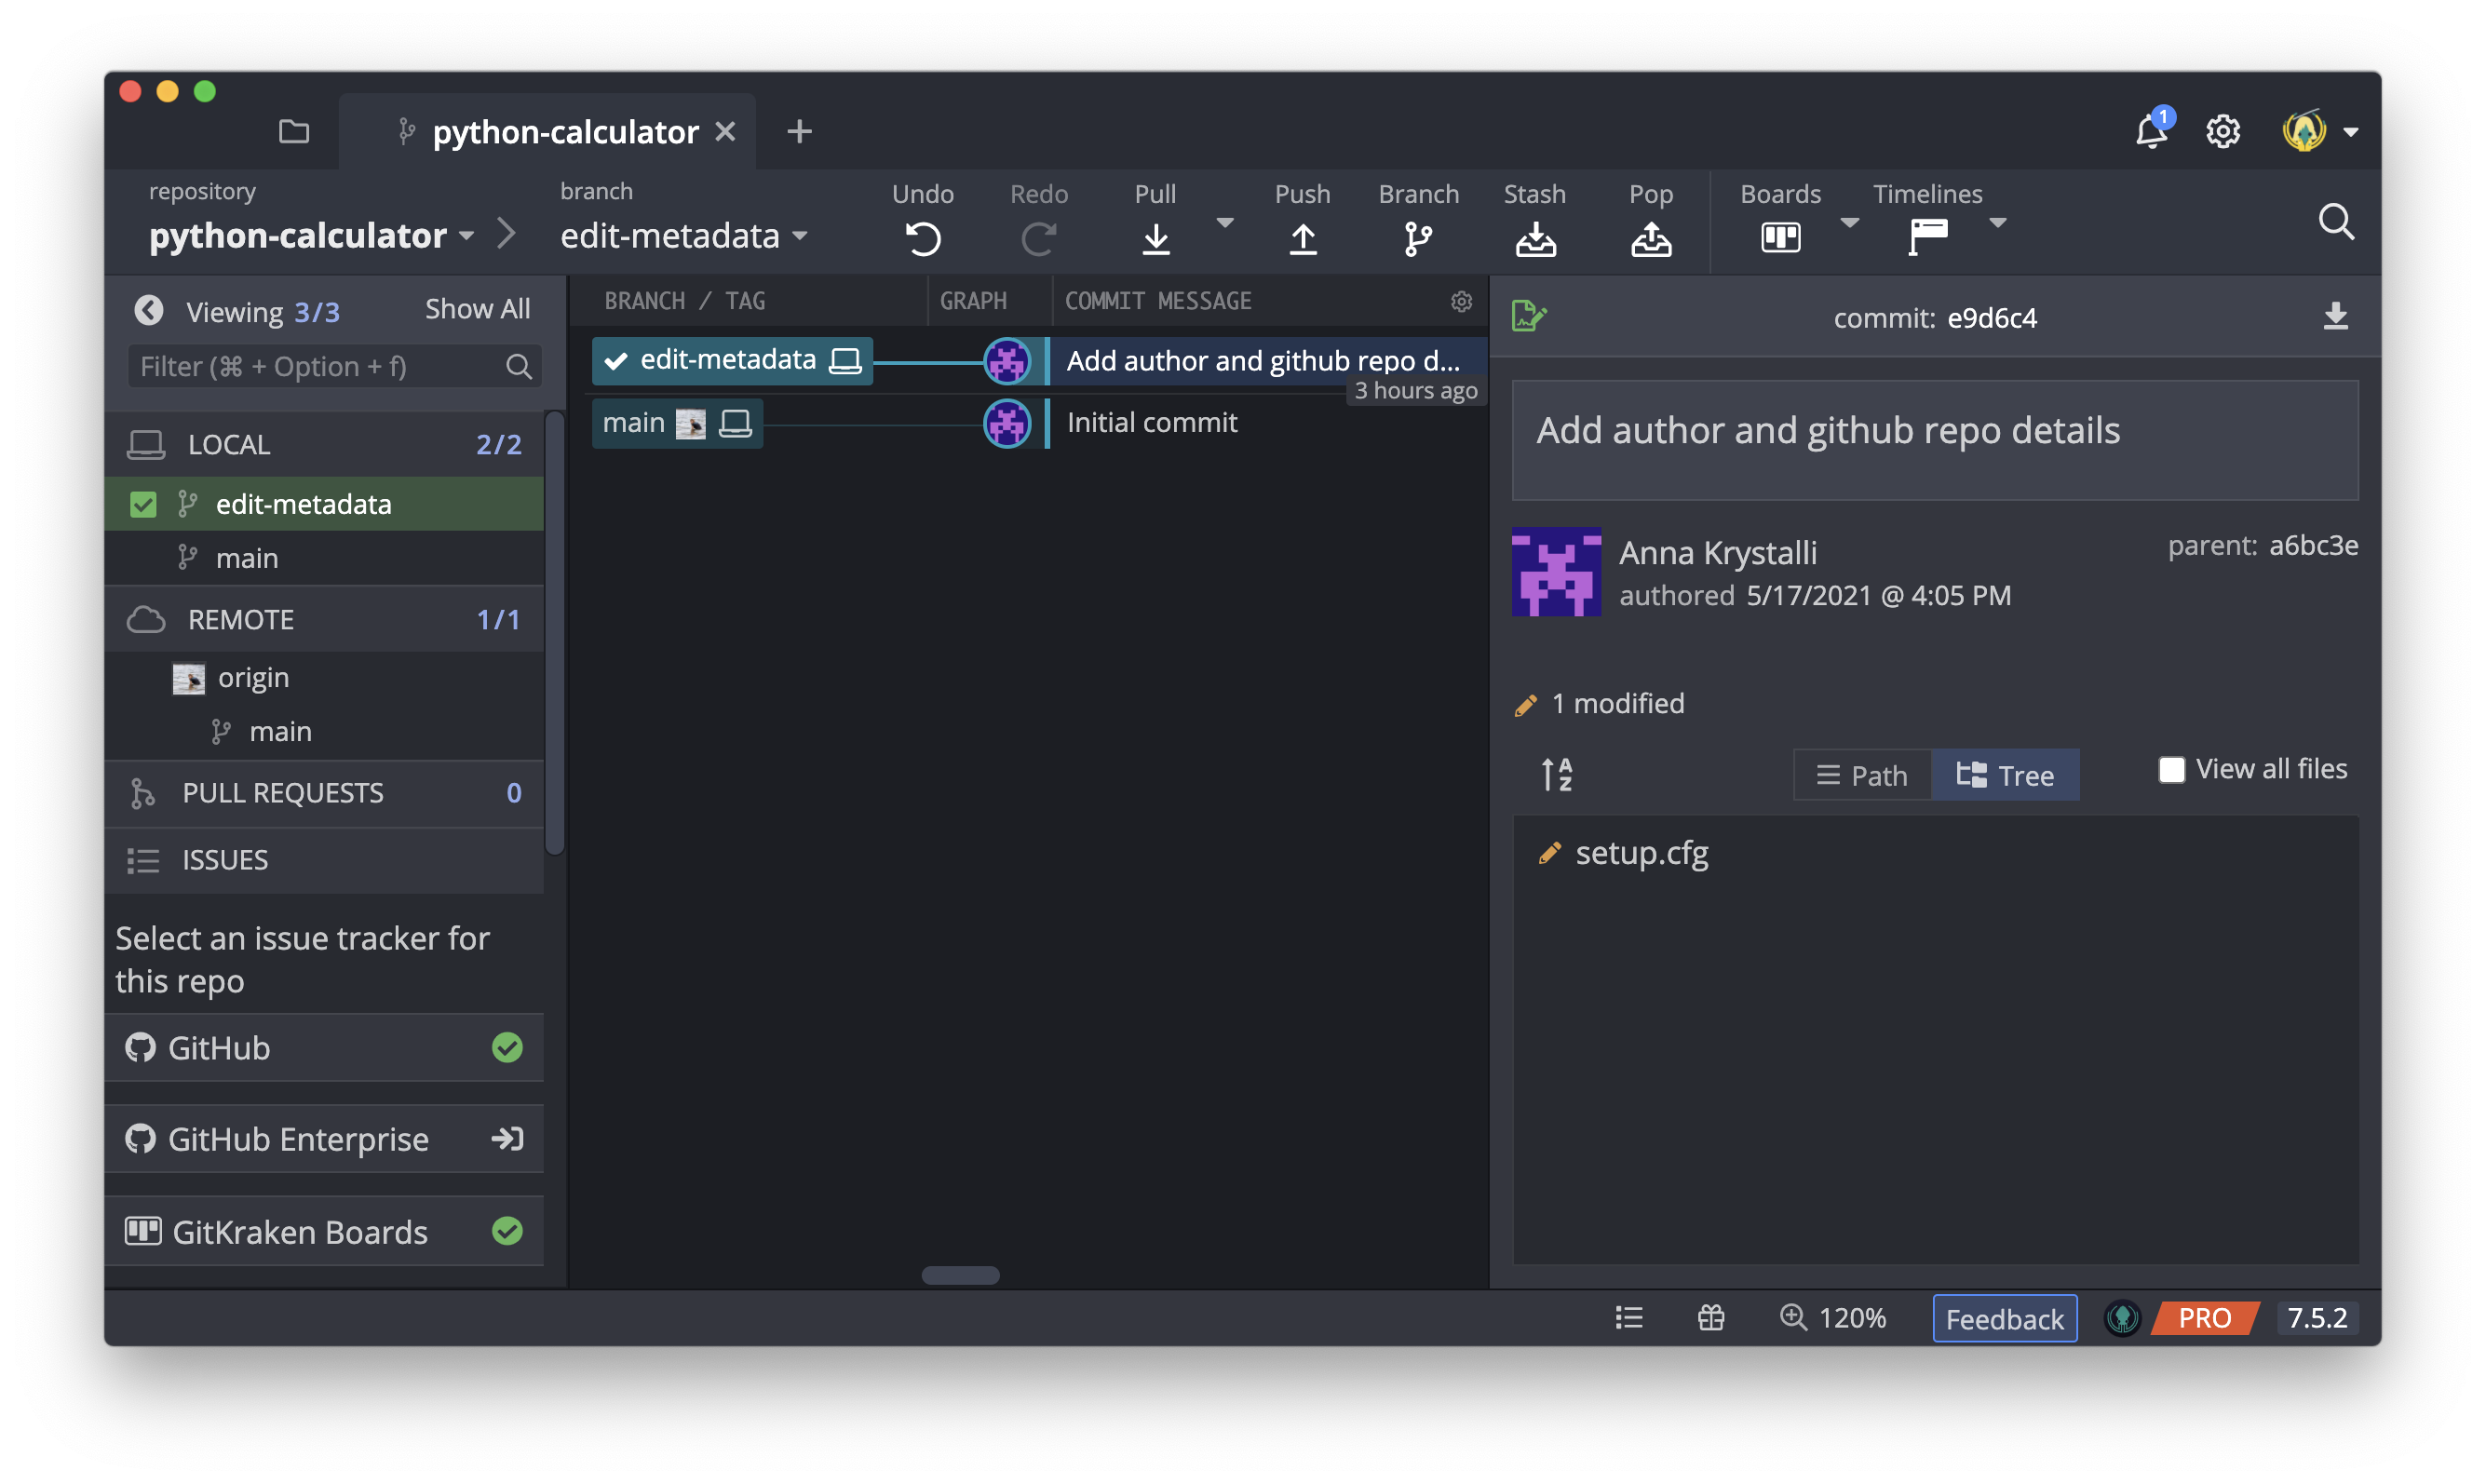
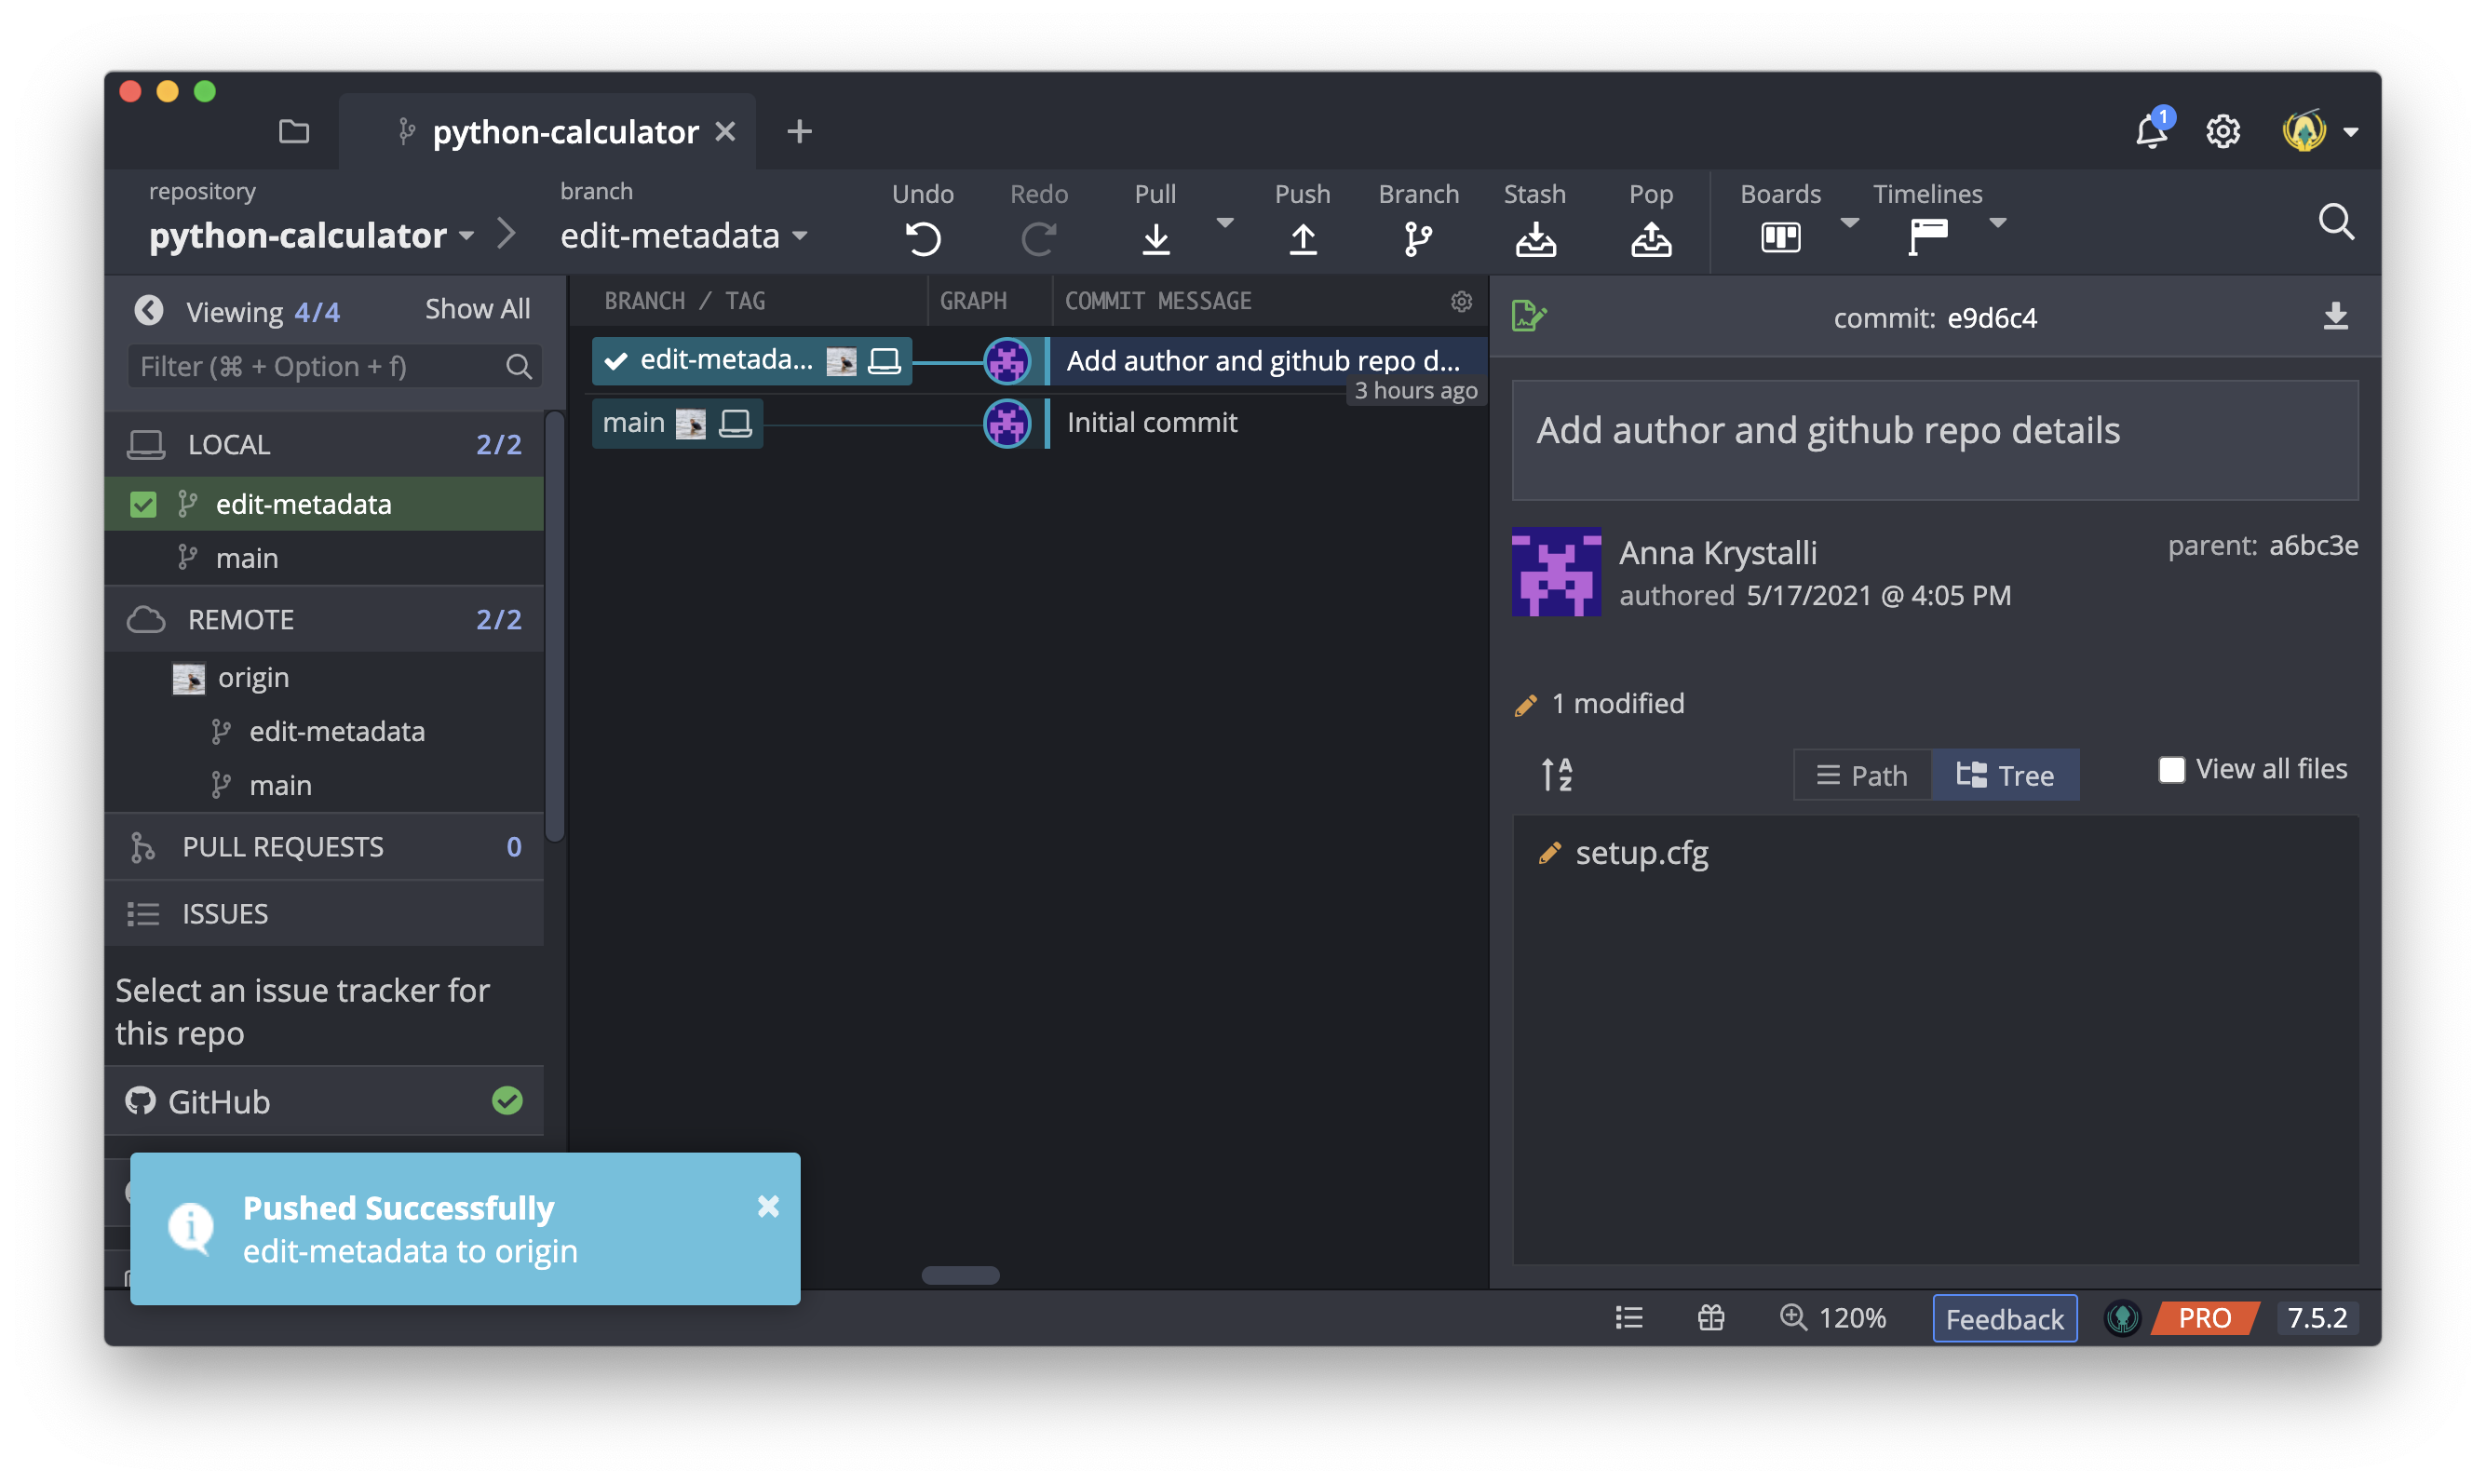
Your commit has now been made to the edit-metadata branch and you can see it is ahead of the both the local and origin main branch.
Push changes to GitHub
Click on
Push
to push to GitHub.
This will create a new branch in the origin repository. By default it will name it the same as the local branch (edit-metadata), so just click on
Submit
to continue.
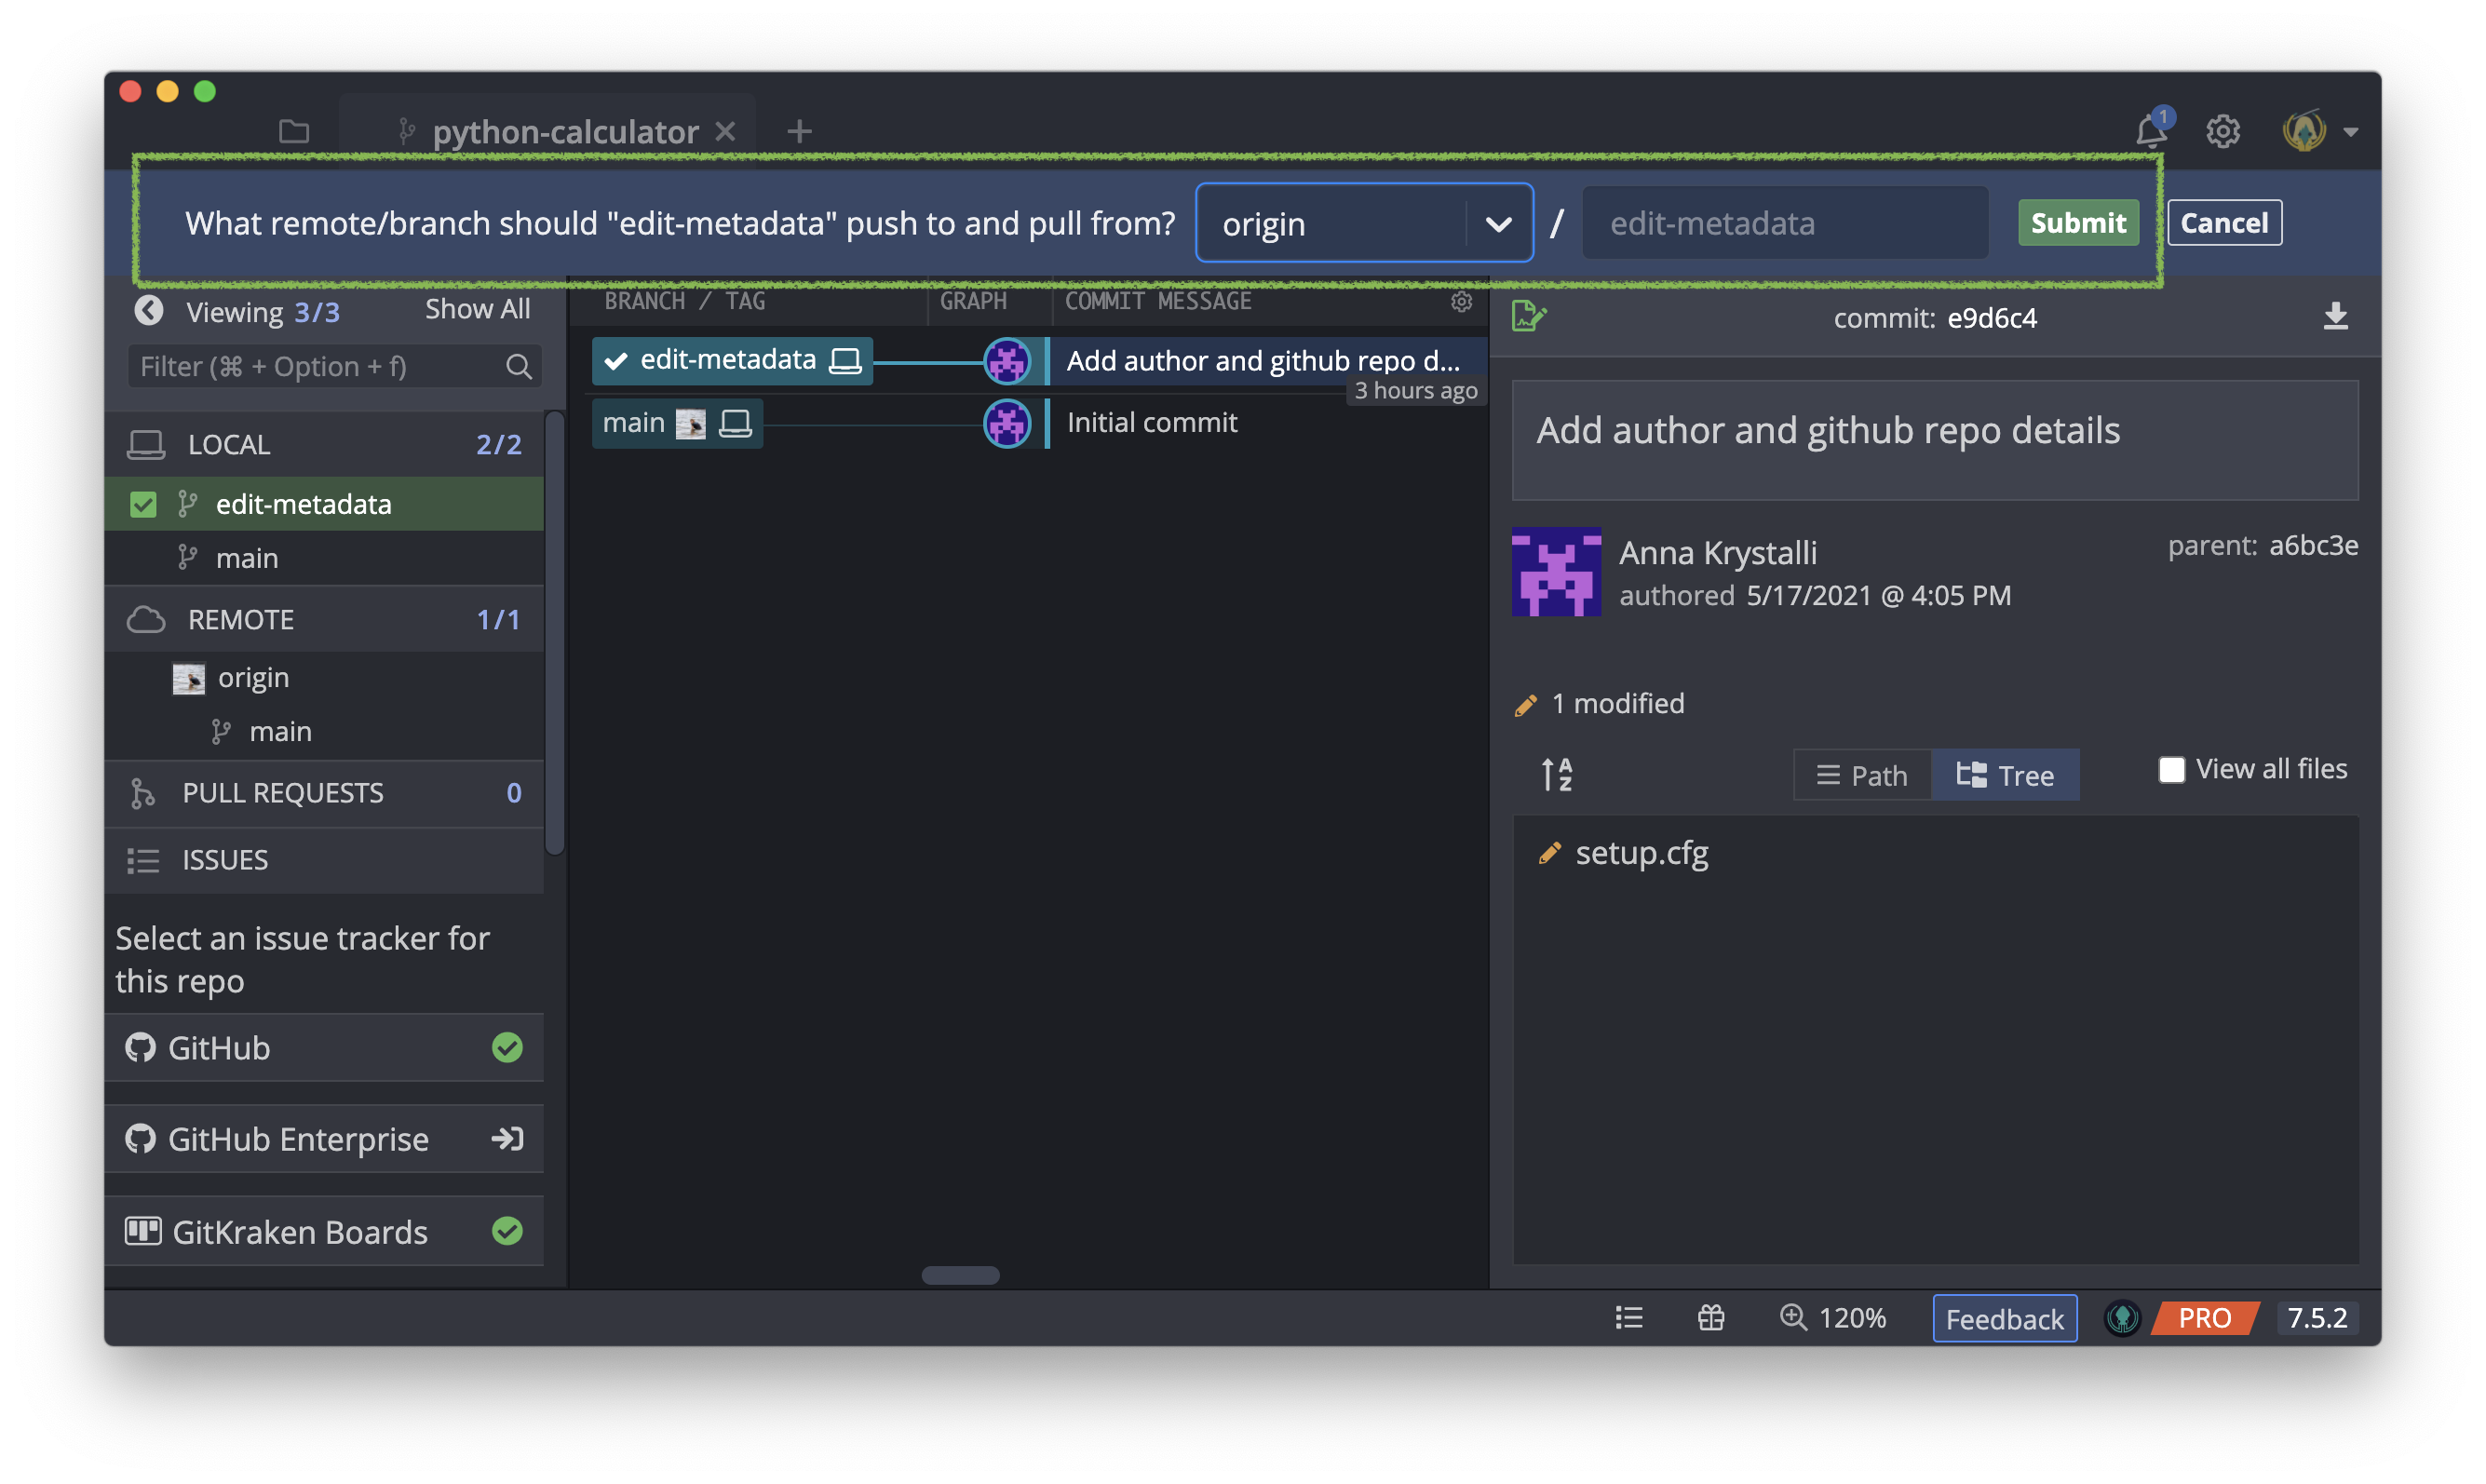
Once the push is complete, you will notice that there is now an origin commit indicator associated with the branch, indicating that the local and origin branch are in synch while both origin and local main branches are 1 commit behind edit-metadata.
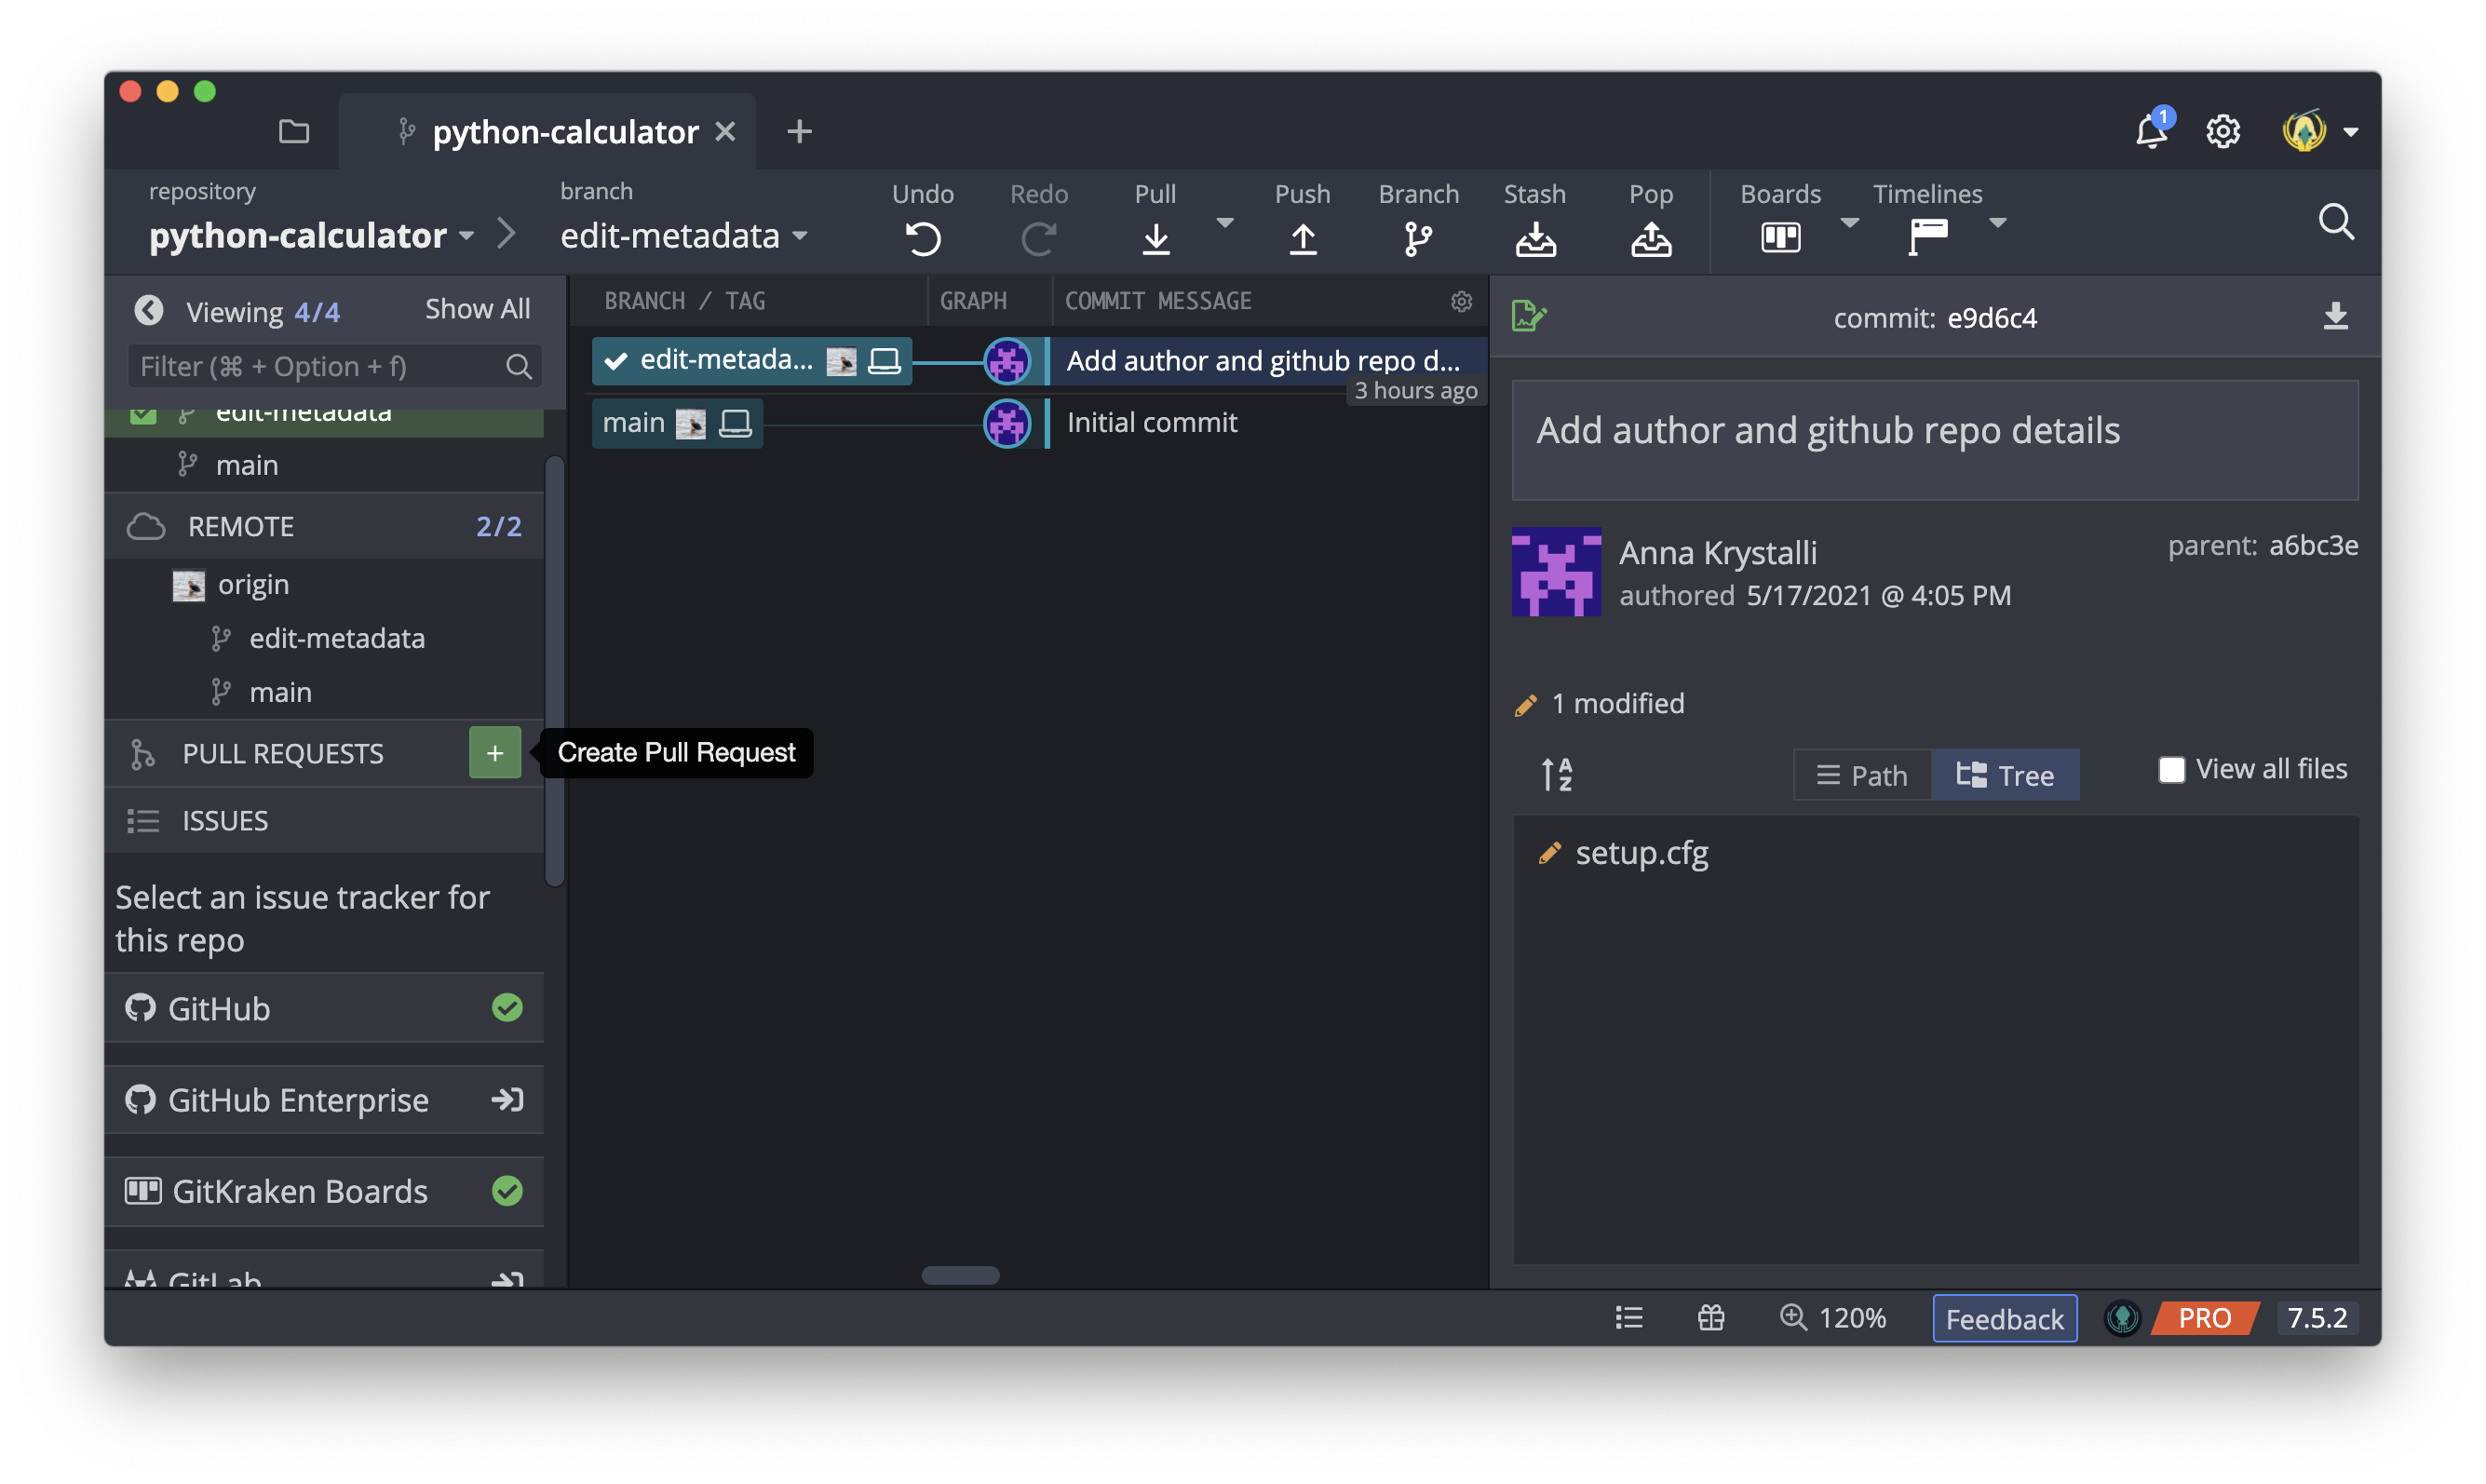
Make pull request
We can make a pull request from within GitKraken Client!
To do so, on the left-hand navigation panel, hover over PULL REQUESTS and click on the Create pull request button when it appears.
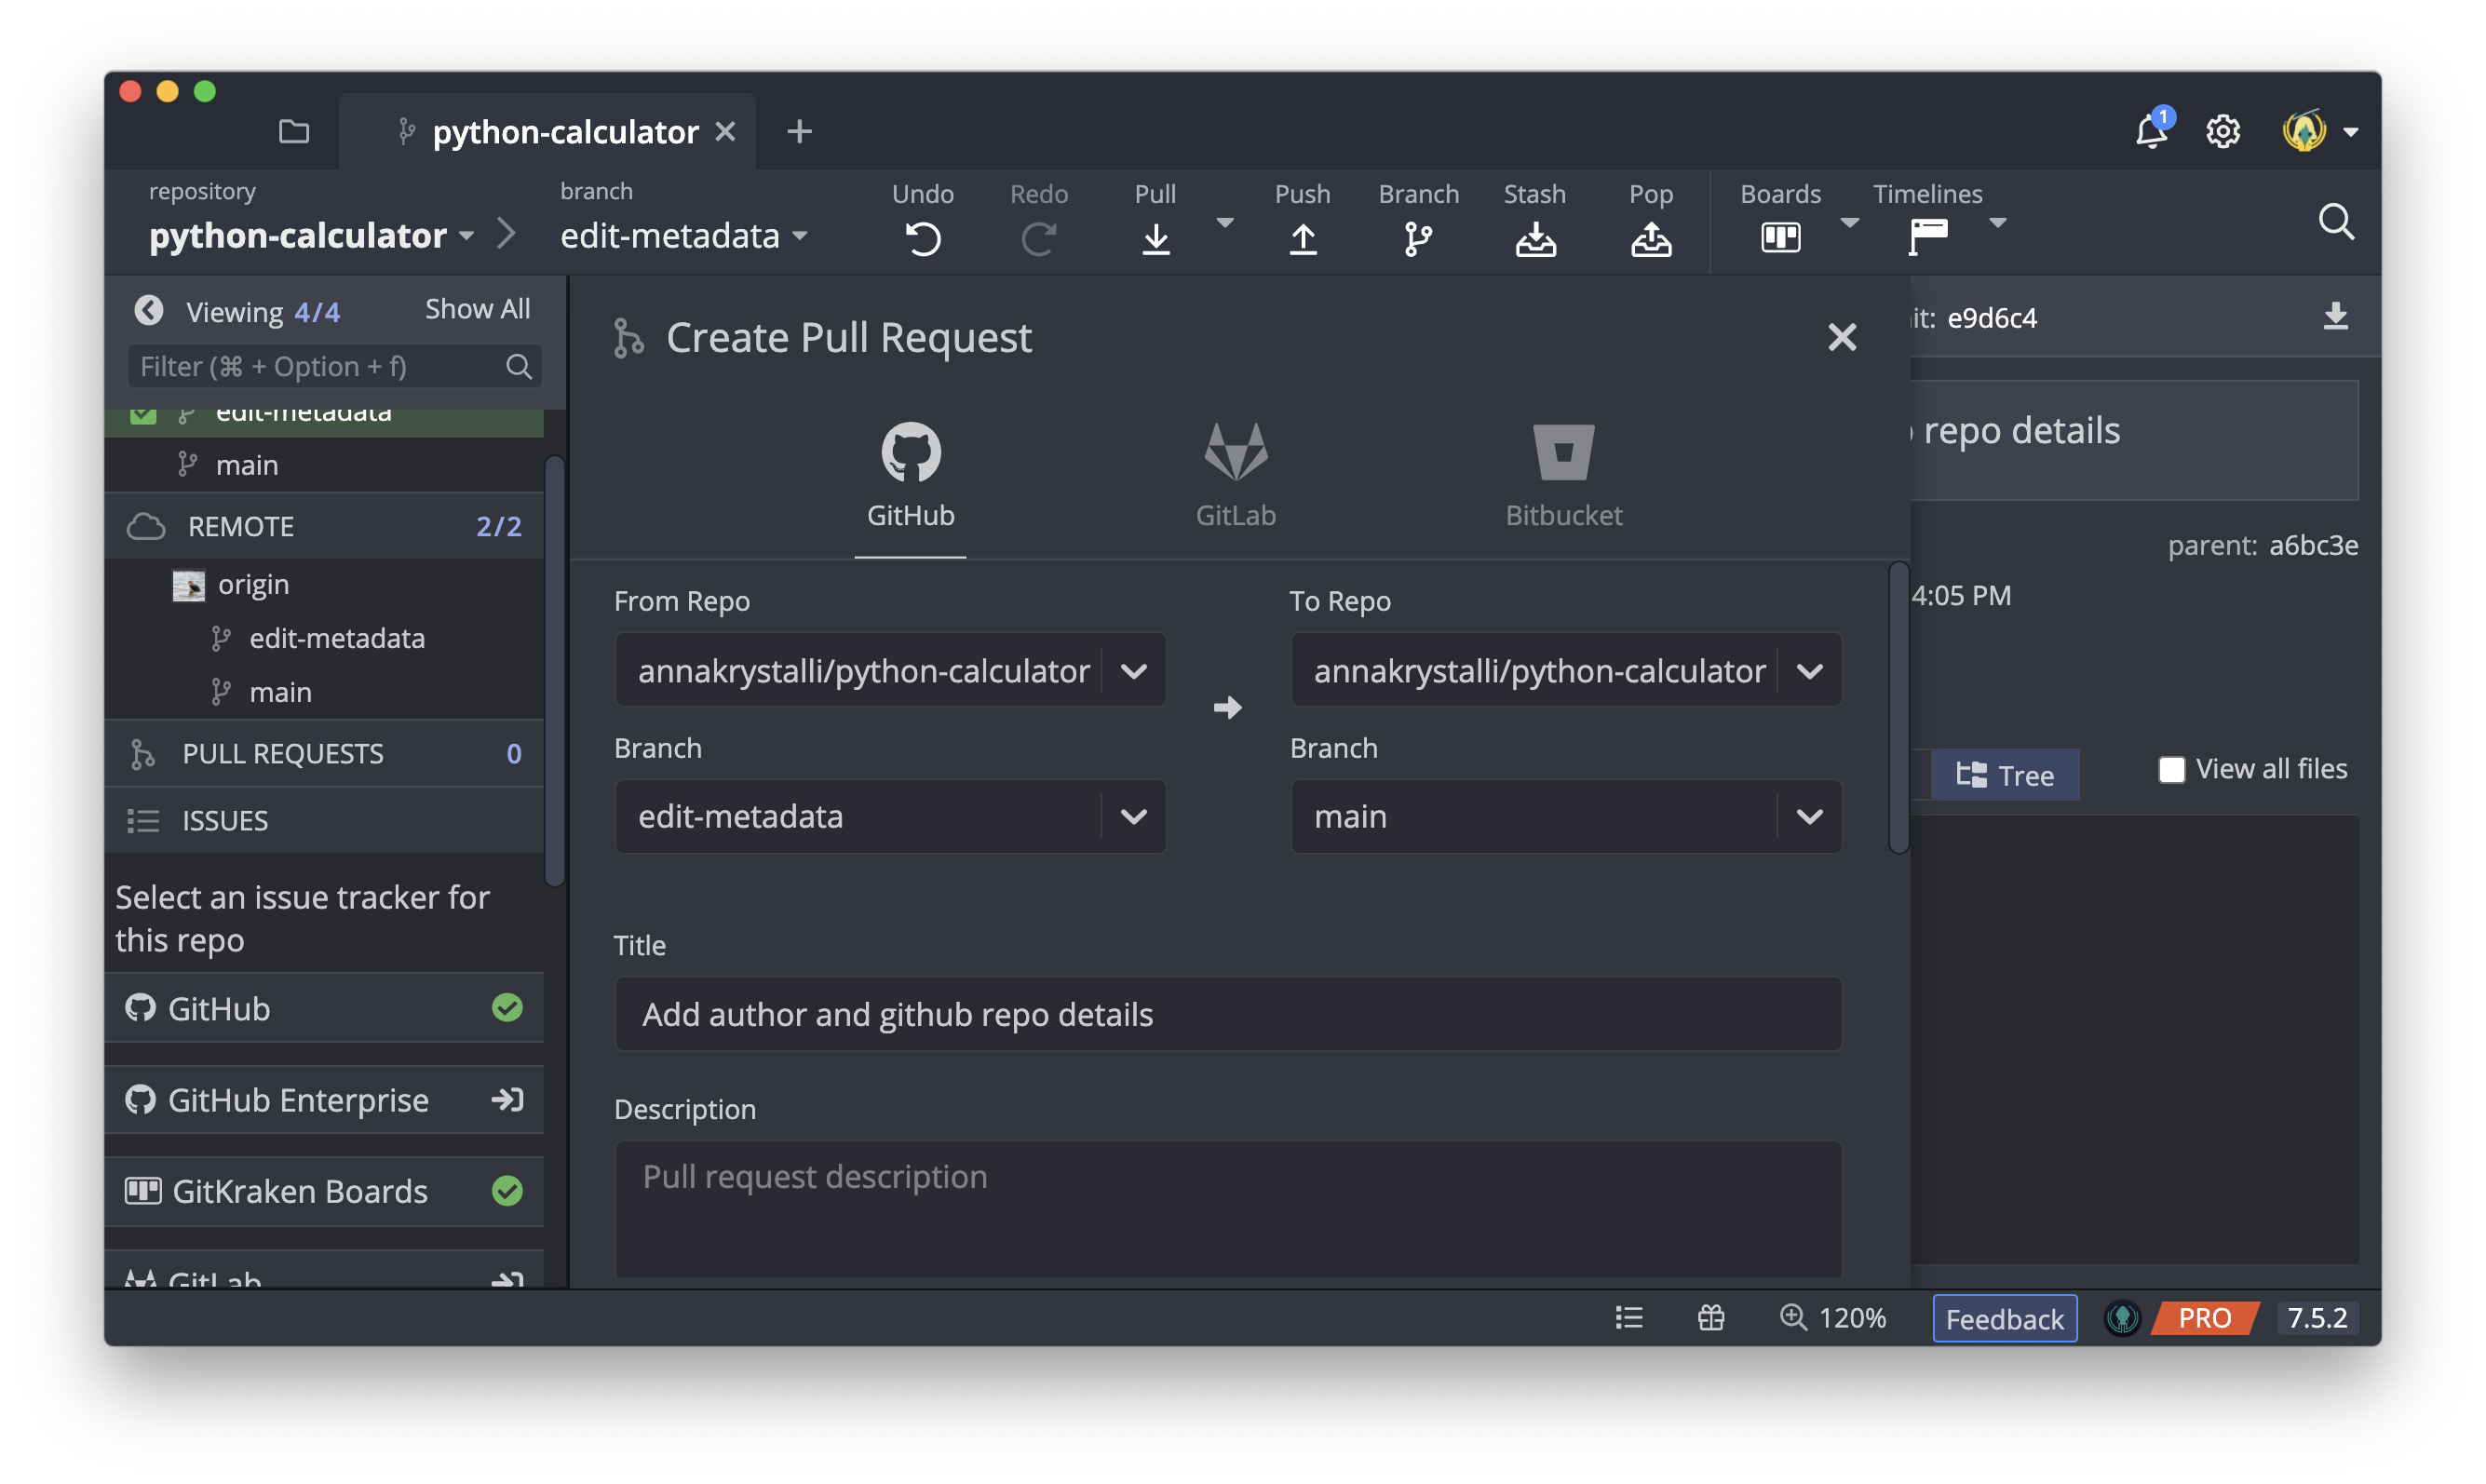
Next configure the details of the pull request including the source and target repository (in this case your copy of the repository) and the source and target branches, in this case you want to merge the edit-metadata branch into the main branch.
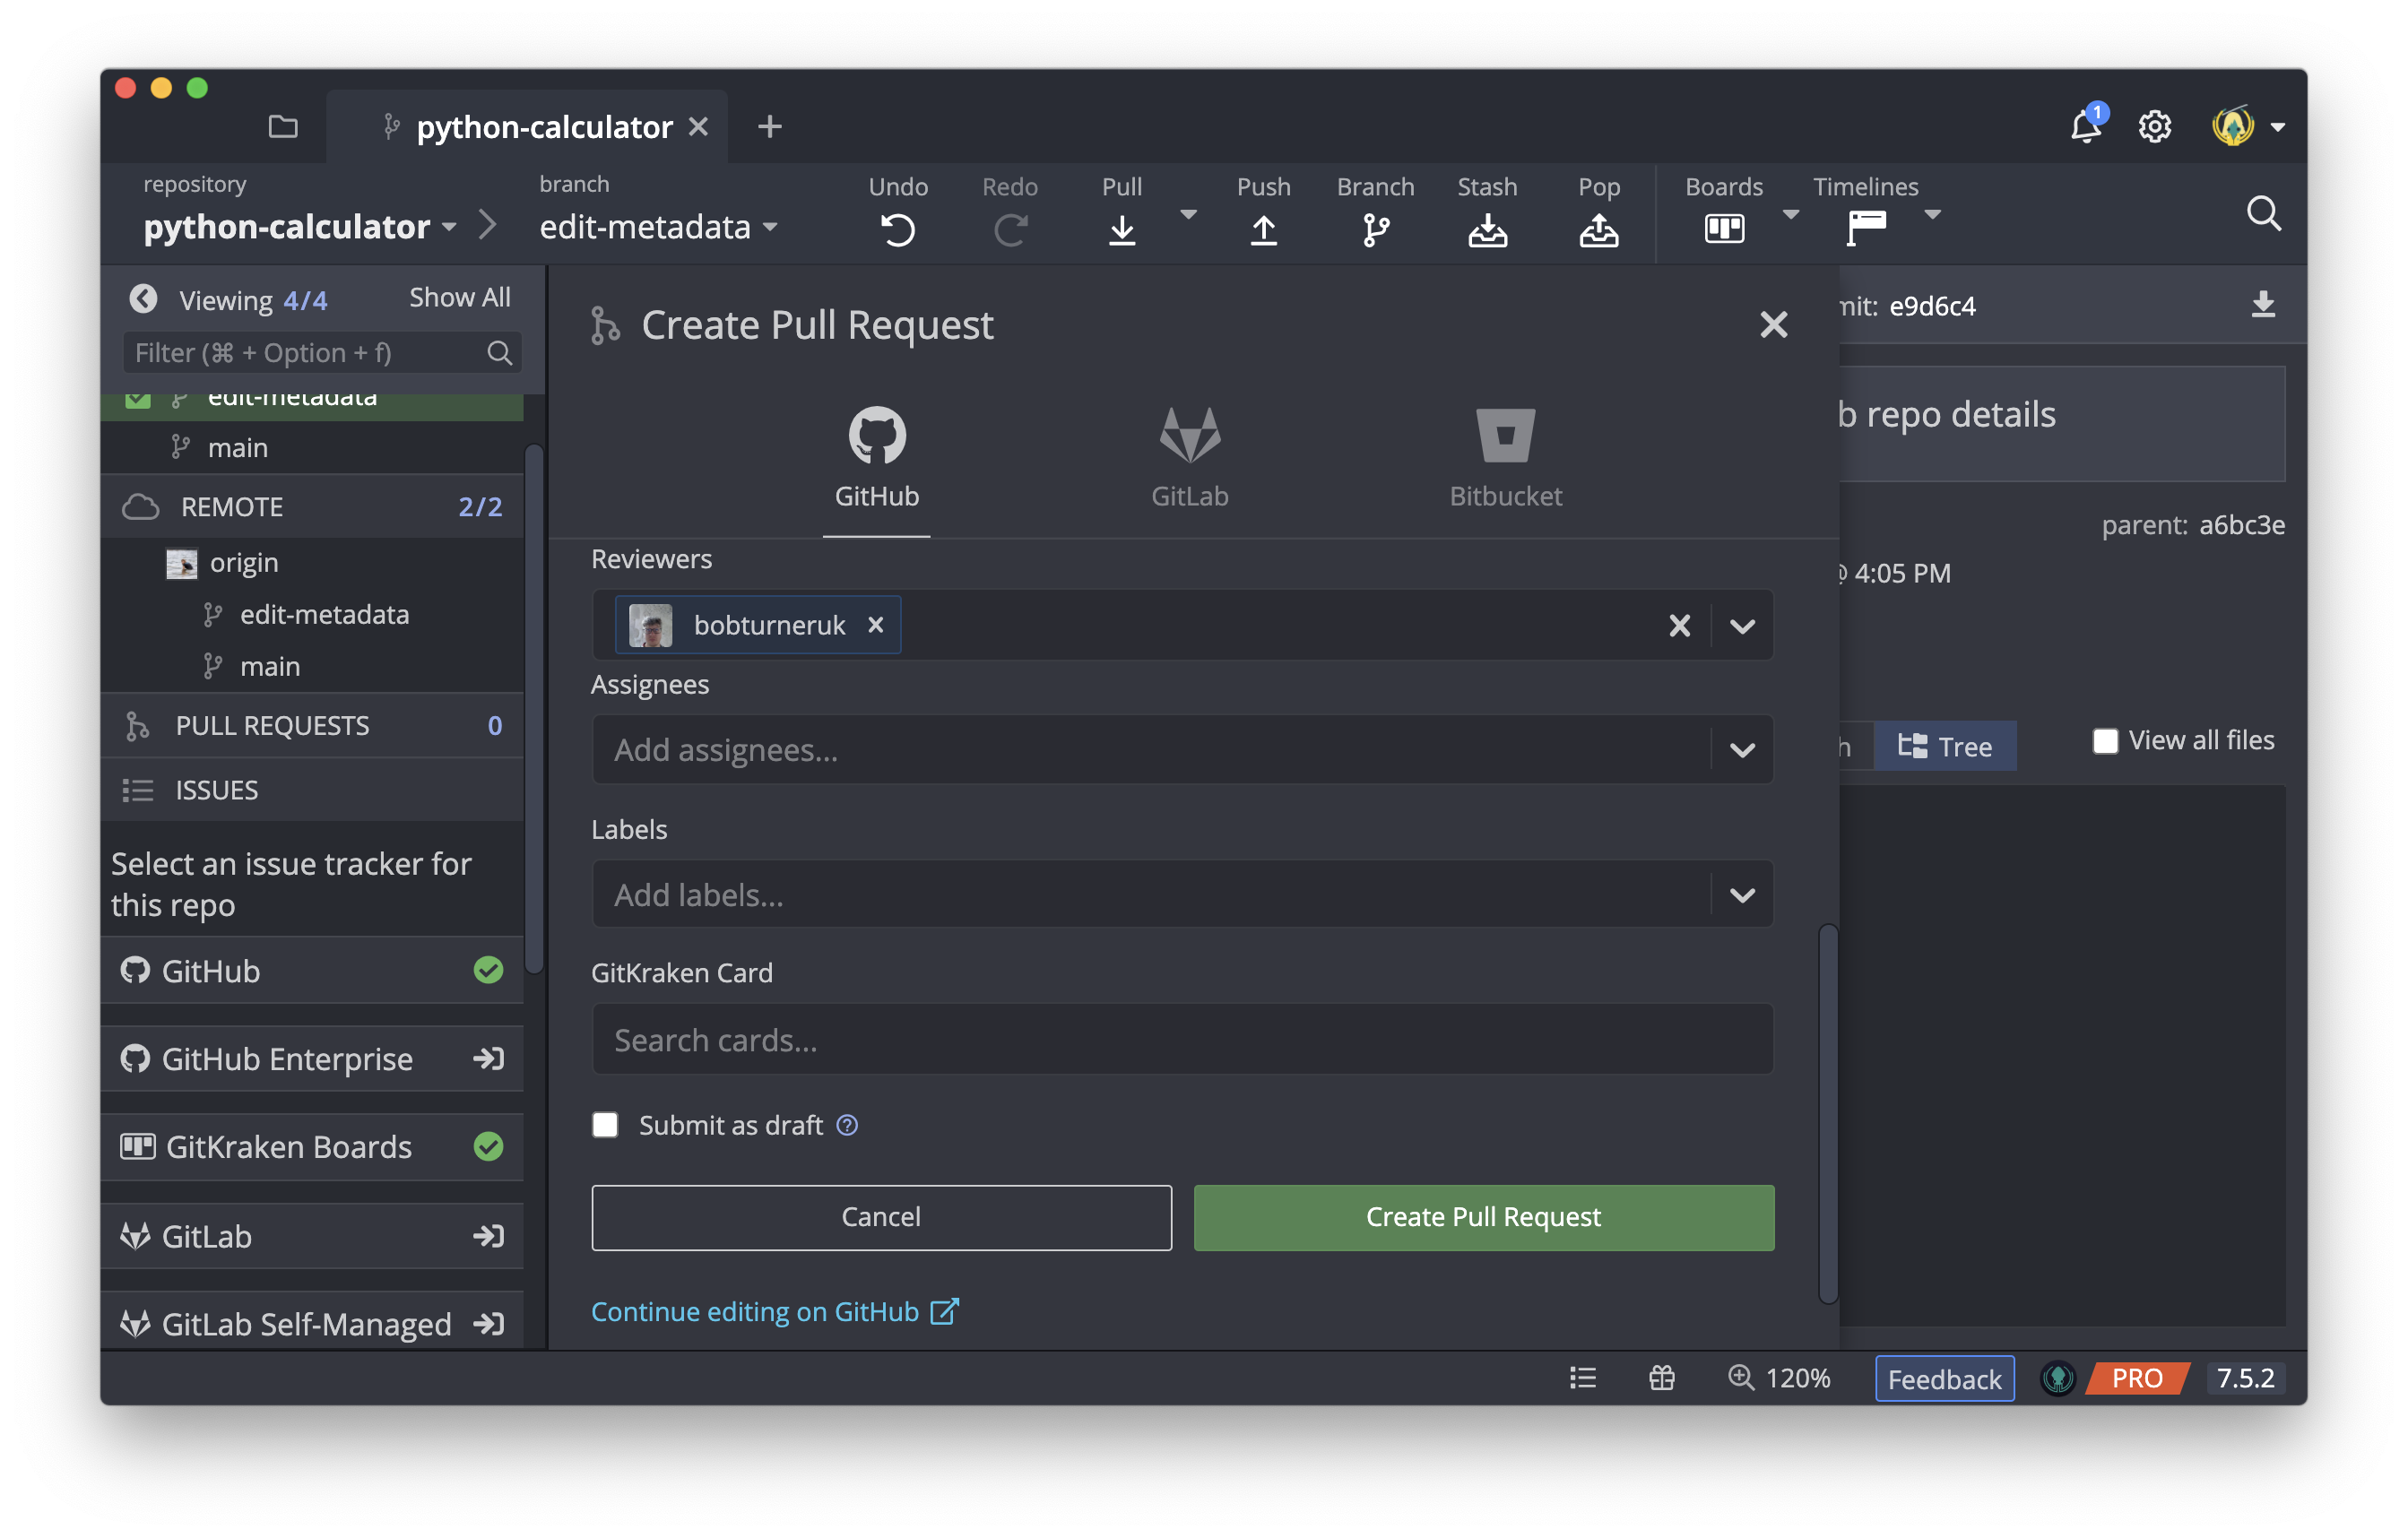
We also need our pull request reviewed before it can be merged. A nice feature of pull requests is than you can request a review from a team mate. Let’s do this.
If you scroll down to Reviewers you will be able to select a reviewer from your team mates. Go ahead and select someone.
Finally, at the very bottom, click on Create Pull Request to submit it.
You should now see 1 indicated next to PULL REQUESTS. If you click on it to expand you can see your pull request listed and if you hover over it, you can see more details.
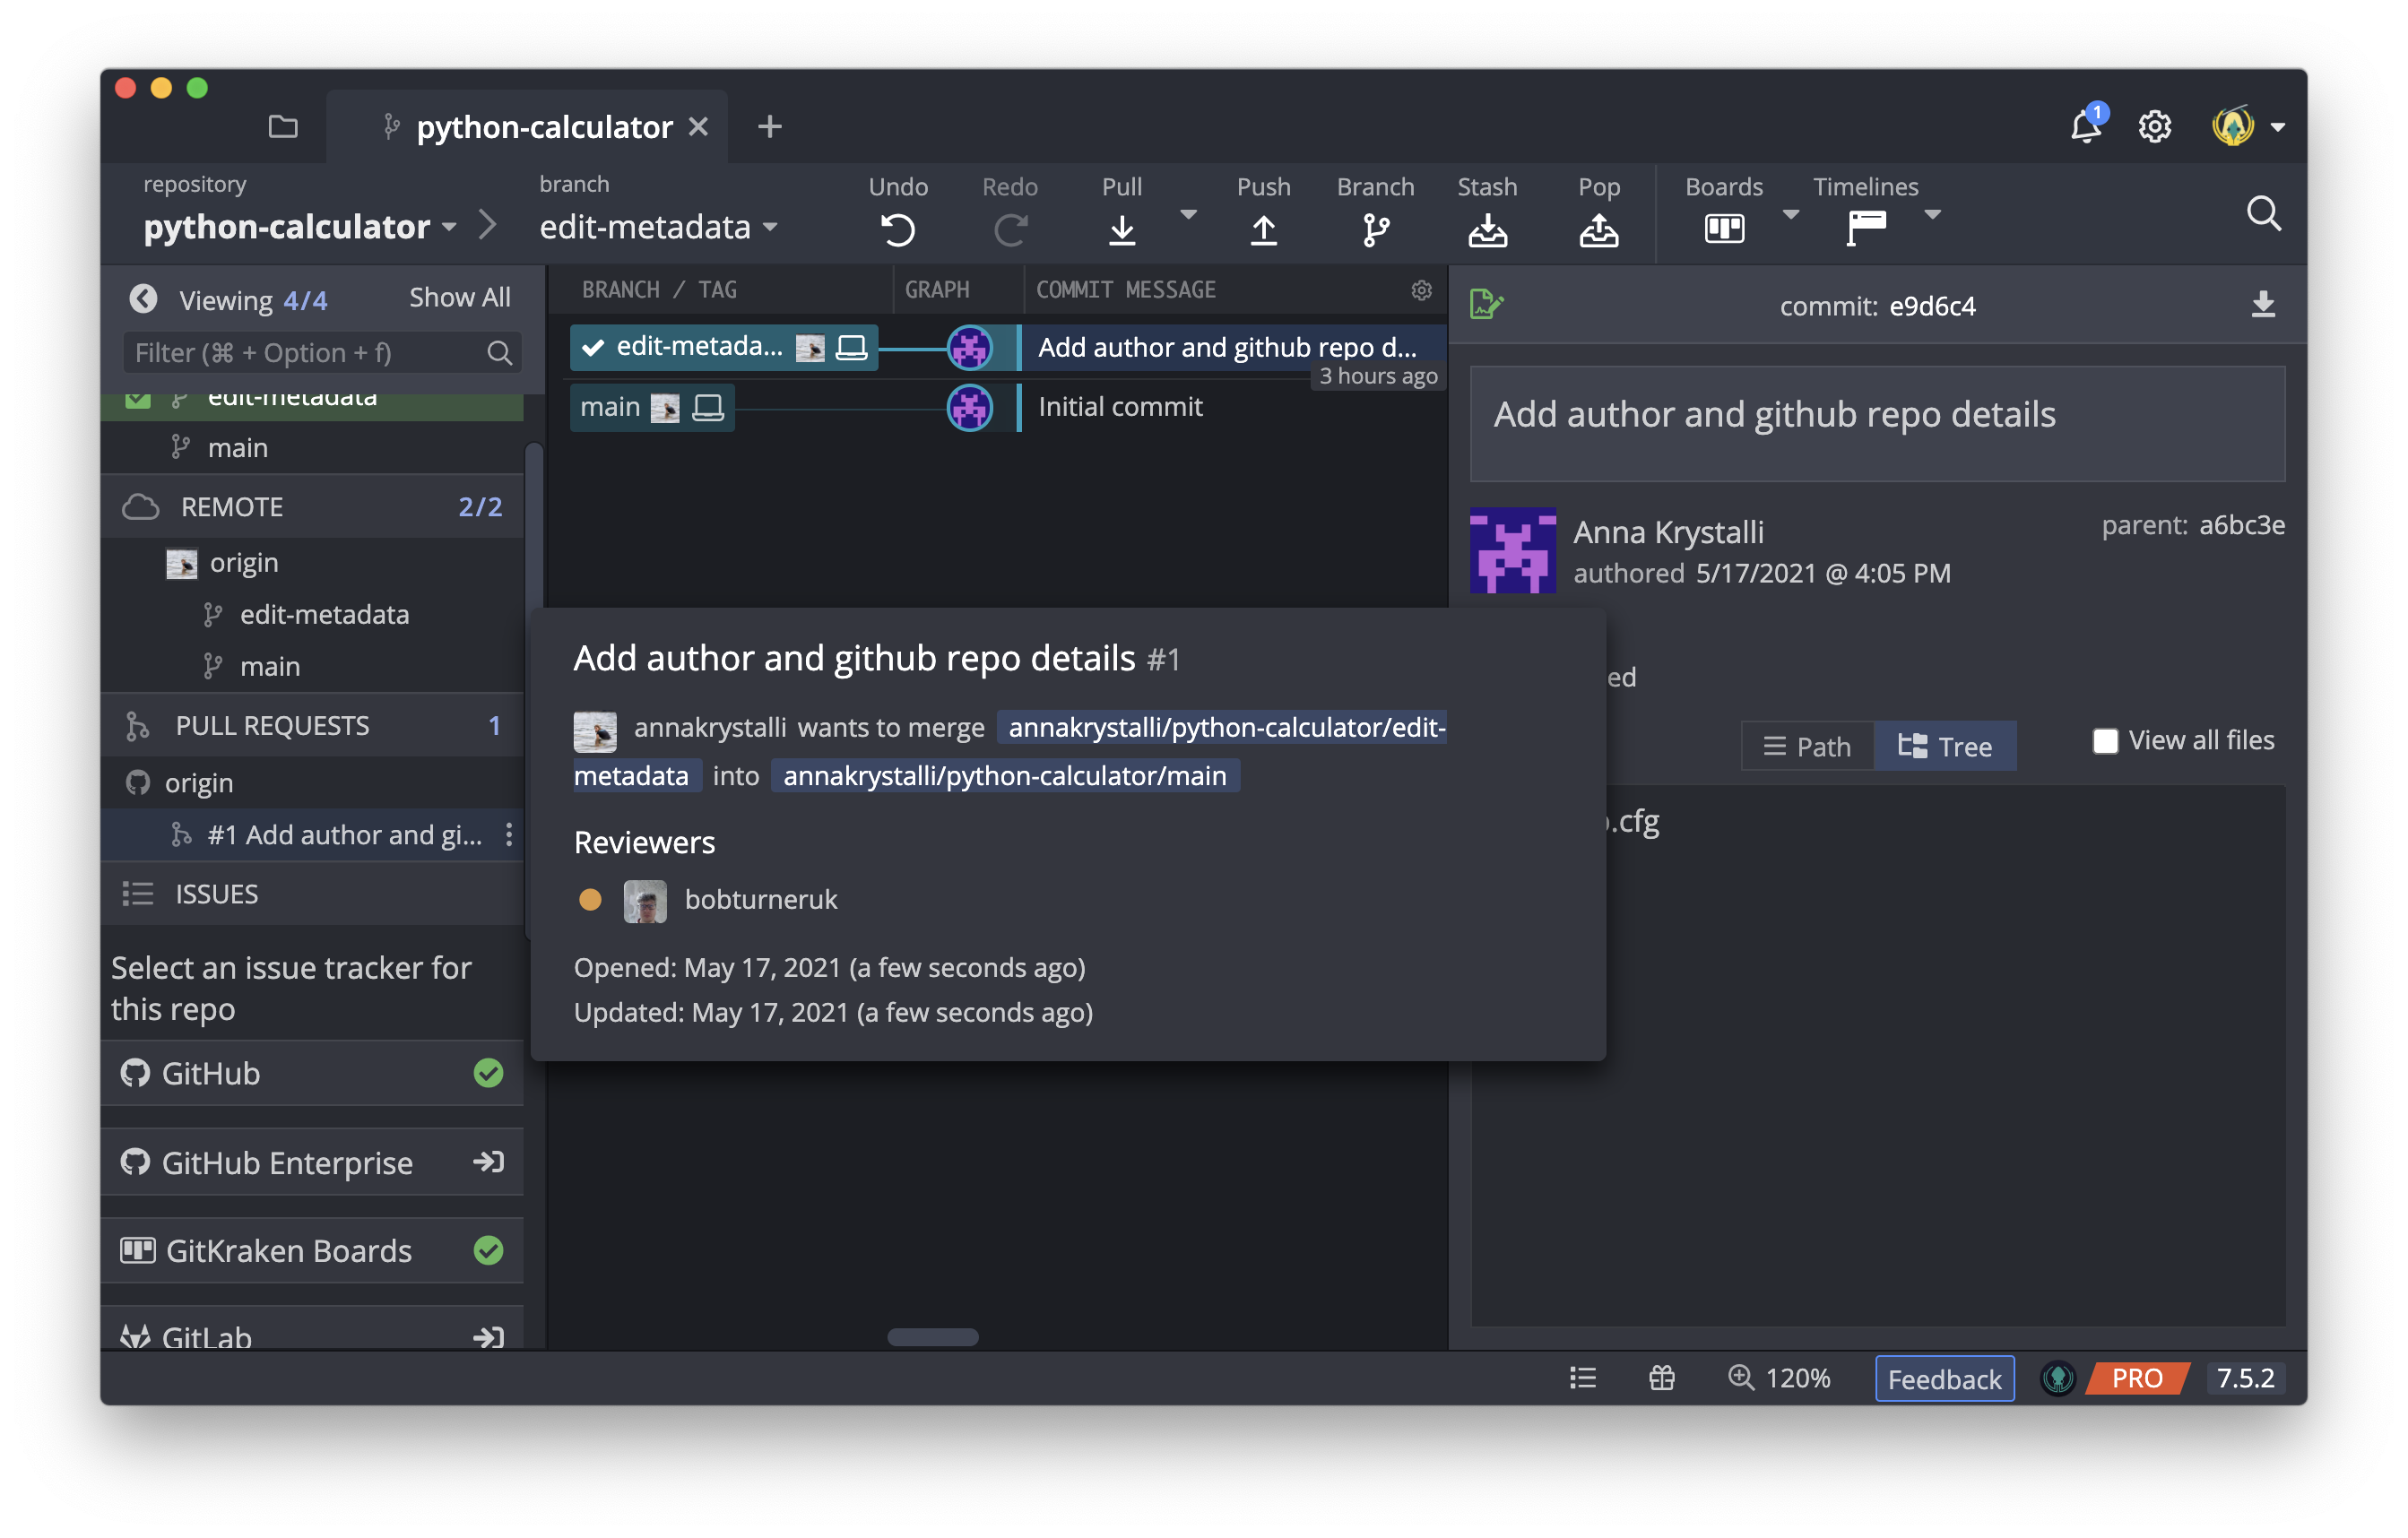
Clicking on the three vertical dots next to the PR opens up a menu that allows you to View the pull request on GitHub.com
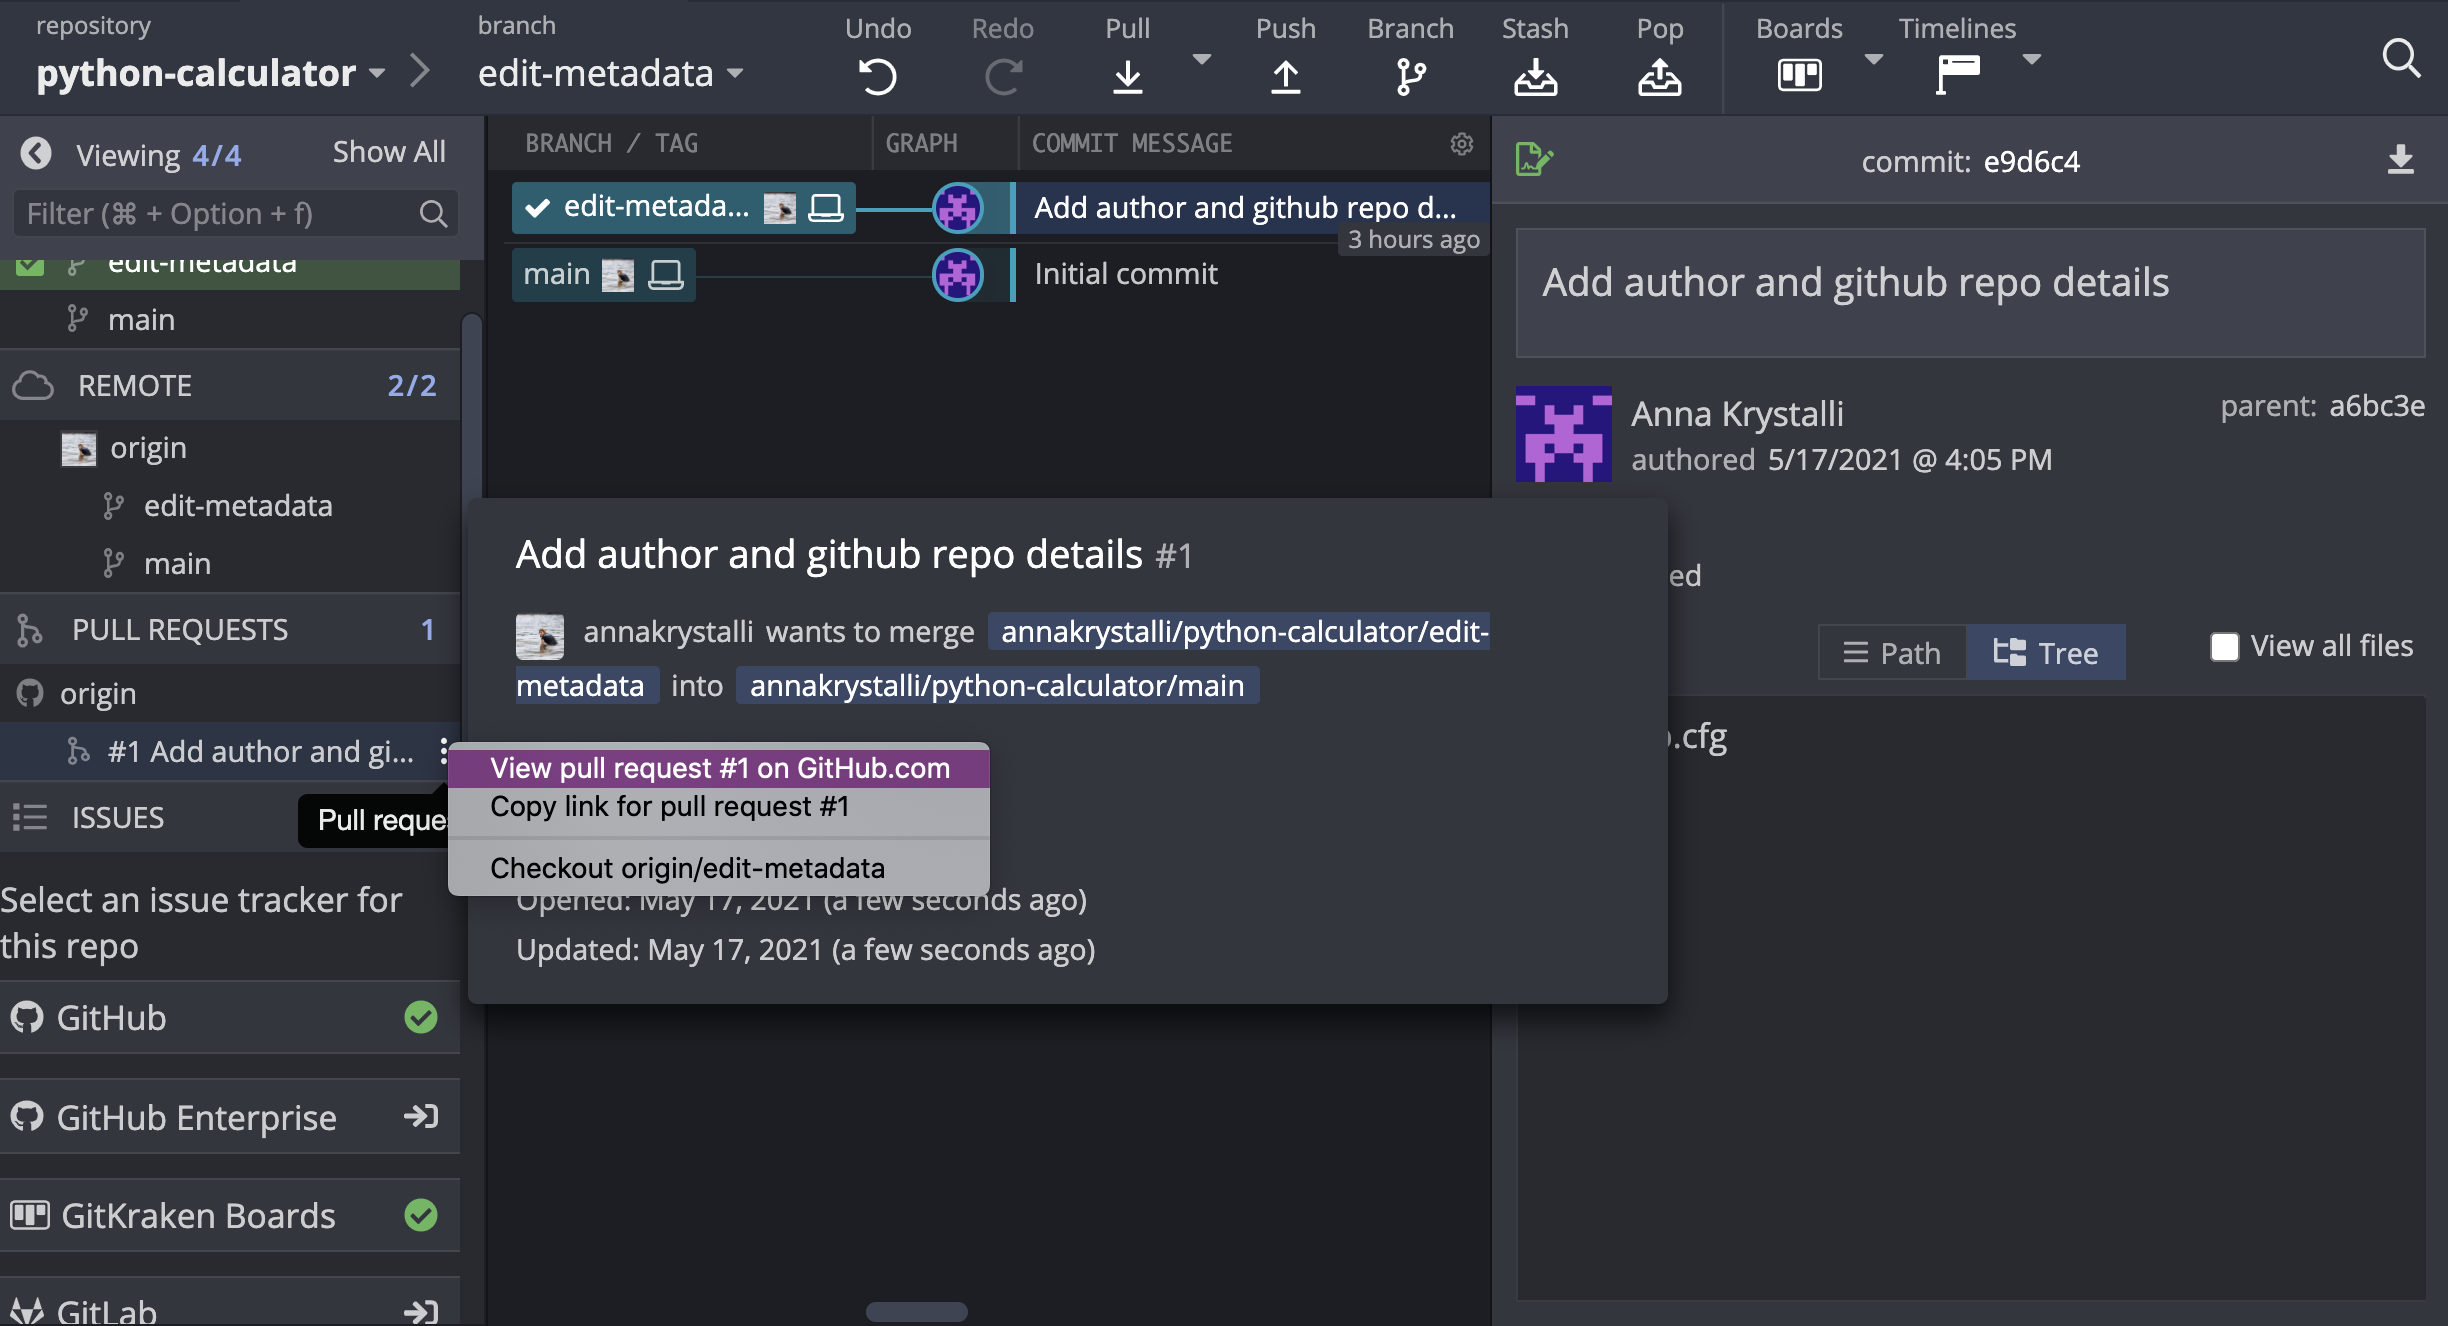
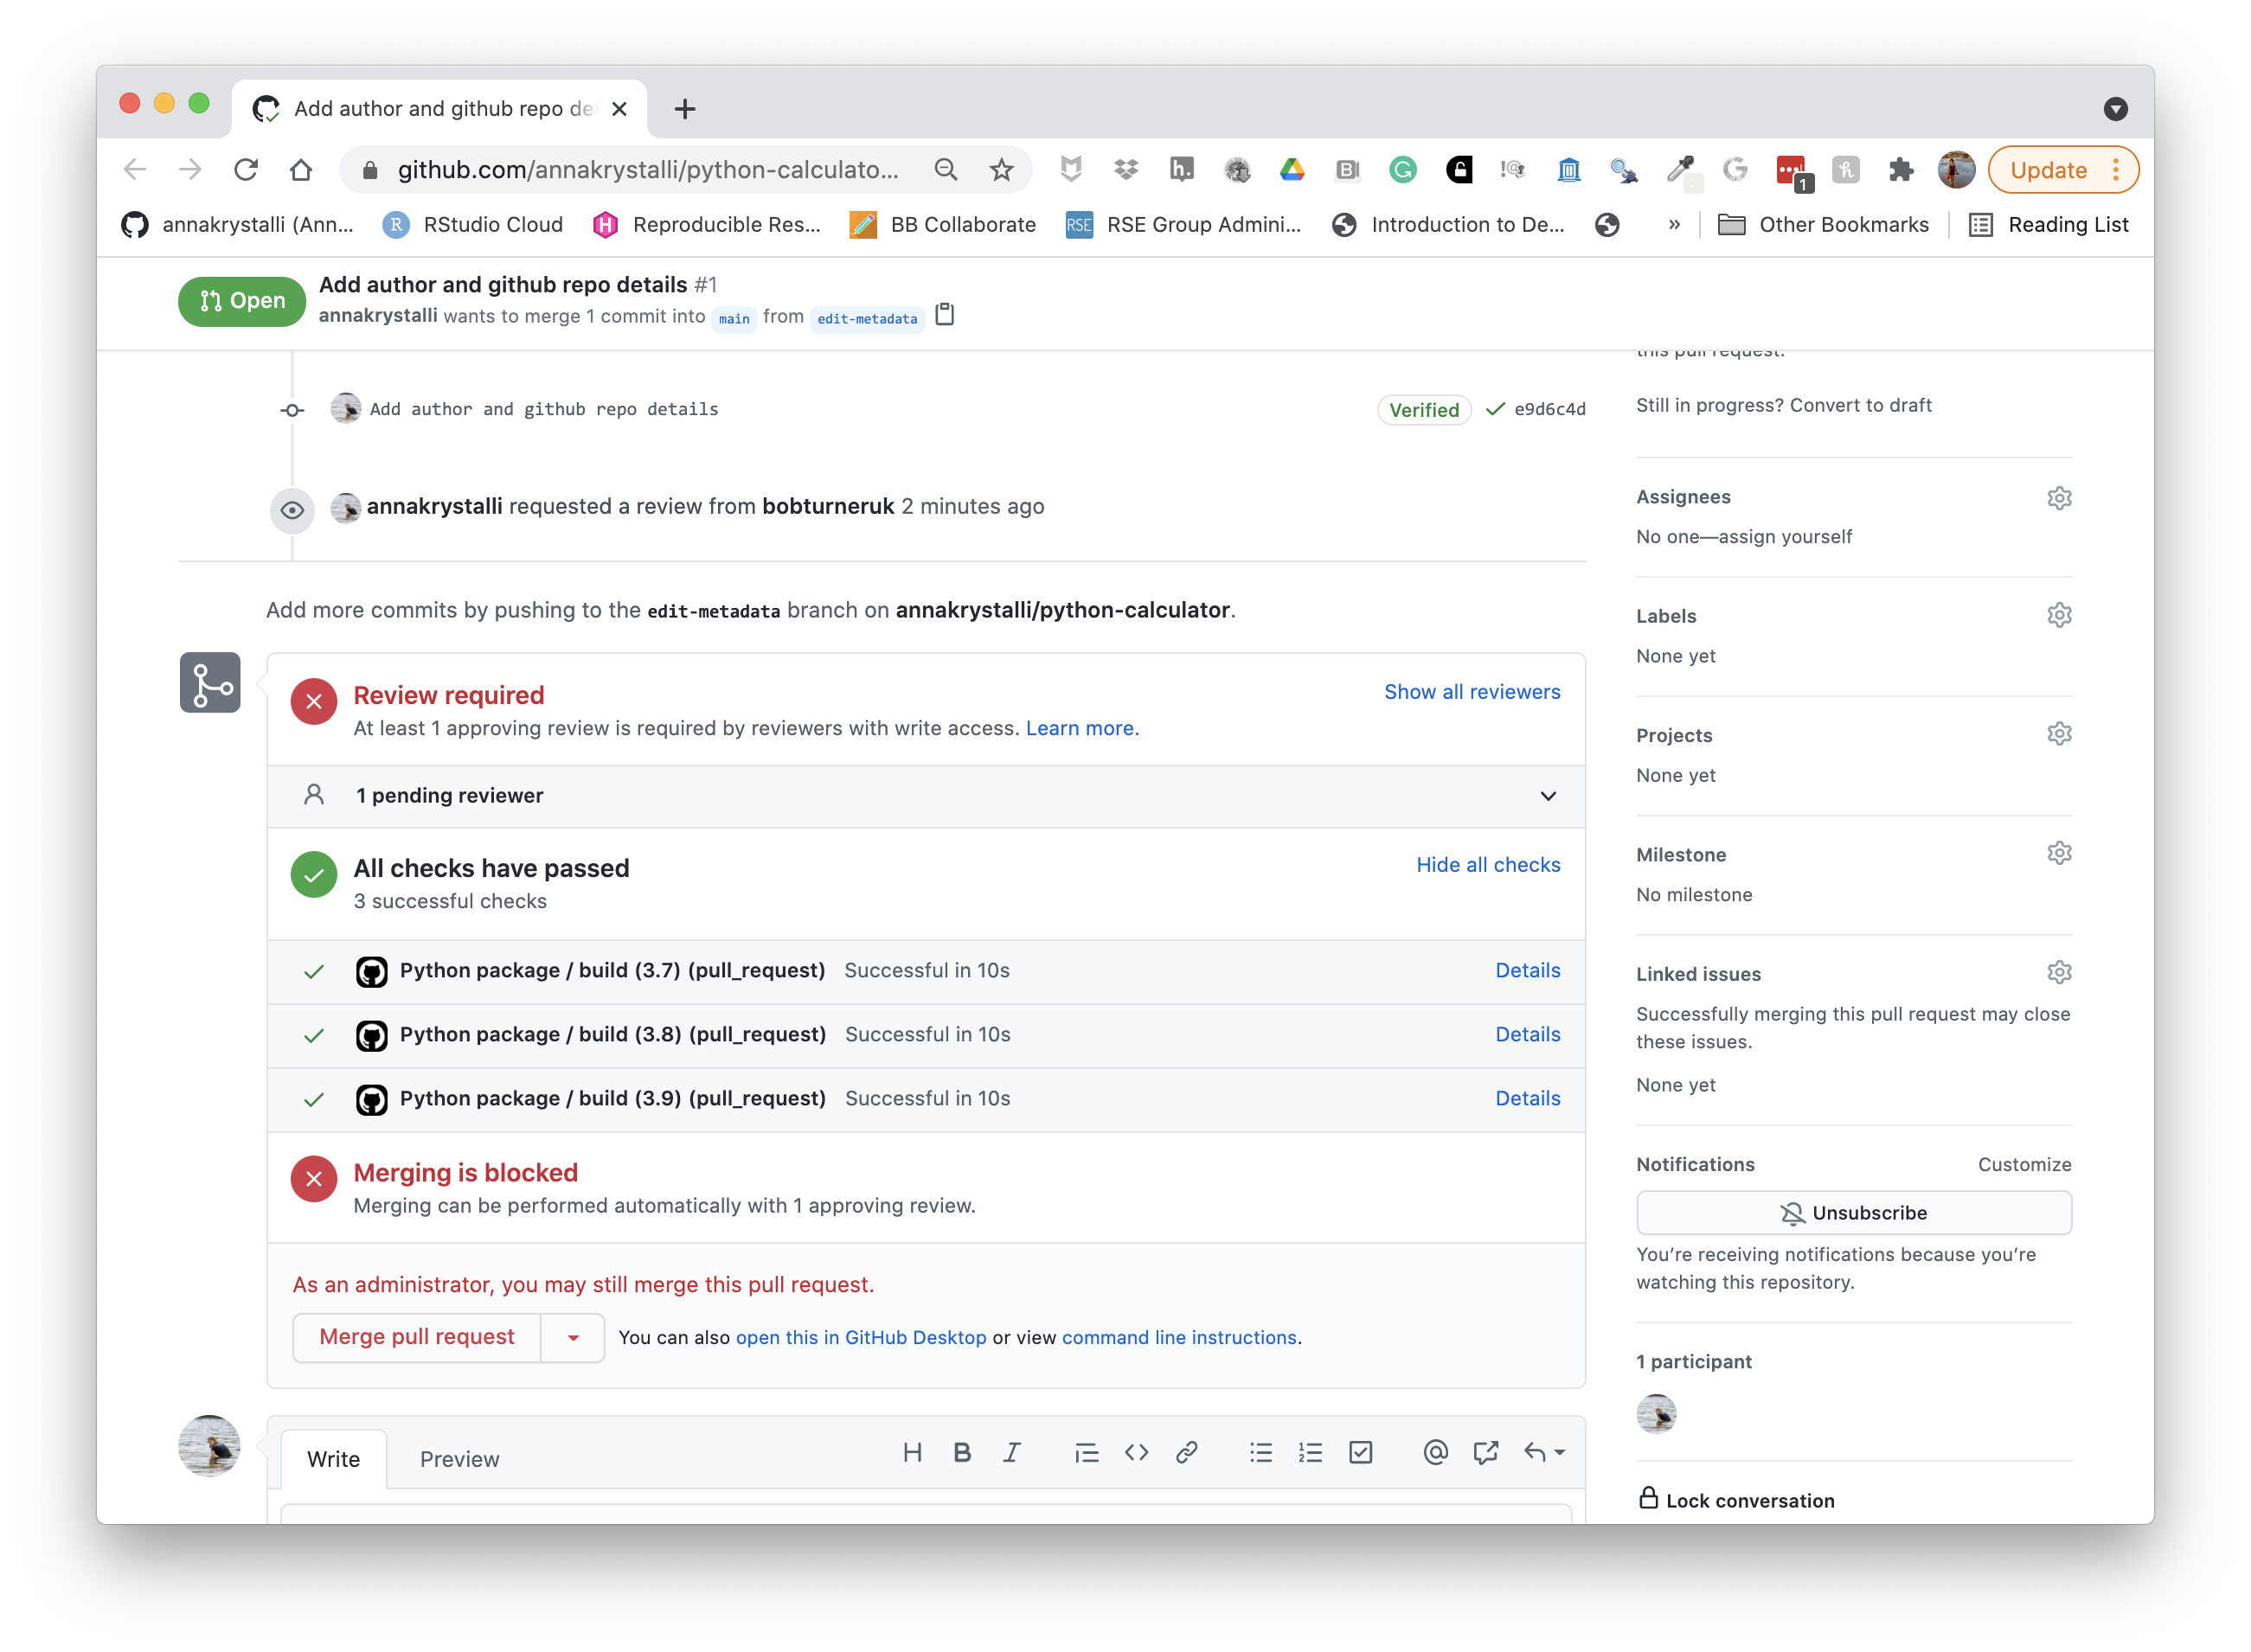
Clicking on that, navigates you to the PR page on GitHub. You can see that the Continuous integration tests have passed (indicated by All Checks have passed). However merging is blocked until an approving review is submitted (indicated by Review Required and Merging is blocked).
Review Pull Request
Next, the team member the owner requested a review from should perform the review. Other team member’s could also do this but to keep things simple let’s just let the assigned reviewer do this.
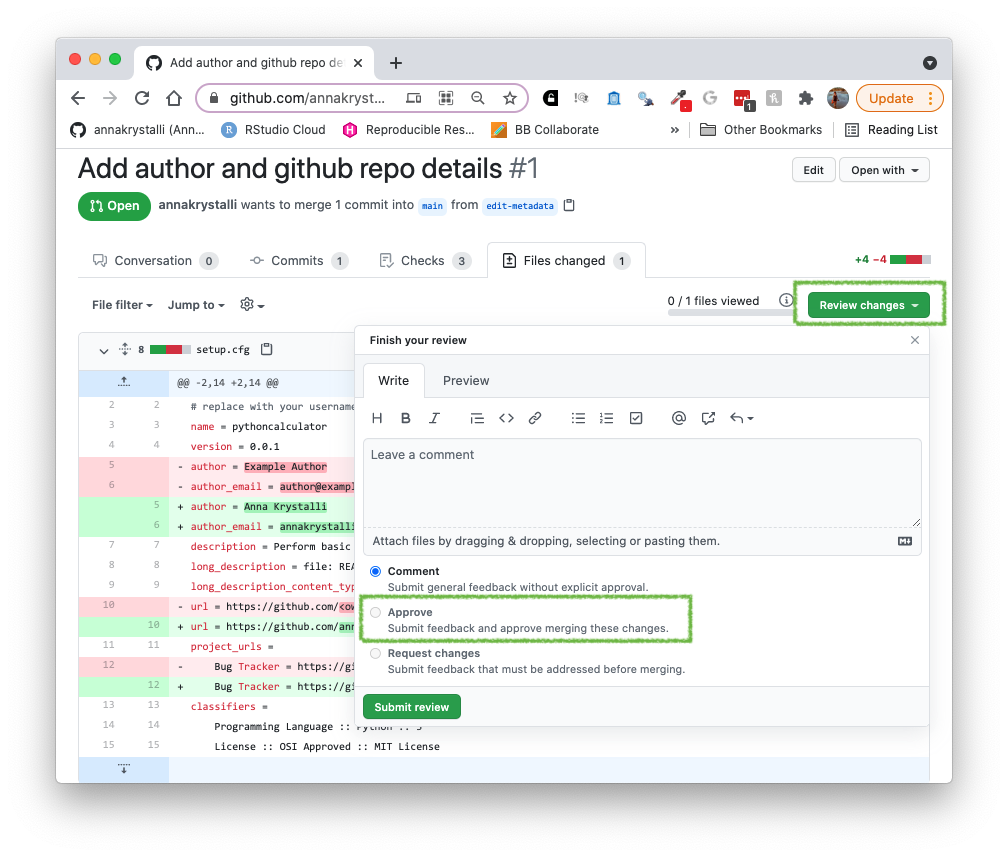
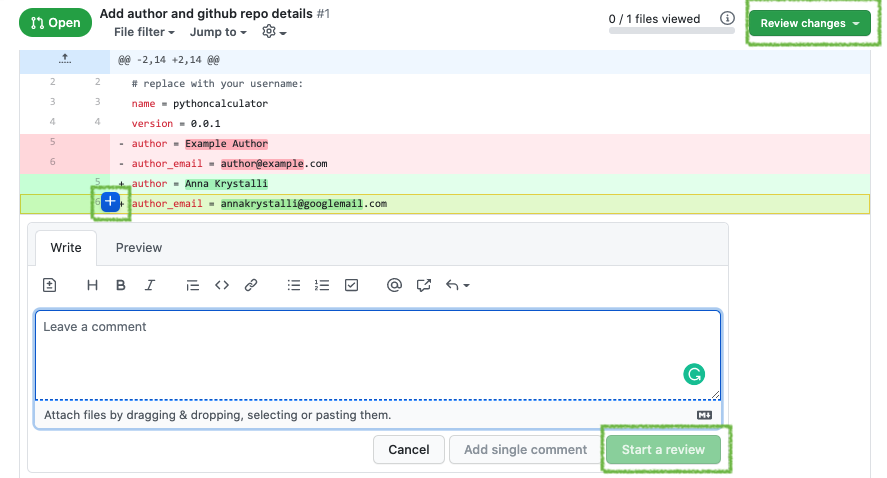
In the pull request Files changed tab, the reviewer has the opportunity to inspect the changes made in the pull request.

They can also initiate a review by clicking Review changes in which they can:
- add a comment
- approve the review
- explicitly request changes
Alternatively, the can initiate a review by inserting a comment next to a specific line of code.
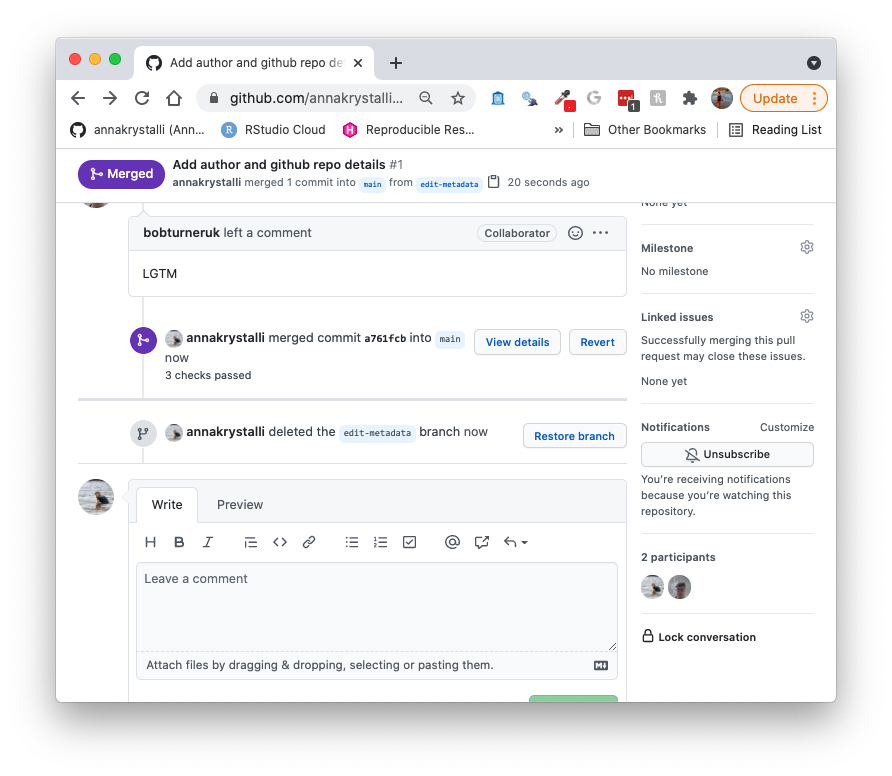
Merge Pull Request
Once an approving review has been submitted (and as long as all checks are passing), the PR is free to be merged!
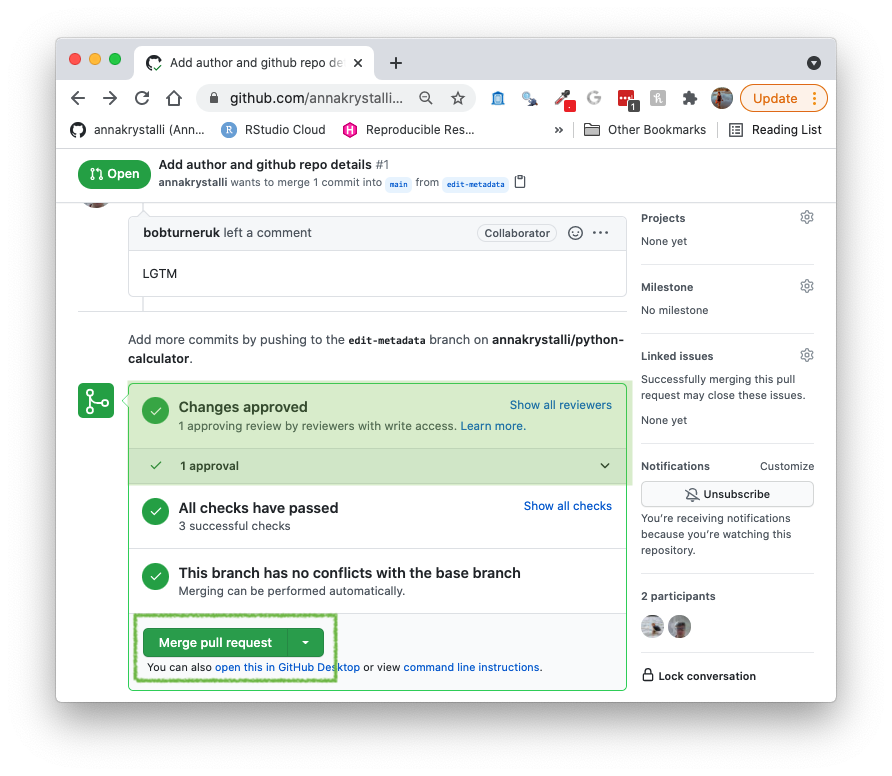
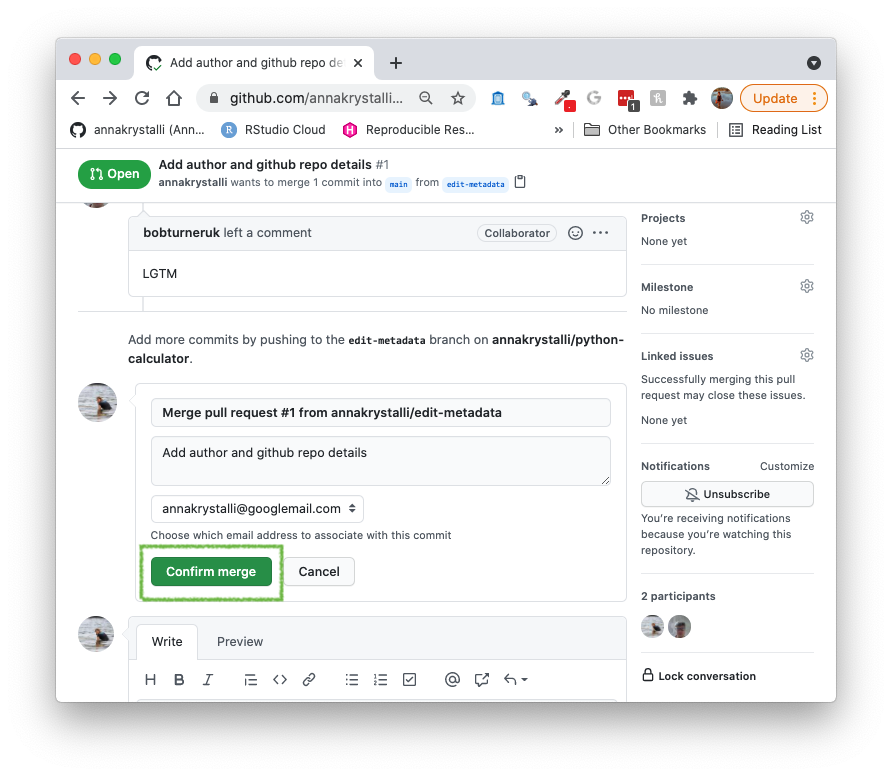
Follow through until the PR has been merged!
To keep the repo tidy, as the edit-metadata branch is now redundant (i.e. I don’t expect any further contributions in this branch regarding the particular feature it was created for), I’m going to go ahead and click Delete branch.
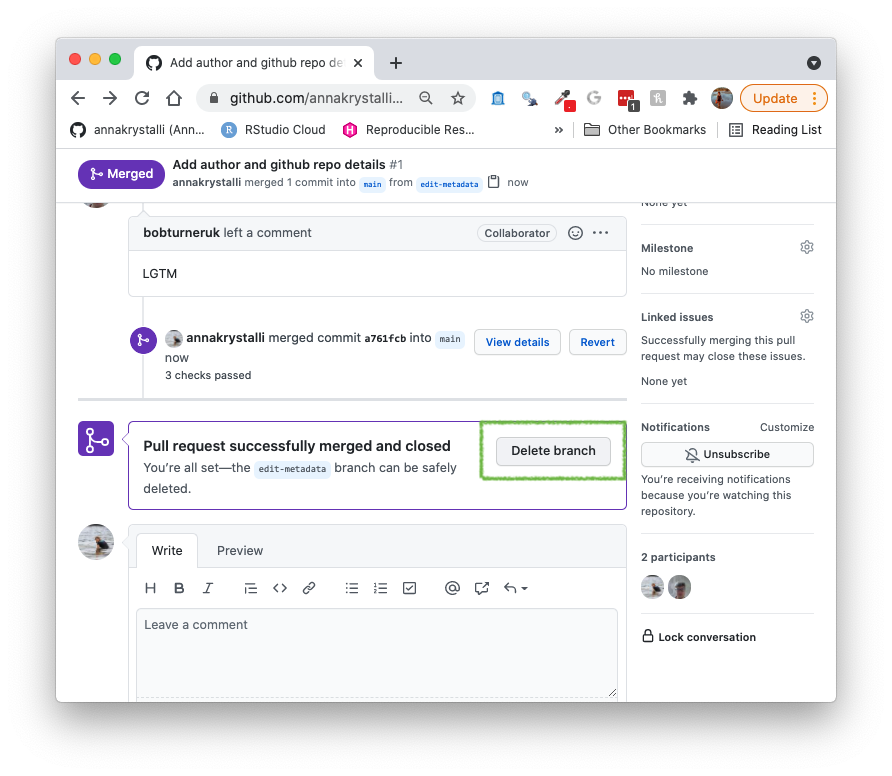
This removes the origin branch. Later we’ll also delete local branch also.