Creating your first repository
Creating your first repository
When a local directory becomes initialised with git, a hidden .git folder is added to it. It’s now called a repository. You can initialise an existing project with git or a start with a completely new project. We’ll start by creating a new repository.
-
In GitKraken Client, make sure you’re logged in to GitHub.
-
Create a new repository (
File > Init Repo)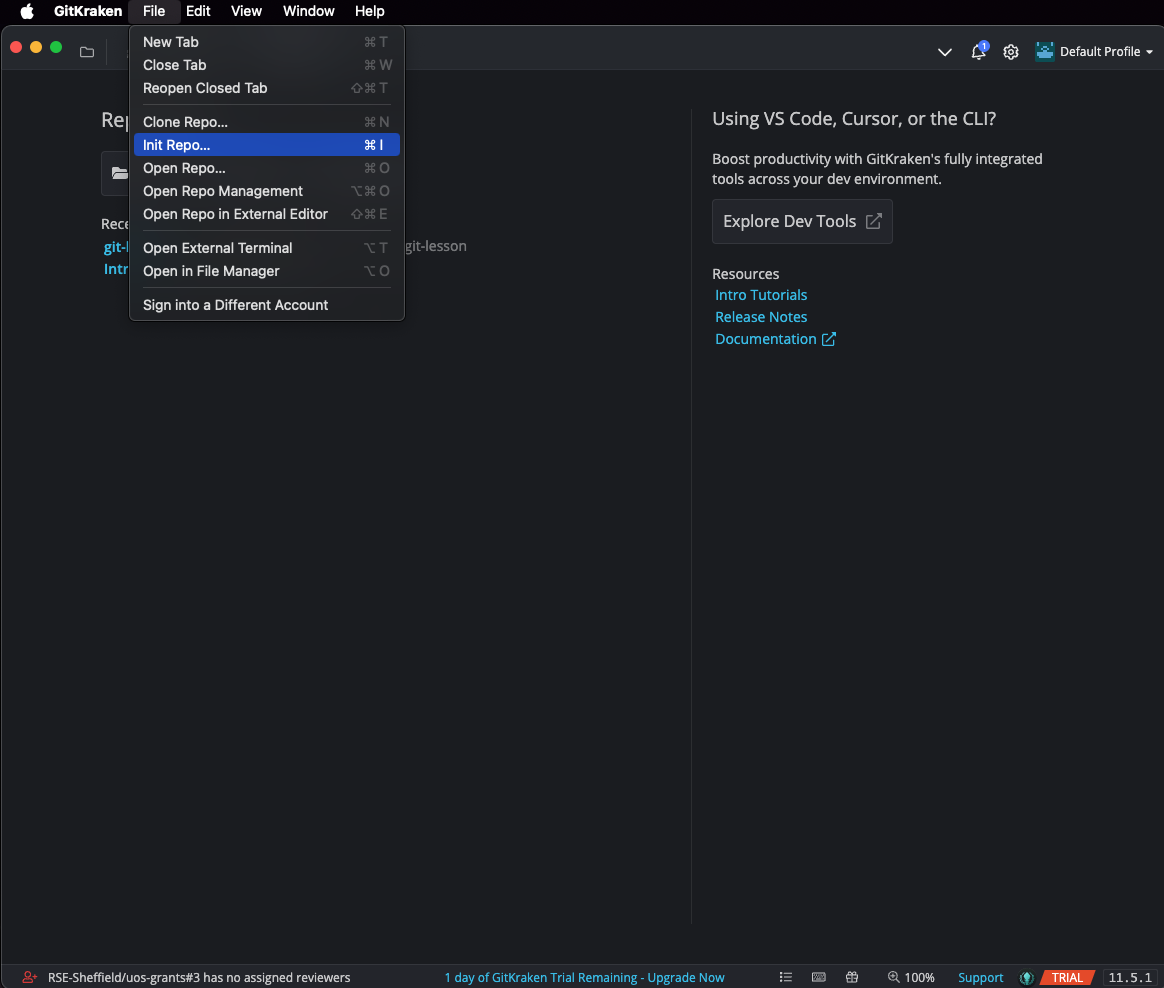
-
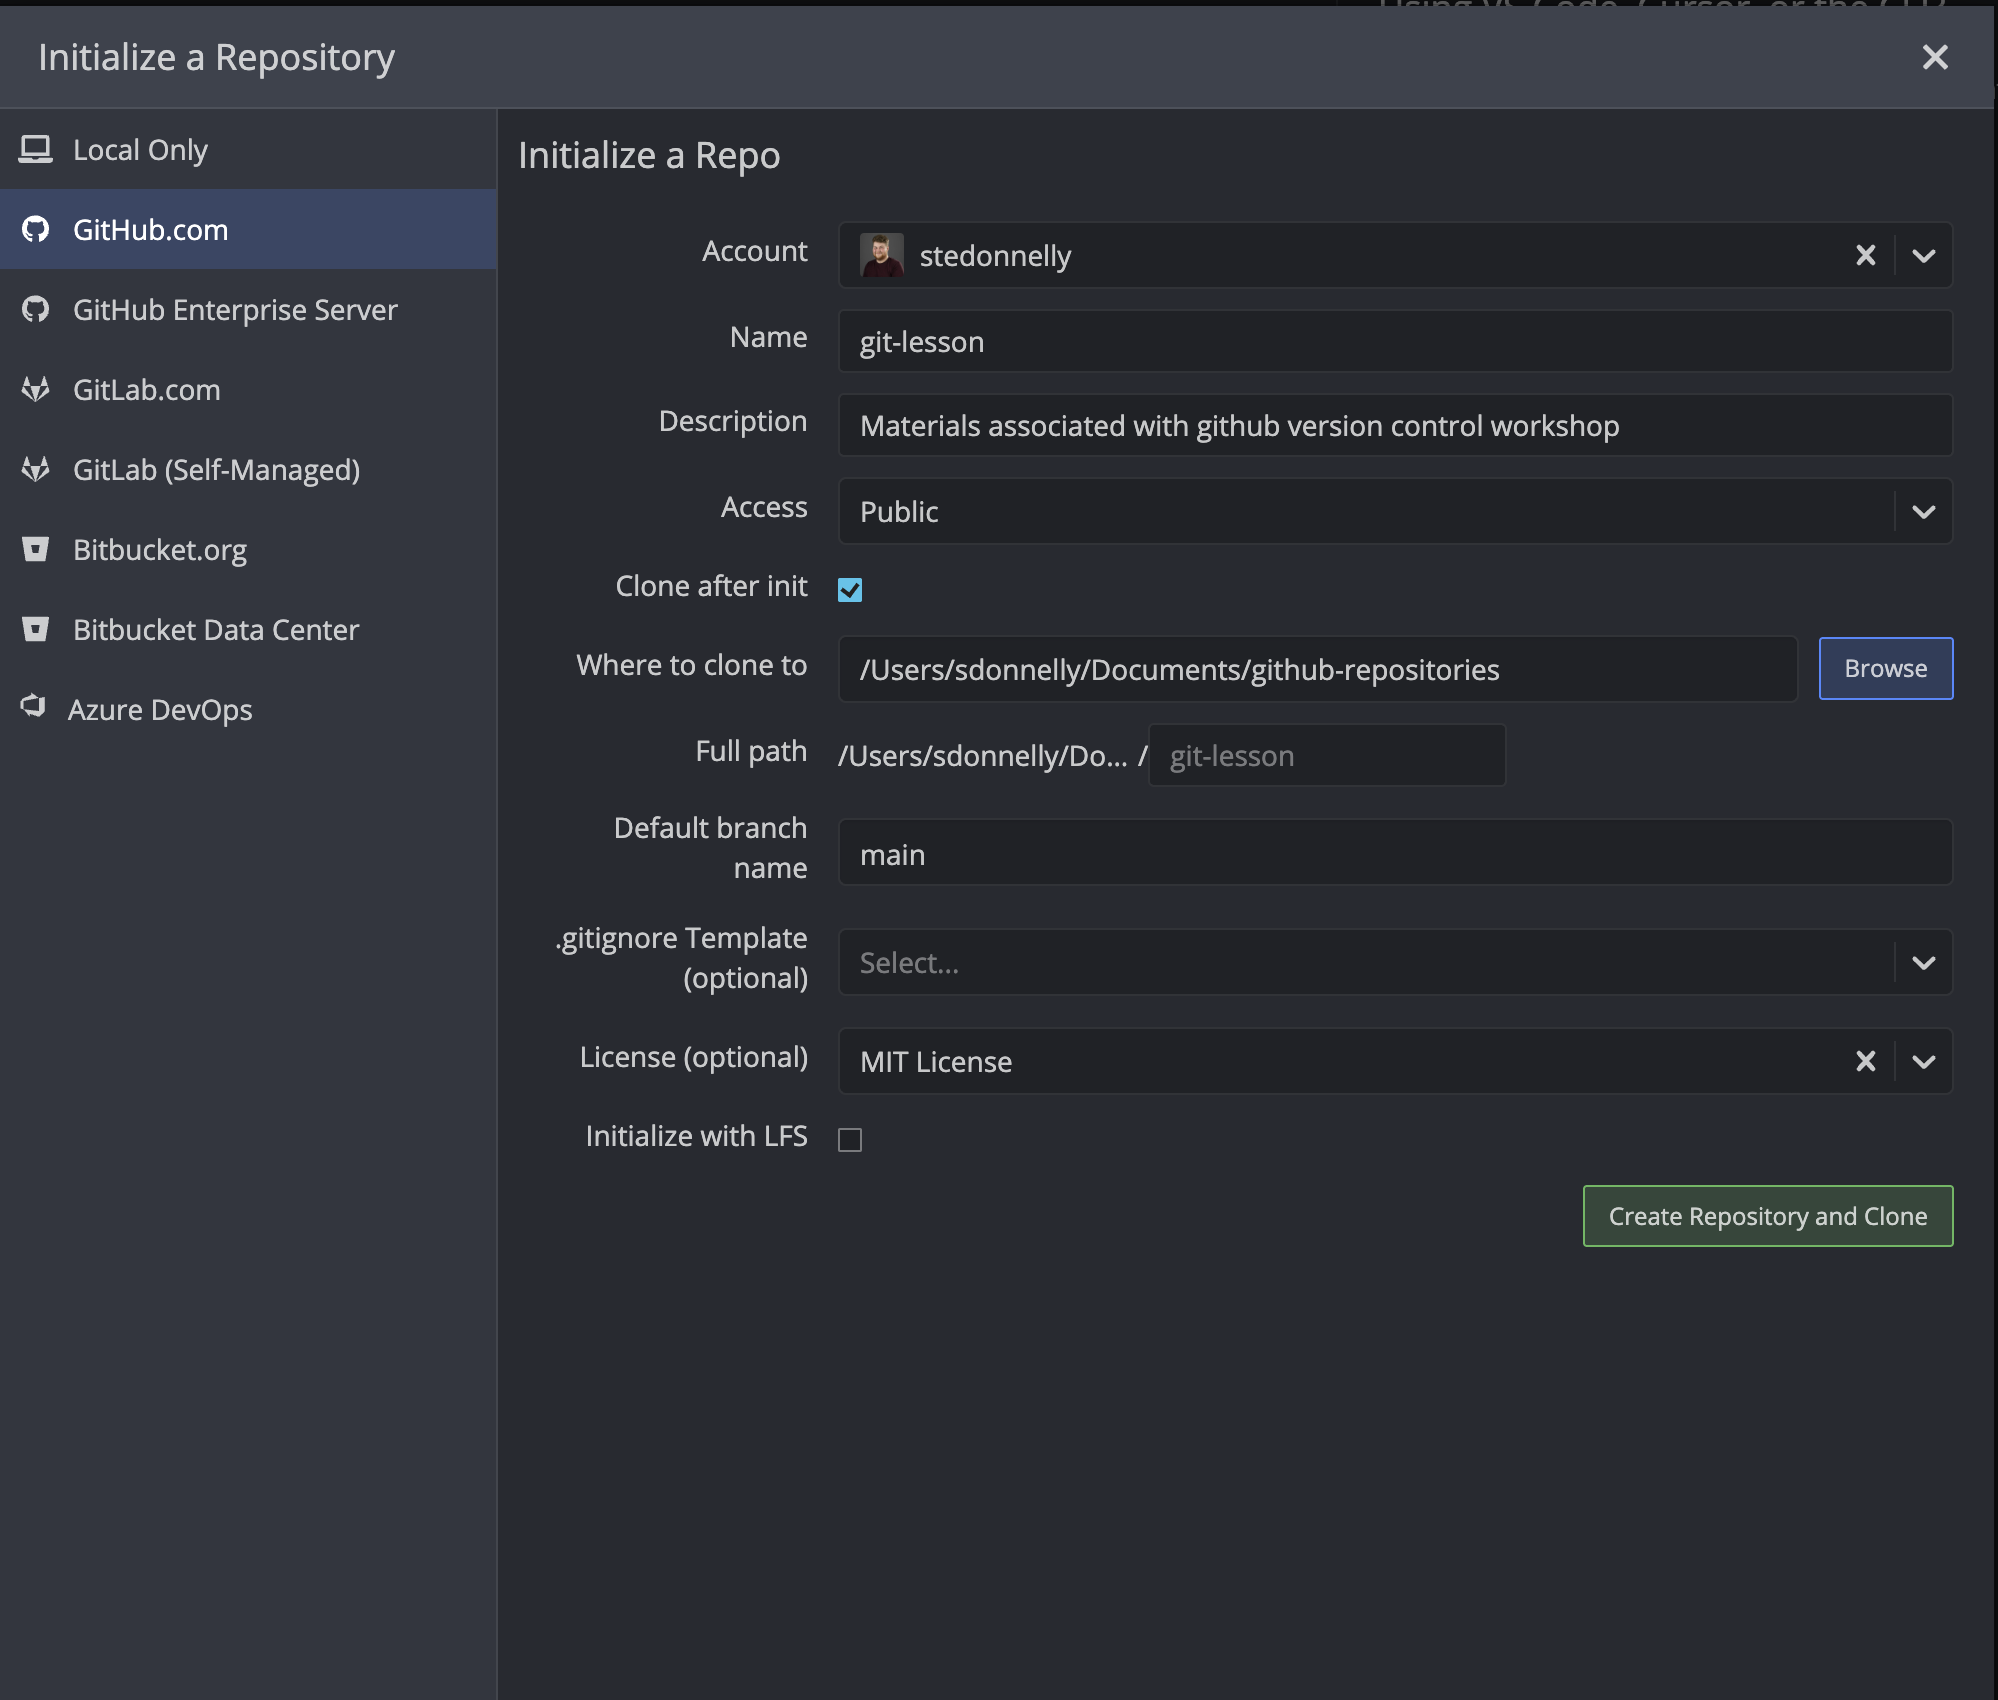
You will be presented with a new GUI with a bunch of options. To initialise a new repository and create a linked GitHub repository in one step, choose the GitHub.com option.

-
Account: The account in which you want the repository to be created under. This can be your account or an organization that you have access to.
-
Name: The name of the repository, let’s say git-lesson.
-
Description: Optional, but every repository should have a small description!
-
Access: Public or Private.
-
Clone after init: This checkbox tells GitKraken Client to clone the resulting GitHub repository. This essentially creates a local copy of the repository at the path you specify next.
-
Where to clone to: Select the folder where the repository will be cloned to. Let’s say Documents/github-repositories. However, if this path is not available on your system pick any folder that suits you.
-
Full path: This should now be something like /Users/{username}/Documents/github-repositories - This should be the same as the path you previously cloned to.
-
License: A license is mainly a list of permissions specifying how other people can use your code. For example you may want others to use your code but only if they accredited you. choosealicense.com can help you choose the right license. For open source repositories MIT and GNU GPLv3 are usually appropriate licenses.
-
-
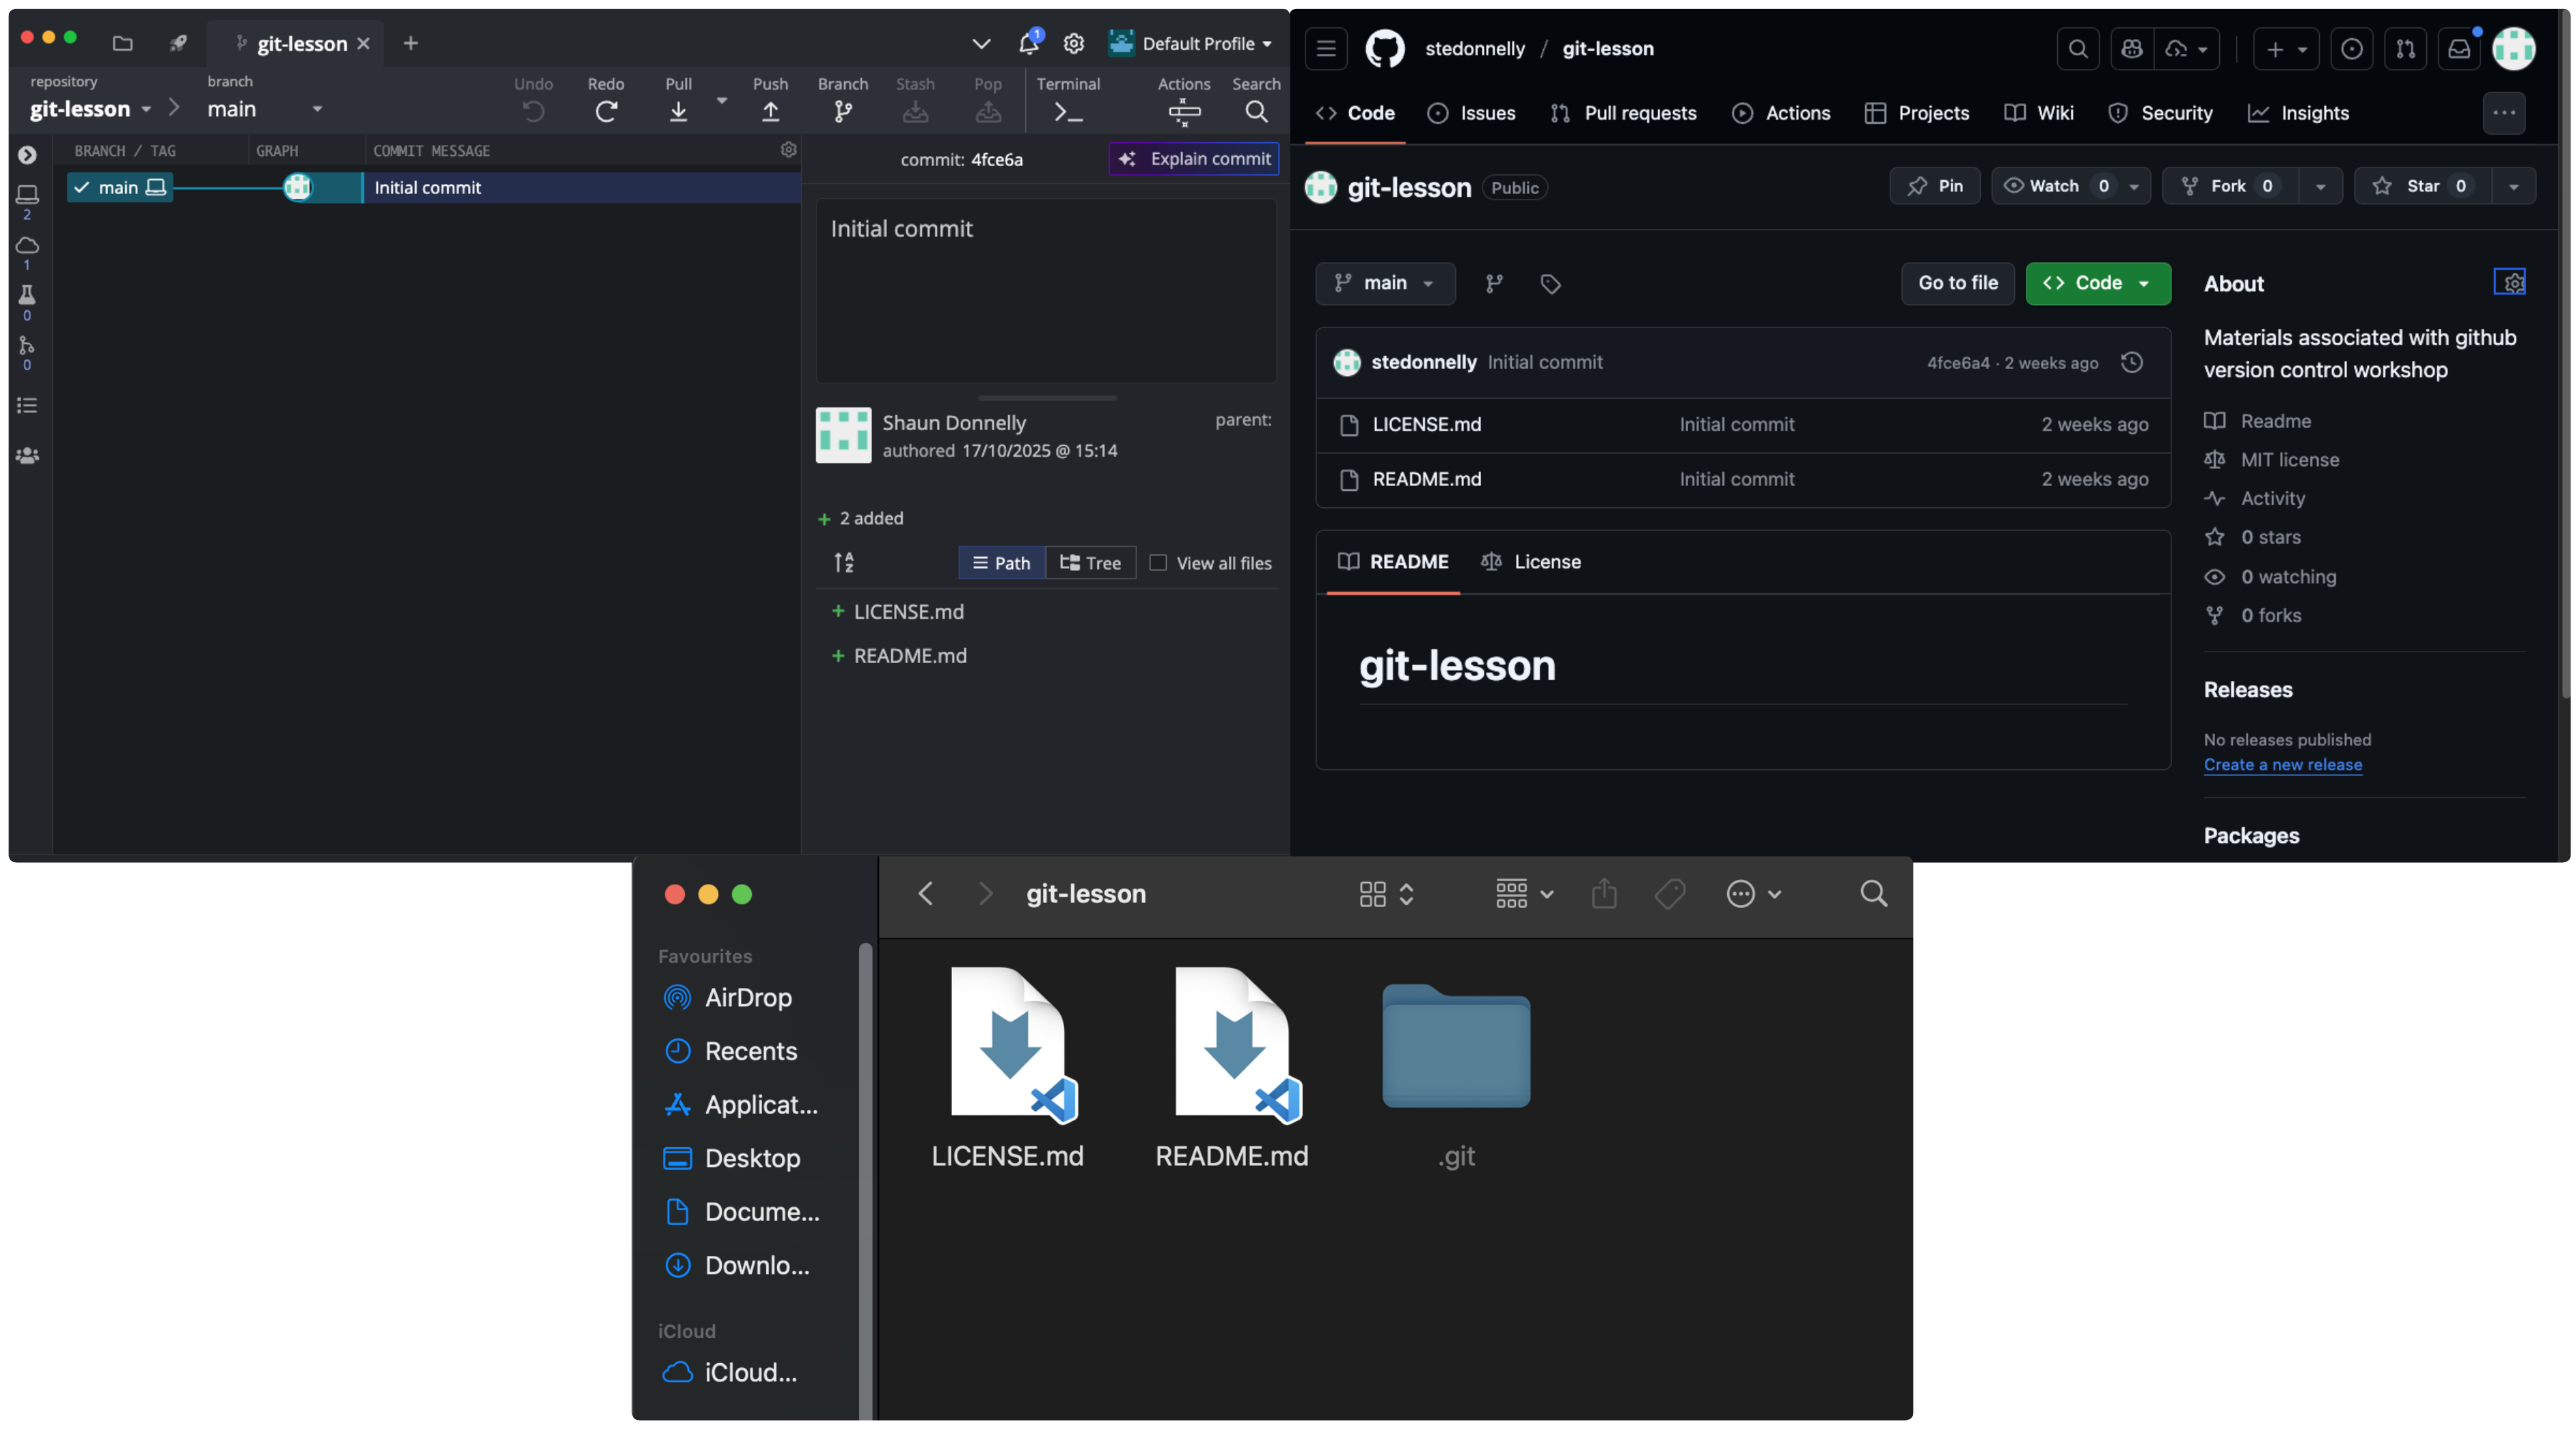
Let’s have a look at:
- the repository’s history in GitKraken Client,
- our local version of the repository and
- the repository in GitHub.